
Last Updated on September 10, 2026 by Daniel Globe
New hiking shoes should feel comfortable before you ever reach the trail. Breaking them in is mainly a way to confirm the fit, let stiffer materials flex and find pressure points in a low-risk setting. Flexible synthetic hiking shoes may need little break-in, while stiff leather or backpacking boots can take several outings to soften. Either way, break-in should never be used to force a poorly fitting shoe to work.
Quick Answer
Break in hiking shoes by wearing them first at home with the socks and insoles you plan to hike in, then progress to short walks and easy trails before adding distance, hills and pack weight. Stop if you feel persistent pinching, numbness, toe impact or major heel slip; break-in cannot correct a poor fit.
Key Takeaways
- Hiking shoes should fit properly from the start. Break-in can soften stiff materials, but it cannot fix the wrong length, width or foot shape.
- Use the same socks, insoles or orthotics you plan to wear on the trail when testing new footwear.
- Increase walking distance, terrain difficulty and pack weight gradually instead of wearing brand-new footwear on a long hike.
- Treat a hot spot as soon as you notice it. Moisture-wicking socks, moleskin, blister tape and friction-reducing products can help.
- Persistent pain, numbness, severe heel slip or toes hitting the front of the shoe usually point to a fit problem rather than a need for more break-in time.
At a Glance
| Time Required | Little or none for some flexible synthetic shoes; several short outings to a few weeks for stiff leather or backpacking boots |
| Difficulty | Easy |
| Tools Needed | Hiking socks, normal insoles or orthotics, blister tape or moleskin, and a daypack for later test walks |
| Cost | Usually $0 beyond the footwear; approximately $5–$20 if you need optional blister-prevention supplies |
Disclosure: As an Amazon Associate I earn from qualifying purchases. Some links on this page are affiliate links, at no extra cost to you.
Check the Fit Before Breaking In Hiking Shoes
A hiking shoe should feel secure without squeezing your foot. According to guidance from FootCareMD, feet should be measured periodically, both feet should be checked, and footwear should be fitted to the larger foot. Trying shoes later in the day can also help because feet naturally become somewhat larger after hours of standing and walking.
Stand in the shoes and check the space in front of your longest toe. FootCareMD recommends roughly 3/8 to 1/2 inch of room. You should also be able to wiggle your toes without the sides or top of the toe box pressing against them.
- Heel: It should feel held in place. A small amount of movement may settle as the shoe flexes, but repeated major heel lift can cause rubbing.
- Midfoot: It should feel secure without numbness, tingling or strong pressure across the top of the foot.
- Toes: Your toes should not strike the front when walking downhill or descending stairs.
- Width: The widest part of your foot should line up comfortably with the widest part of the shoe.
- Both feet: Test both shoes because one foot is commonly larger than the other.
Pro Tip: Try hiking footwear late in the day while wearing the exact sock thickness, insoles and orthotics you plan to use on the trail. This gives you a much more realistic fit test.
Break-in can soften a stiff boot, but it cannot correct a shoe that is the wrong length, width or shape for your foot.
Warning: Do not assume persistent pain is normal because a shoe is new. Numbness, severe pinching, repeated toe impact or major heel slippage are reasons to reconsider the fit rather than simply walking farther in the shoes.
Choosing the Right Hiking Socks
The socks you wear affect both comfort and the amount of space available inside a hiking shoe. Choose moisture-wicking hiking socks made from merino wool, synthetic fibers or a blend. The National Park Service recommends wool or synthetic moisture-wicking socks for longer hikes and suggests carrying an extra pair.
Sock thickness should match your footwear and conditions rather than following a “thicker is always better” rule. Midweight socks may add warmth and cushioning in cool weather, but they also occupy more shoe volume. Lightweight socks can work well in warmer conditions or snugger footwear.
Most importantly, use the same socks during the break-in process that you expect to wear on the trail. Switching from thin test socks to thick hiking socks later can turn a comfortable shoe into a cramped one.
Gradually Increasing Hiking Distance

Whether you are breaking in new footwear or returning to hiking after time away, increase the workload gradually. Sudden increases in the duration, frequency or intensity of activity can contribute to soft-tissue injuries, according to the American Academy of Orthopaedic Surgeons.
There is no universal mileage rule that works for every hiker. Instead, change one major variable at a time. First increase walking time or distance. Next add hills or rougher terrain. Add your normal backpack only after the shoes remain comfortable during easier walks.
This progression also gives you time to evaluate your socks, insoles, lacing and footwear before a problem develops miles from the trailhead.
Using Blister Prevention Techniques
| Blister Prevention Technique | Why It Helps | Best Use |
|---|---|---|
| Properly fitted shoes | Reduces excessive rubbing, pressure and unwanted movement | The foundation of blister prevention |
| Moisture-wicking socks | Help manage sweat and keep wet fabric from remaining against the skin | Long, warm or sweaty hikes |
| Moleskin, blister tape or soft bandages | Protect areas where rubbing has started or commonly occurs | Apply when a hot spot first appears |
| Foot powder or friction-reducing lubricant | Can help manage moisture or reduce skin-to-material friction | Areas with a history of rubbing or heavy sweating |
Blisters commonly form where repeated friction, pressure and moisture irritate the skin. The American Academy of Dermatology recommends well-fitting footwear, moisture-wicking socks, protective bandages such as moleskin and friction-reducing products for problem areas.
Pay attention to the first sign of a hot spot: warmth, redness, tenderness or a rubbing sensation in one small area. Stop while the skin is still intact. Remove your shoe and sock, dry the area if necessary and apply blister tape, moleskin or another protective dressing before continuing.
Note: Carry a dry spare pair of socks on longer hikes. Changing wet socks can reduce prolonged moisture exposure and gives you a chance to inspect your feet for developing hot spots.
If a blister does form, protect it rather than automatically popping it. Intact skin helps shield the tissue underneath. Seek medical care if redness spreads, the area becomes increasingly warm or painful, pus develops, or other signs of infection appear.
How to Break In Hiking Shoes Step by Step
The safest approach is slow and progressive. Some flexible synthetic hiking shoes may already feel ready for normal use after a few test walks. Stiffer leather and backpacking boots usually need more time. Manufacturer guidance from Salomon similarly distinguishes modern synthetic footwear from traditional leather boots that soften more noticeably with use.
- Wear them indoors first. Put on your normal hiking socks and insoles, lace the shoes normally and walk around the house. Check for pinching, numbness, heel rubbing or pressure against the toes.
- Take a short local walk. Walk somewhere close enough to home that you can stop easily if a pressure point develops.
- Extend the walking time gradually. If your feet still feel comfortable, use the shoes for a longer neighborhood or park walk.
- Move onto an easy trail. Test the footwear on dirt, small rocks, gentle climbs and descents. Trail movement places different demands on the shoe than flat pavement.
- Add your normal pack. Once the footwear works well without a load, repeat a familiar hike with the backpack weight you normally carry.
- Test realistic terrain before the big trip. Complete at least one outing that resembles the terrain, elevation and load of your planned hike.
During each stage, wear the same socks you plan to use on your longer hike. Adjust lacing when needed, but do not keep walking through sharp pain or numbness.
Warning: Avoid shortcut methods such as soaking hiking shoes, heating them, deliberately wearing overly thick socks or aggressively stretching them. Do not apply leather conditioner or other treatments unless the manufacturer recommends them for your specific material. Some brands may also restrict returns after footwear has been stretched, treated or worn outdoors.
Ensuring Proper Lacing Techniques
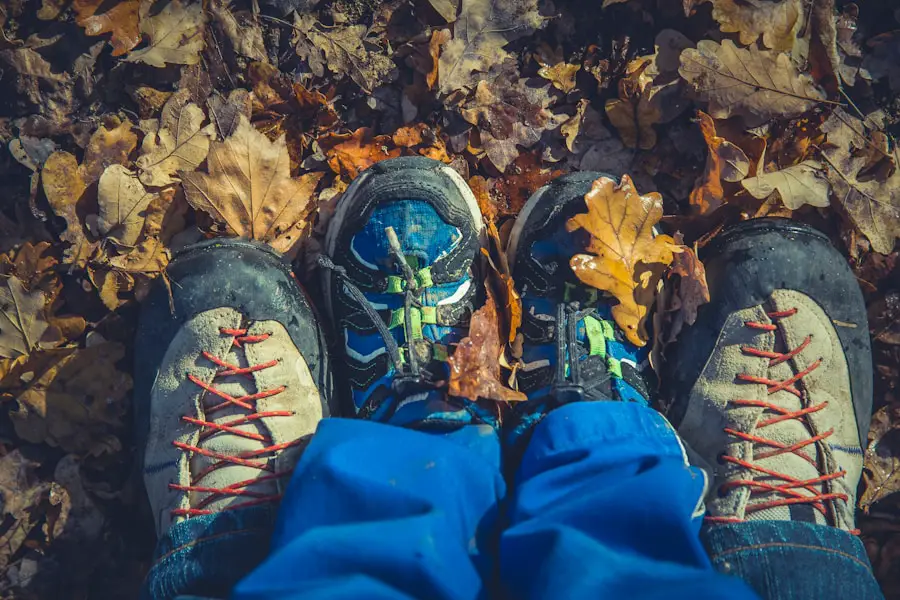
Lacing can fine-tune a good fit by changing tension in different areas of the shoe. It cannot compensate for footwear that is fundamentally too short, narrow, wide or poorly matched to your foot.
Heel Lock Lacing Technique
A heel-lock style pattern can help reduce excessive heel movement in footwear with an appropriate overall fit. Use the upper eyelets to create a more secure hold around the ankle or heel area, then tighten until the heel feels stable without cutting off circulation or creating pressure.
If the heel continues to lift significantly after reasonable lacing adjustments, the shoe may have too much internal volume or the wrong heel shape for your foot.
Customizing Lacing Tension
You do not need identical tension from the toes to the ankle. A slightly looser forefoot can provide extra room where the foot expands, while firmer tension through the midfoot can improve hold.
If you feel numbness or strong pressure across the top of the foot, loosen that area rather than assuming the discomfort must be endured during break-in.
Experimenting with Lacing Patterns
Different feet need different solutions. Alternative patterns can relieve pressure over a sensitive area, reduce heel movement or create a little more room near the toes. Make one adjustment at a time and test it during a short walk before using it on a long hike.
Utilizing Foot Care Products
A small foot-care kit can prevent a minor hot spot from becoming a trip-ending blister. Useful items include blister tape, moleskin, soft bandages, foot powder and a friction-reducing lubricant such as petroleum jelly.
Foot powder can be useful when excess moisture is a recurring problem. Antifungal products are different: they are intended for fungal prevention or treatment under their labeled directions and are not necessary for every hiker simply to break in footwear.
After hiking, remove damp footwear and socks and allow both your feet and shoes to dry. Wash and dry your feet thoroughly. If your skin tends to become dry or cracked, an appropriate moisturizer can help maintain healthy skin, but avoid applying products immediately before a hike if they make your feet excessively slippery inside your socks.
Seeking Professional Advice for Foot Issues
Persistent foot pain should not automatically be blamed on a shoe needing more break-in time. A podiatrist, foot and ankle orthopaedic specialist or other qualified healthcare professional can evaluate recurring pain, gait problems and conditions such as plantar fasciitis.
Insoles or orthotics may help selected conditions. However, custom orthotics are not automatically necessary for every hiker. FootCareMD notes that appropriate footwear or quality off-the-shelf inserts can solve many fit and support problems, while custom devices are generally reserved for specific medical needs.
Stop hiking and seek appropriate medical evaluation if you experience persistent numbness, severe or worsening pain, major swelling, an inability to bear weight, or a blister that develops spreading redness, warmth, pus or increasing pain. The American Academy of Orthopaedic Surgeons also recommends professional evaluation when an ankle injury causes significant difficulty bearing weight or symptoms fail to improve.
Before your next hiking trip, give new footwear enough low-risk testing to reveal fit problems before you are miles from the trailhead. Properly fitted shoes, suitable socks, gradual mileage and quick attention to hot spots are far more reliable than trying to force an uncomfortable shoe to conform to your foot.
Love travel? Join Our Facebook Community
Frequently Asked Questions
What are the benefits of breaking in hiking shoes?
Breaking in hiking shoes gives you a safe opportunity to test the fit, identify hot spots, adjust the lacing and let stiff materials flex before a long hike. It is especially useful with rigid leather or backpacking boots. It should not be used to force an incorrectly sized shoe to fit.
How long does it take to break in hiking shoes?
There is no fixed break-in period. Flexible synthetic hiking shoes may feel comfortable almost immediately, while stiff leather or backpacking boots can require several outings over days or even weeks. Move to longer hikes only when shorter tests remain comfortable.
What are the best tips for breaking in hiking shoes?
Start indoors with the hiking socks and insoles you normally use. Progress to short local walks, longer walks, easy trails and finally outings with your normal backpack. Treat hot spots immediately and stop if you experience sharp pain, numbness or repeated toe impact.
Can I speed up the process of breaking in hiking shoes?
It is better to use several controlled walking sessions than aggressive shortcuts. Avoid soaking, heating or forcefully stretching footwear, and do not use conditioners unless the manufacturer approves them for that material. Walking naturally in the shoes is the safest way to determine whether they genuinely fit.
What should I do if my hiking shoes still feel uncomfortable after breaking them in?
First determine whether the problem can be corrected with lacing, your normal insole or a different sock thickness. Persistent pinching, numbness, toe impact, severe heel slip or significant pain usually suggests a fit problem. Consider exchanging the footwear or consulting a footwear or foot-health professional rather than continuing to force the break-in process.
Do synthetic hiking shoes need to be broken in?
Many flexible synthetic hiking shoes require little traditional break-in and should feel comfortable from the start. Short test walks are still valuable because they confirm sizing, lacing, sock compatibility and whether any hot spots develop before a longer hike.
Sources
- American Academy of Dermatology — How to Prevent and Treat Blisters — supports blister prevention, hot-spot protection and infection-warning guidance.
- FootCareMD — 10 Points of Proper Shoe Fit — supports sizing, toe-room, end-of-day fitting and orthotic guidance.
- U.S. National Park Service — Hike Smart — supports appropriate hiking footwear, moisture-wicking socks and carrying spare socks.
- American Academy of Orthopaedic Surgeons — Sprains, Strains & Other Soft-Tissue Injuries — supports gradual conditioning and injury-prevention guidance.
- Salomon — How to Break In Your Hiking Shoes — supports differences in break-in needs between modern synthetic footwear and traditional leather hiking boots.
- Danner — What’s the Best Way to Break In My New Boots? — supports gradual break-in and cautions regarding stretching or applying care products before confirming fit.

