
Last Updated on September 10, 2026 by Daniel Globe
Packing a hiking backpack well is about more than making everything fit. The goal is to keep the load stable, place dense gear close to your body, protect essential equipment from weather, and keep the items you need during the day within easy reach. A good packing system can make a day hike more comfortable and a multi-day trip much easier to manage.
Quick Answer
Pack bulky, lightweight camp gear at the bottom; place dense items such as food, a cook kit, and water close to your spine in the middle; keep frequently used layers near the top; and reserve outer pockets for light, quick-access essentials. Finish by tightening the compression straps and adjusting the hipbelt and shoulder harness.
Key Takeaways
- Choose backpack capacity according to trip length, weather, water needs, and how bulky your gear is.
- Keep dense, heavy gear centered in the core of the backpack and close to your spine rather than at the very bottom or in outside pockets.
- Place bulky, relatively light items such as a sleeping bag near the bottom and frequently used layers near the top.
- Use outer pockets for light items you may need quickly, including snacks, sunscreen, navigation tools, and rain gear.
- Carry the Ten Essentials and adapt your safety, water, and food-storage plan to the specific trail and local regulations.
- Fit the backpack around your torso and hips, then adjust the hipbelt, shoulder straps, load lifters, and sternum strap with the pack loaded.
At a Glance
| Time Required | About 10–20 minutes once your gear is laid out |
| Difficulty | Easy |
| Tools Needed | Backpack, trip gear, and optional pack liner, dry bags, or packing sacks |
| Cost | $0 if you already own the backpack and gear; waterproof organizers are optional |
Disclosure: As an Amazon Associate I earn from qualifying purchases. Some links on this page are affiliate links, at no extra cost to you.
Choosing the Right Backpack for Your Hike
A hiking backpack should match the length and type of trip rather than a single universal capacity rule. Weather, required water, winter clothing, camera equipment, climbing gear, a bear canister, and the size of your sleeping system can all change how much space you need.
Day Hikes: Small but Mighty
For many day hikes, a pack in roughly the 15- to 30-liter range provides enough space for water, food, rain protection, extra clothing, first aid, and other essentials. Current REI daypack guidance notes that daypacks generally range from about 5 to 40 liters, with the right size depending on how much gear a specific hike demands rather than a fixed number, while shorter outings can use smaller packs and winter or gear-heavy trips may require more room.
Do not choose the smallest pack simply to reduce weight. A pack that is overstuffed can be difficult to organize, can interfere with access to emergency gear, and may force heavy equipment into poor positions.
Multi-Day Hikes: Room for More
Overnight and backpacking trips require space for a sleeping system, shelter, food, cooking equipment, extra clothing, and other overnight gear. Around 30–50 liters can work for many efficient one- to three-night setups, while roughly 50–80 liters is common for three- to five-night trips. Extended trips, cold-weather travel, or bulky equipment may require 70 liters or more.
Capacity alone does not determine whether a pack is suitable. Check its load-support system, frame, hipbelt, torso adjustment, pocket arrangement, and the manufacturer’s recommended load range. Pack fabric matters too: heavier-denier nylon shells resist abrasion from rock and brush better than ultralight fabrics, but add weight, so trade-off between durability and pack weight based on the terrain and how hard you tend to be on gear.
A Comfortable Fit Is Key
A backpack should be sized primarily around your torso rather than your overall height. To estimate torso length, locate the C7 vertebra at the base of your neck and measure down the contour of your spine to the level of the top of your hip bones. Brand sizing varies, so compare that measurement with the manufacturer’s chart.
A supportive hipbelt should wrap around the upper part of your hips so the pack can transfer much of its load to your pelvis instead of leaving all the pressure on your shoulders. Current REI backpack-fitting guidance recommends beginning the fit process with the hipbelt and then adjusting the shoulder harness, load lifters, and sternum strap.
Pro Tip: Try on a backpack with realistic weight inside it and while wearing the layers you expect to hike in. A pack that feels comfortable when empty may fit very differently when fully loaded.
Organizing Your Gear for Efficient Packing
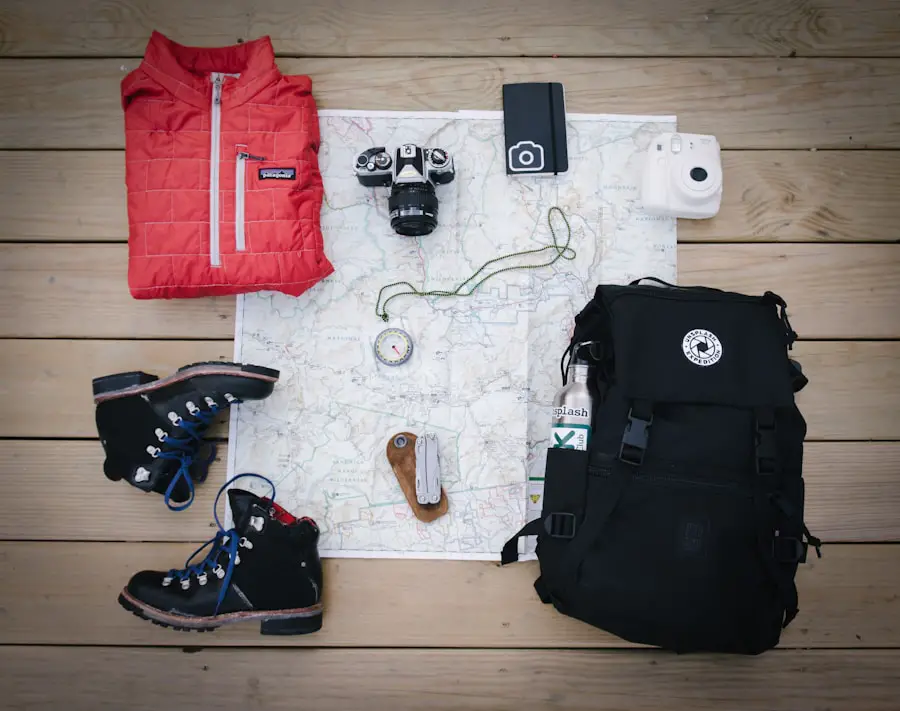
Before loading the backpack, spread your gear out where you can see it. Group items by both weight and how soon you will need them. This makes it much easier to build a stable load.
A practical backpack can be divided into four zones:
- Bottom zone: bulky, relatively light gear you normally will not need until camp, such as a sleeping bag or sleep clothing.
- Core zone: dense gear such as food, a cook kit, water, and a bear canister when required. Keep this weight centered and close to your spine.
- Top zone: items you may need during the day, including an insulating layer or rain shell.
- Outer pockets: light items that need fast access, such as snacks, sunscreen, navigation tools, gloves, insect repellent, or a water bottle.
This bottom/core/top system matches the basic loading approach described in REI’s backpack-loading guidance. Dense equipment should stay near your body’s centerline rather than pulling outward from the pack.
Packing cubes, stuff sacks, or dry bags can make small items easier to find, and each solves a slightly different problem. Stuff sacks and packing cubes mainly keep similar items grouped together; dry bags add real waterproofing for anything that must stay dry even in a downpour or stream crossing. A full waterproof pack liner protects everything inside the main compartment at once and is usually simpler for backpacking trips, while individual dry bags make more sense if you only need to isolate one or two specific items.
Note: “Water-resistant” does not mean waterproof. Protect gear that must stay dry—especially sleeping insulation, warm clothing, electronics, and first-aid supplies—with a liner or waterproof inner bag when rain or stream crossings are possible.
Packing Your Backpack for Comfort and Balance
| Item | Weight Profile | Best Location in Backpack |
| Sleeping Bag | Bulky and usually relatively light | Bottom zone in a waterproof liner or dry bag |
| Tent | Varies by shelter | Around the core or vertically beside other central gear; split components if that improves balance |
| Clothing | Usually light and compressible | Spare camp clothing low in the pack; rain or insulation layers near the top for quick access |
| Food and Cooking Gear | Often dense and relatively heavy | Core zone, centered close to the spine |
| Water and Hydration System | Dense and becomes lighter as you drink | Reservoir close to the back; bottles in side pockets with left-to-right weight kept reasonably balanced |
1. Prepare the Pack for Water and Weather
If you use a hydration reservoir, place a filled reservoir in its sleeve before the main compartment is packed. It is much harder to slide a full bladder into place after the pack is tightly loaded.
Next, add a waterproof liner if conditions call for one. Keep sleeping insulation, dry camp clothing, and other moisture-sensitive gear inside the protected area.
2. Put Bulky, Lightweight Gear at the Bottom
Place your sleeping bag and other soft, bulky items that you will not need while hiking in the bottom zone. This creates a stable base without concentrating dense weight at the bottom of the pack.
3. Build the Dense Core Close to Your Spine
Food, a cook kit, water, and other dense items generally belong in the middle of the backpack near your spine. Surround hard objects with softer equipment so they do not press into your back or shift as you walk.
Balance the load from left to right. One heavy bottle or piece of equipment on only one side can make the pack pull sideways over a long hike — a single liter of water weighs a bit over two pounds, so even one or two unbalanced bottles add up quickly over miles.
4. Keep Daytime Essentials Near the Top
Place a rain shell, insulating layer, hat, gloves, or other weather-dependent items near the top. You should be able to respond to changing conditions without unloading half the backpack.
5. Use Outer Pockets for Quick-Access Gear
Snacks, sunscreen, insect repellent, a map, small navigation equipment, and other frequently used items are good candidates for hipbelt, lid, front, or side pockets. Avoid turning those pockets into storage for several pounds of dense equipment.
6. Tighten Compression Straps
Once the pack is loaded, tighten its compression straps enough to keep the contents from shifting. A compact load is less likely to sway as you walk, but avoid crushing fragile equipment or blocking anything you need to reach quickly.
Warning: Do not solve a space problem by hanging several heavy objects far from the outside of your backpack. Weight that swings or sits far behind your body can reduce balance, catch on branches, and make the pack more tiring to control.
Common Packing Mistakes to Avoid
- Putting dense food, water, or cookware at the very bottom of the backpack.
- Loading one side noticeably heavier than the other.
- Burying a rain shell, headlamp, first-aid kit, or navigation tools beneath camp gear.
- Leaving loose equipment to swing from the outside of the pack.
- Overpacking “just in case” items without considering their usefulness.
- Failing to protect sleeping gear and warm clothing from rain.
- Filling the backpack before installing a hydration reservoir.
- Leaving compression straps loose enough for the load to shift while walking.
Essential Items to Pack for Safety and Survival
Backpack organization matters, but what you carry matters even more. The National Park Service Ten Essentials provide a useful baseline for preparing for injuries, unexpected delays, weather changes, and navigation problems.
- Navigation: map, compass, GPS or another appropriate navigation system, plus the knowledge to use it.
- Sun protection: sunscreen, sunglasses, a hat, and protective clothing as conditions require.
- Insulation: extra clothing appropriate for temperatures, wind, and rain.
- Illumination: headlamp or flashlight and suitable backup power.
- First aid: a trip-appropriate first-aid kit and personal medications.
- Fire: a legal and appropriate way to start an emergency fire where fires are permitted.
- Repair kit and tools: items such as repair tape, a multitool, or trip-specific repair supplies.
- Nutrition: enough food for the planned trip plus an emergency margin appropriate to the route.
- Hydration: sufficient water plus a treatment method where collecting natural water may be necessary.
- Emergency shelter: a tent, bivy, tarp, emergency blanket, or other shelter appropriate to the trip.
Also tell a responsible person where you are going, what route you expect to take, and when you expect to return. Check current weather, trail conditions, closures, hazards, and local regulations before leaving.
Warning: Do not assume natural water is safe to drink untreated. Plan enough water for the route and carry an appropriate treatment method when you may need to collect water in the backcountry.
Food Storage in Bear Country
Food-storage rules vary by destination. In some areas, an approved bear-resistant container or food locker is required for food, trash, toiletries, and other scented items. Other locations use different systems. Check the current regulations for the park, forest, or land-management agency before your trip.
The National Park Service’s bear-food safety guidance explains that scented items can extend well beyond obvious meals and snacks. Never assume that a food-hanging method is legal or adequate everywhere.
Note: If you carry liquid stove fuel, keep the container tightly closed, upright, and separated from food in case it leaks. Follow all manufacturer and land-manager rules for fuel and stove use.
Tips for Adjusting and Fitting Your Backpack
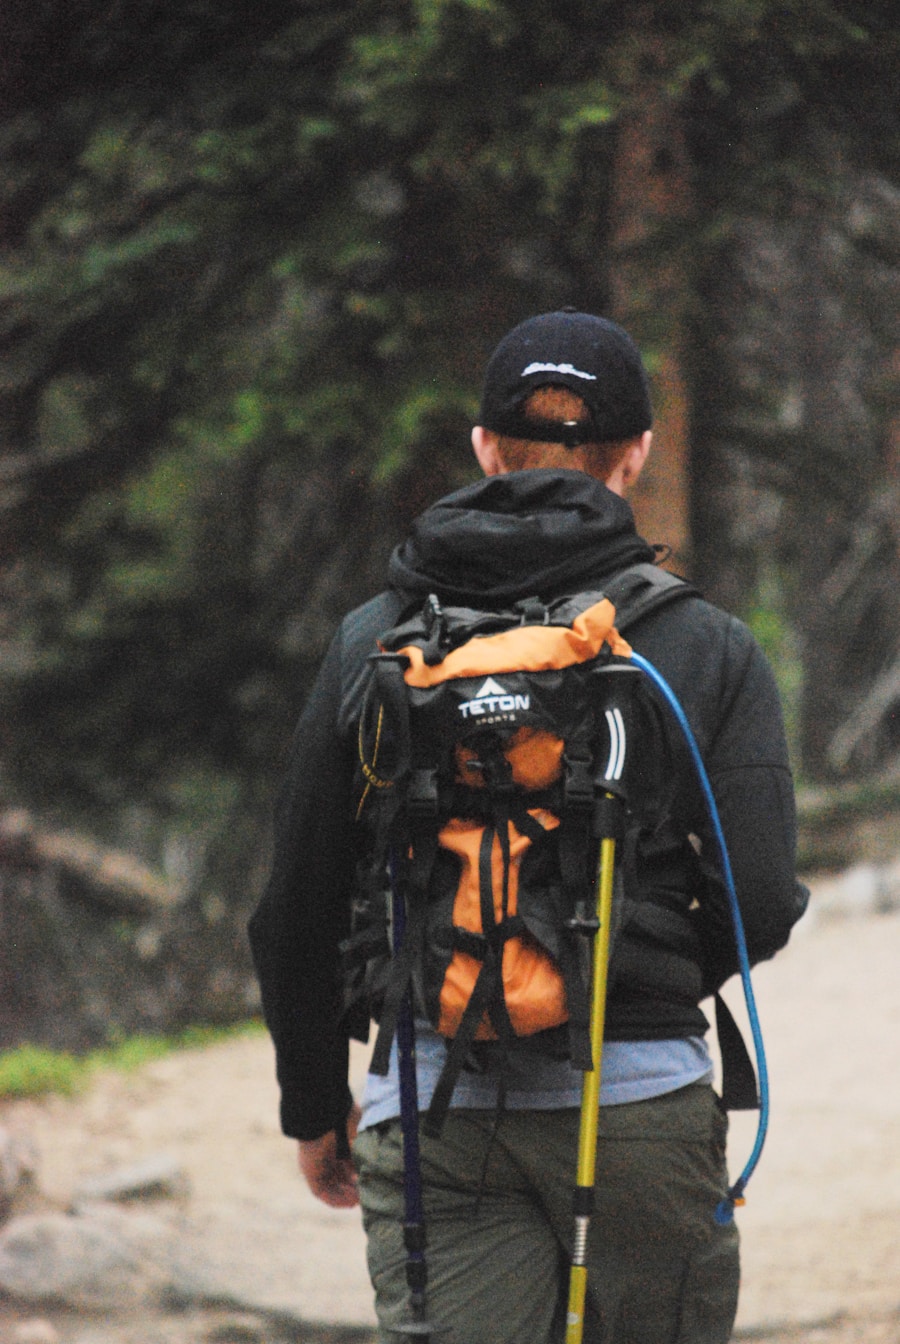
Adjust your pack with realistic weight inside it. Start with all major straps slightly loosened so you can make changes in a logical order.
1. Set the Torso Length
If your backpack has an adjustable torso system, set it according to your measured torso length and the manufacturer’s instructions. The shoulder harness should follow your shoulders naturally without leaving a large gap behind them.
2. Position and Tighten the Hipbelt
Place the hipbelt so its padded section wraps around the top of your hip bones. Fasten it and tighten until secure without creating painful pressure. The belt should help support the load rather than simply wrapping around your waist.
3. Snug the Shoulder Straps
Pull the shoulder straps until the harness follows your shoulders and keeps the backpack close to your body. Do not crank them so tightly that the hipbelt stops carrying its share of the load.
4. Adjust the Load Lifters
Load-lifter straps connect the upper part of many larger backpacks to the shoulder harness. Gently tighten them to bring the upper pack closer to your body. Over-tightening can distort the shoulder-strap fit.
5. Set the Sternum Strap
Fasten the sternum strap across your chest and tighten it enough to stabilize the shoulder straps. It should not restrict normal breathing.
6. Recheck Compression and Balance
Walk several minutes, move your arms, step up and down, and lean slightly in different directions. If the backpack sways, first check whether the contents are balanced and whether the compression straps are secure before simply tightening every body strap harder.
Final Check Before Hitting the Trail
Walk around with your fully packed backpack before leaving. Pay attention to pressure on your hips, shoulders, lower back, and collarbone area. Correct rubbing, numbness, excessive sway, or a backward-pulling sensation before starting a long hike.
Pro Tip: Small strap adjustments during the hike are normal. Loosening or tightening the shoulder harness slightly can change pressure points as terrain and water weight change.
Maximizing Space and Weight Distribution
More volume isn’t the goal — carrying only what the trip actually requires, and using that space well, is what matters most.
Compression sacks can reduce the volume of soft clothing or other suitable items, while small sacks can keep related gear together. Fill empty gaps around rigid objects with soft items so the load forms one stable unit rather than several pieces that shift independently.
Keep dense gear close to your back and near the center of the pack. Side pockets are useful for water bottles and trekking poles, but balance similar weights where possible. A full bottle on one side and an empty pocket on the other may become noticeable over many miles.
Use exterior attachment points mainly for items that are too long, wet, or awkward to place inside. Secure trekking poles, a wet shelter, or a foam pad so nothing swings freely or extends far enough to snag vegetation.
If you find yourself carrying equipment that has no clear safety, comfort, or trip-specific purpose, reconsider whether it needs to come. Sharing appropriate group gear can also reduce unnecessary duplication on multi-person trips.
Diagram of a Well-Packed Hiking Backpack
A simple mental diagram makes the loading system easier to remember. Think of the backpack from bottom to top, with the heaviest part of the load drawn inward toward your spine:
| Pack Area | Typical Contents |
| Top | Rain shell, insulating layer, hat, gloves, or other items needed during the day |
| Core near spine | Food, cook kit, water reservoir, bear canister when required, and other dense gear |
| Bottom | Sleeping bag, sleep clothing, and other bulky lightweight camp items |
| Outer pockets | Snacks, sunscreen, navigation tools, small first-aid items, water bottles, and other light quick-access gear |
The exact arrangement will change with your backpack, body shape, and equipment. The principle is more important than a rigid diagram: keep dense weight close to your body’s centerline, prevent side-to-side imbalance, and make emergency or weather gear easy to reach.
If your hiking trip is part of a larger international journey, travel logistics may require other equipment before or after the trail. For that broader planning context, this article on 5 must-have universal travel adapters covers charging considerations for travel between countries. Keep travel-only electronics and accessories out of your hiking load unless you actually need them on the trail.
Love travel? Join Our Facebook Community
Frequently Asked Questions
What are the essential items to pack in a hiking backpack?
Use the Ten Essentials as a baseline: navigation, sun protection, insulation, illumination, first aid, fire, repair supplies and tools, nutrition, hydration, and emergency shelter. Adapt those categories to the route, weather, season, remoteness, and local regulations.
How should I distribute the weight in my hiking backpack?
Put bulky, relatively light camp gear near the bottom. Keep dense items such as food, water, and cooking equipment centered in the middle and close to your spine. Place daytime layers near the top and use outside pockets mainly for light, frequently used items.
What is the best way to pack a hiking backpack for comfort and efficiency?
Lay out your gear first, protect moisture-sensitive equipment, load light bulky items at the bottom, build a dense core close to your back, keep frequently used clothing near the top, and place small essentials in accessible pockets. Finish by tightening compression straps and testing the pack while walking.
How do I adjust the straps and hip belt of a hiking backpack for a proper fit?
Start with the correct torso setting. Position and tighten the hipbelt around the top of your hip bones, snug the shoulder straps, gently adjust the load lifters, and then fasten the sternum strap. The sternum strap should stabilize the harness without restricting your breathing.
What are some tips for packing a hiking backpack for a multi-day trip?
Plan by nights, weather, water availability, food requirements, and local storage rules. Use compact gear where practical, avoid duplicate equipment, keep sleeping gear dry, place dense supplies close to your spine, and verify whether your destination requires a bear-resistant food container or another specific storage system.
Where should water go in a hiking backpack?
A hydration reservoir normally sits in its dedicated sleeve close to your back. Water bottles can go in side pockets for fast access, but try to keep the left and right sides reasonably balanced. Remember that water is dense, so several liters placed far from your back can noticeably affect balance.
Should I attach gear to the outside of my backpack?
Use outside attachment points selectively for items such as trekking poles, a wet shelter, or a foam sleeping pad. Secure them tightly so they do not swing or snag. Dense, heavy equipment is usually more comfortable and stable when carried inside the pack close to your body.
Sources
- U.S. National Park Service — Ten Essentials — emergency-preparedness and hiking-safety equipment.
- U.S. National Park Service — Hike Smart — trip planning, food, water, and safety preparation.
- REI Expert Advice — How to Pack and Hoist a Backpack — bottom, core, top, and accessory packing zones.
- REI Expert Advice — Backpack Fit and Adjustment — hipbelt, shoulder strap, load-lifter, and sternum-strap adjustment.
- REI Expert Advice — Daypacks: How to Choose — daypack sizing and capacity guidance.
- U.S. National Park Service — Bear Safety: Storing Food — food, trash, scented-item, and bear-resistant storage considerations.

