

Last Updated on September 10, 2026 by Daniel Globe
Packing a hiking backpack well is about more than making everything fit. A balanced pack keeps dense gear close to your body, protects important equipment from weather, puts frequently used items within reach, and transfers much of the load through a properly fitted hipbelt. The exact gear you need will depend on the route, weather, trip length, local regulations, and your own needs.
Quick Answer
Pack bulky, lightweight camp gear near the bottom; place dense items such as food, water, and cooking gear in the middle close to your back; keep rain gear, navigation, first aid, snacks, and other frequently used essentials near the top or in accessible pockets. Balance both sides, compress the load, and adjust the hipbelt before the shoulder straps.
Key Takeaways
- Choose a pack that matches your trip length, gear volume, torso length, and hip size rather than choosing by height alone.
- Put bulky, lightweight sleeping gear near the bottom and dense items in the middle, close to your spine.
- Carry the Ten Essentials, including navigation, sun protection, extra clothing, illumination, first aid, fire, repair tools, extra food, water treatment, and emergency shelter.
- Treat uncertain natural water and check destination-specific food-storage, fire, permit, and trail regulations before leaving.
- Keep frequently used gear accessible, balance the left and right sides, tighten compression straps, and test the fully loaded pack before the hike.
At a Glance
| Time Required | About 20–30 minutes for a normal pack-out, plus time to check weather, regulations, and your route |
| Difficulty | Easy to moderate |
| Tools Needed | Hiking pack, gear checklist, dry bags or pack liner, compression straps; luggage or gear scale optional |
| Cost | $0 to organize gear you already own; new equipment costs vary by trip and conditions |
Disclosure: As an Amazon Associate I earn from qualifying purchases. Some links on this page are affiliate links, at no extra cost to you.
Choose the Right Hiking Pack Before You Start Packing
The right backpack depends on how long you will be out, how bulky your equipment is, the season, the terrain, and how efficiently you pack. A small daypack in roughly the 15- to 30-liter range is often enough for a straightforward day hike. Longer day hikes in cold or unpredictable weather may require more room for insulation, rain gear, food, and emergency equipment.
Overnight and backpacking loads vary more. Some compact overnight setups fit in roughly 35 to 45 liters, while many multi-day trips use packs around 50 to 65 liters. Extended trips, winter conditions, bulky gear, or carrying equipment for another person may call for 70 liters or more. Treat these ranges as starting points rather than strict rules.
Fit the Pack to Your Torso and Hips
Capacity matters, but fit matters just as much. Back length or torso length is more useful than overall height when sizing a technical hiking pack. The pack’s hipbelt should wrap securely around the upper part of your hips so the suspension can transfer much of the load away from your shoulders.
Many outdoor retailers and manufacturers offer pack-fitting help. When possible, try a pack with weight inside it rather than judging an empty backpack. Check that the hipbelt fits correctly, the shoulder harness follows your body comfortably, and the pack does not sway from side to side.
Pro Tip: Do a short test walk with the same load you expect to carry. Walk up and down stairs or a gentle hill, then adjust the load if the pack pulls backward, leans to one side, or creates a pressure point.
Packing Essentials: Clothing and Footwear
Base Layer: Moisture-Wicking Essentials
Your base layer should help move moisture away from your skin. Merino wool and synthetic performance fabrics are common choices because they manage moisture better than heavy cotton clothing when you are sweating or dealing with changing temperatures.
Pack only the layers you are likely to need, plus enough extra insulation to handle a reasonable change in conditions. For overnight trips, keep dry sleep clothing protected inside a pack liner or waterproof dry bag.
Middle and Outer Layers: Insulation and Weather Protection
The middle layer provides insulation. Depending on the weather, that might be fleece, a synthetic insulated jacket, or a down jacket protected from moisture. Your outer layer should block wind and rain while allowing heat and moisture to escape as much as practical.
Keep rain protection near the top of the backpack or in an accessible external pocket. A waterproof shell does little good if a sudden storm forces you to unpack your entire bag to reach it.
Footwear: Support, Traction, and Comfort
Choose hiking footwear for the terrain, weather, load, and your feet. Lightweight trail shoes or trail runners can work well for many maintained trails and for hikers who prefer flexible footwear. Boots may provide greater protection, structure, or weather resistance when carrying heavier loads or traveling through rough, muddy, snowy, or rocky terrain.
Whatever style you choose, wear it enough before a long trip to identify pressure points. Pair footwear with comfortable moisture-managing socks, keep toenails trimmed, and address hot spots before they turn into blisters.
Essential Gear: Navigation, First Aid, and Emergency Supplies
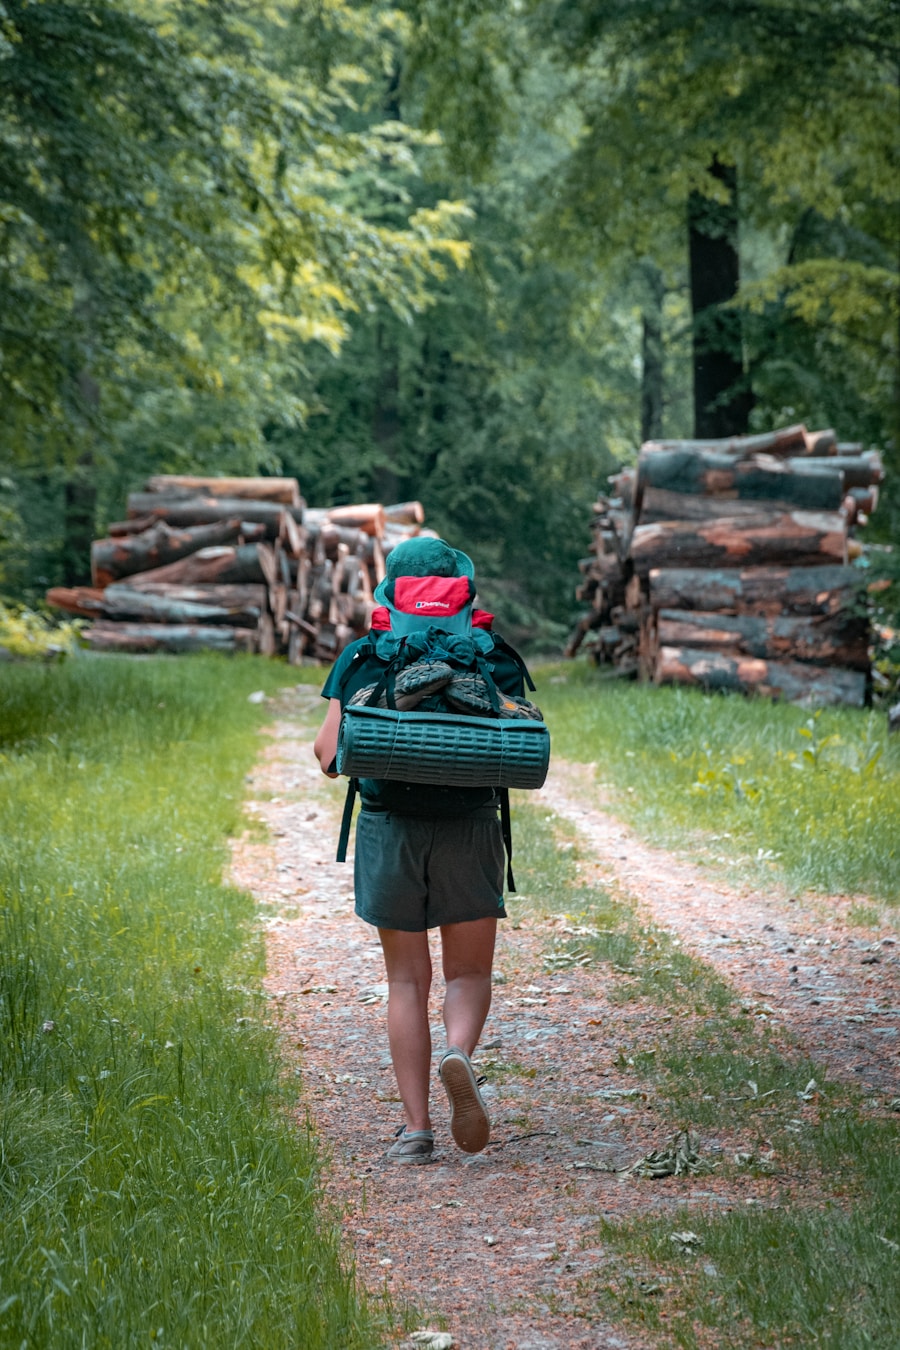
The National Park Service organizes basic hiking preparedness around the Ten Essentials. The exact equipment can change with your destination, season, route, and activity, but these categories provide a strong starting point.
- Navigation: Carry an appropriate map, compass, GPS device, or offline digital map. A phone is useful, but batteries fail and coverage disappears, so a physical backup is valuable on unfamiliar routes.
- Sun protection: Pack sunscreen, sunglasses, a brimmed hat, and protective clothing as conditions require.
- Extra clothing: Bring insulation and weather protection suitable for conditions that may become worse than the forecast.
- Illumination: A headlamp keeps both hands free. Carry spare batteries or another reliable power source.
- First aid: Include wound care, blister treatment, personal medication, and supplies appropriate for your group and trip.
- Fire: Where legal and appropriate, carry a lighter or matches and reliable fire-starting material. Always follow current fire restrictions.
- Repair tools: A small multi-tool, duct tape, repair patches, cord, or trip-specific spare parts can solve common gear problems.
- Extra food: Carry more food than the minimum required for your planned itinerary in case you are delayed.
- Water and treatment: Carry enough water to reach your next reliable source plus a treatment system appropriate for the water you expect to encounter.
- Emergency shelter: Even on a day hike, an emergency bivy, tarp, space blanket, or other suitable shelter can provide protection if you are unexpectedly delayed.
A portable power bank can be useful for a phone or navigation device, but it should supplement rather than replace good trip planning and appropriate navigation skills.
A hiking first aid kit commonly includes adhesive bandages, sterile gauze, tape, antiseptic supplies, blister care, and any personal medications. Customize it for your group and learn how to use the contents before an emergency occurs.
Warning: Do not depend on cellular service for navigation or rescue. Download needed maps before leaving, carry backup navigation appropriate for the route, tell someone where you are going and when you expect to return, and check current trail closures and weather before departure.
Food and Water: How to Pack and Stay Hydrated on the Trail
Food should provide useful energy without taking up more weight and space than necessary. The numbers below are only planning examples because serving sizes, recipes, and brands vary. Check each product’s nutrition label when calculating your actual food supply.
| Item | Typical Packed Weight | Typical Calories | Hydration |
|---|---|---|---|
| Trail Mix (1 cup) | About 4–6 oz; recipe dependent | Varies widely; check label or recipe | Minimal |
| Granola Bar | About 1–2 oz | Varies by product | Minimal |
| Beef Jerky (1 oz) | 1 oz | Varies by product | Minimal |
| Dehydrated Meal | Varies by meal and serving count | Varies by meal | Requires water for preparation |
| Energy Gel | About 1–1.5 oz | Varies by product | Consume with water as directed |
| Water (per liter) | About 35.3 oz / 2.2 lb | 0 | 33.8 fl oz |
| Prepared Sports Drink (per liter) | About the same as 1 liter of water, plus mix | Depends on formulation | 33.8 fl oz |
Trail mix, bars, dried fruit, jerky, nut or seed butter, tortillas, and other calorie-dense foods are convenient because they can be eaten without cooking. For multi-day trips, dehydrated meals can save space and food weight, although you must account for the water and fuel needed to prepare them.
Plan Water for the Route and Conditions
Water needs change with temperature, exertion, altitude, humidity, body size, and individual physiology. As one useful trail-planning benchmark, current National Park Service guidance for Great Smoky Mountains National Park recommends at least 1 liter of water for every two hours of hiking. Hot, exposed, strenuous, or water-scarce routes may require substantially different planning.
Hydration reservoirs allow convenient sipping while walking, while bottles make it easy to see how much water remains. Either system can work. Before leaving, identify reliable water sources and confirm whether they are currently flowing rather than assuming a marked stream will contain usable water.
Treat Natural Water Correctly
Clear-looking water is not necessarily safe. The Centers for Disease Control and Prevention advises treating water when you are unsure of its safety. Boiling is the most reliable method for killing germs. When boiling is not practical, filtration followed by an appropriate disinfection method can provide broader protection than relying on many ordinary backpacking filters alone.
Always follow the instructions supplied with your filter, purifier, chemical treatment, or UV device. Treatment methods differ in what they remove, and boiling or disinfection cannot make chemically contaminated water safe.
Warning: Do not assume that a clear mountain stream is safe to drink untreated. Know what your treatment system removes, carry a backup method when the consequences of failure are serious, and use a different water source if chemical contamination is suspected.
Plan for Wildlife and Food-Storage Rules
Before an overnight trip, check the food-storage requirements for the exact park, forest, wilderness area, or other land you will enter. Some destinations require an approved bear-resistant container or food locker, while others allow different methods.
Food-storage rules may apply not only to meals and snacks but also to trash and scented items such as toothpaste, sunscreen, lip balm, soap, insect repellent, and some medications. Pack the required storage system before leaving rather than improvising after arriving at camp.
Shelter and Sleeping Gear: Tips for a Comfortable Night’s Rest
For an overnight hike, choose shelter that matches the expected weather, terrain, campsite rules, and number of occupants. A backpacking tent should balance weather protection, usable space, packed size, durability, and setup simplicity. Vestibules can keep footwear and other equipment outside the sleeping area while protecting it from precipitation.
Your sleeping bag or quilt should be appropriate for the lowest temperatures you reasonably expect, with extra margin if you tend to sleep cold. Standardized temperature ratings are useful for comparing many sleeping bags, but they are not a guarantee of personal comfort.
The sleeping pad is part of the insulation system, not just a cushion. A warm sleeping bag paired with an inadequately insulated pad can still leave you cold because the ground draws heat away from your body. Select the bag and pad as a system based on expected nighttime conditions.
Down insulation can offer excellent warmth for its packed weight, while synthetic insulation can be attractive for cost, moisture tolerance, and simpler care. Protect either type from getting wet inside your pack.
A compact backpacking pillow is optional. Clothing placed inside a clean stuff sack can serve as a simple alternative.
Note: Your expected overnight low is more important than the daytime high when choosing a sleep system. Wind, humidity, shelter, clothing, personal metabolism, and sleeping-pad insulation also affect real-world comfort.
Lightweight and Multi-Purpose Items to Save Space
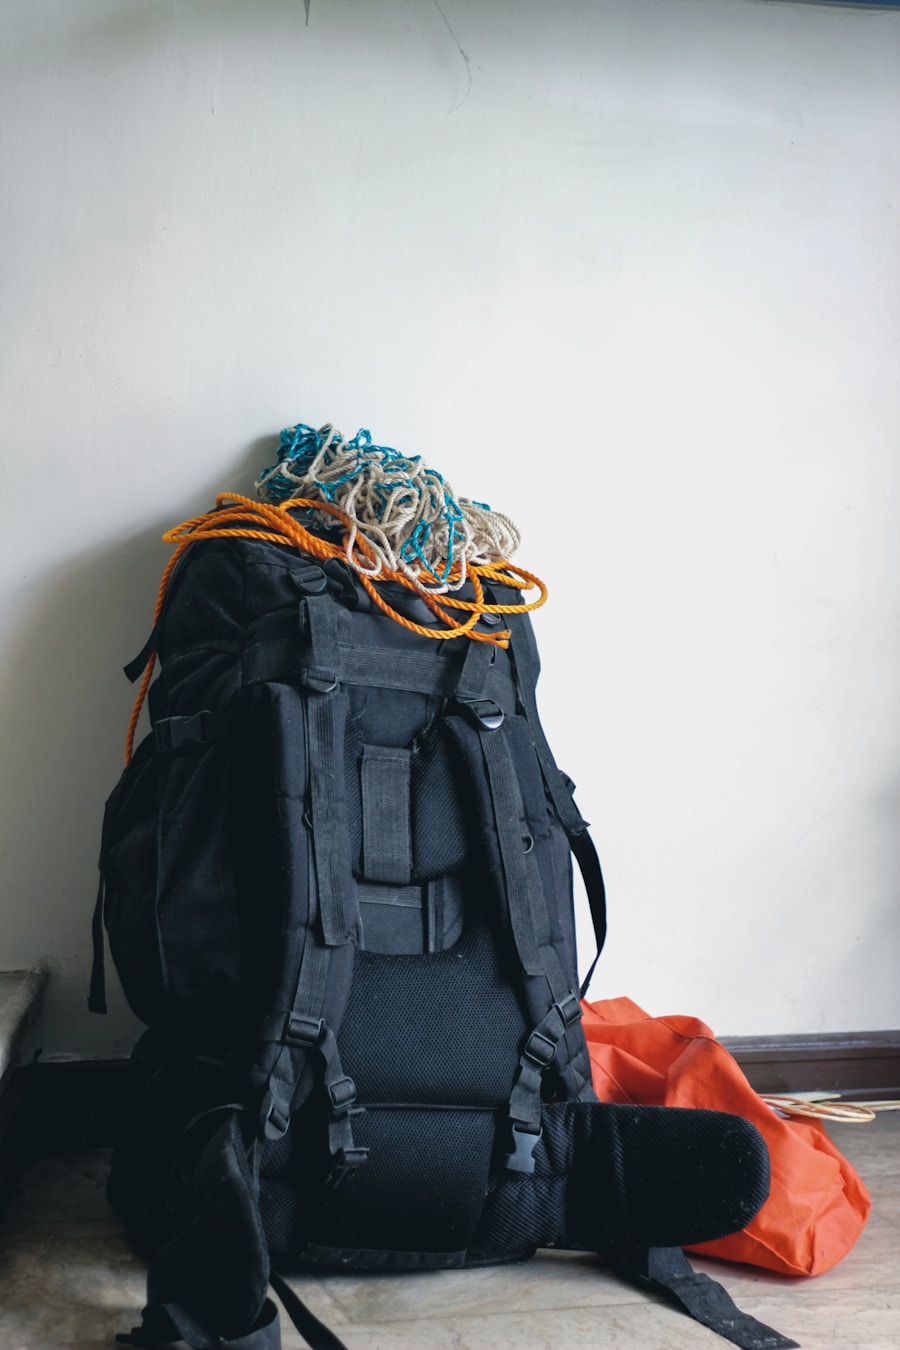
Reducing unnecessary weight can make hiking more comfortable, but the goal is not to remove safety-critical equipment. Start by eliminating duplicate or low-value items rather than cutting navigation, insulation, first aid, water treatment, or emergency equipment.
A multi-tool can replace several individual tools when its functions match your equipment. Nesting or collapsible cookware can save space, and small refillable containers reduce the amount of toiletries you carry. Stuff sacks or packing bags can separate categories such as sleeping clothing, first aid, food, and electronics.
Clothing can serve more than one purpose. Convertible pants can become shorts, a buff can serve as light neck or head protection, and a shell can provide both wind and rain protection when conditions are suitable.
A hammock can function as a rest spot and, where permitted, as an overnight shelter. However, a hammock sleep system still needs weather protection and underside insulation in cool conditions. Use tree-friendly suspension and verify that hammocks are allowed at your destination before relying on one.
Keep Critical Equipment Dry
Many hiking packs are water-resistant rather than completely waterproof. A pack liner, waterproof stuff sacks, or both can protect your sleeping bag, dry clothing, electronics, and other moisture-sensitive equipment. A rain cover can add exterior protection but may not prevent every route for water to enter.
How to Pack a Hiking Pack Step by Step
1. Lay Out Everything Before Loading the Pack
Spread your gear out where you can see it. Group it into sleep system, shelter, clothing, food, water, cooking equipment, Ten Essentials, toiletries, and frequently used trail items. Remove unnecessary duplicates before you start stuffing gear into open spaces.
2. Install the Pack Liner or Water Protection
If you use an internal waterproof liner, put it in the main compartment before loading anything else. Keep the sleeping bag, dry sleep clothing, and other moisture-sensitive equipment inside the protected area.
3. Put Bulky, Lightweight Camp Gear at the Bottom
The bottom of a backpack is a good place for equipment you will not need until camp, especially lightweight, compressible items. This may include your sleeping bag or quilt, sleep clothing, compact sleeping pad, and other soft camp gear.
Avoid putting dense food, a heavy cook kit, or another concentrated mass at the very bottom simply to “lower the center of gravity.” A heavy bottom can make the backpack sag and pull awkwardly.
4. Put the Heaviest Gear in the Core, Close to Your Back
Dense items such as your main food supply, water reservoir, bear canister, and cooking equipment generally belong in the middle or core of the backpack and close to your back. Center them from left to right.
Use softer items such as clothing, a tent body, or other compressible equipment to fill gaps around the heavy core. This reduces movement and prevents hard objects from pressing into your back.
Think “light at the bottom, dense in the middle near your back, quick-access gear near the top.” A compact, balanced load is usually more comfortable than simply forcing the heaviest equipment as low as possible.
5. Keep On-Trail Essentials Near the Top
Rain gear, insulation you may add during a break, your water-treatment kit, toilet kit, and other equipment you might need during the day belong toward the top rather than buried beneath camp gear.
6. Use Pockets for Items You Need Often
Hipbelt, lid, and external pockets work well for snacks, sunscreen, lip balm, map, compass, insect repellent, gloves, and other frequently used items. Your first aid kit and headlamp should also be reachable without dismantling the entire backpack.
Keep valuables secure rather than placing them in loose or easy-to-open exterior pockets.
7. Minimize Gear Hanging From the Outside
Items strapped to the exterior can swing, snag branches, get wet, or alter the pack’s balance. Keep as much equipment inside the backpack as practical.
Long equipment such as trekking poles or tent poles may need exterior attachment points. Secure them tightly so they do not shift or extend dangerously into surrounding hikers or vegetation.
8. Balance Both Sides and Tighten Compression Straps
Check the left-to-right balance before closing the pack. A heavy bottle or piece of equipment on one side should be balanced by something of similar weight on the other whenever practical.
Tighten compression straps enough to reduce empty space and stop the contents from shifting, but do not crush fragile equipment.
9. Put the Pack On and Test It
Walk around with the finished load. The backpack should feel stable rather than swinging or pulling strongly backward. If something feels wrong at home, it is unlikely to improve several miles into the hike.
Pro Tip: Pack your hydration reservoir before the main compartment becomes full. Sliding a filled reservoir into a tightly packed sleeve afterward can be difficult and may disturb the rest of the load.
How to Adjust a Loaded Hiking Pack
A well-packed backpack can still feel uncomfortable if its suspension is adjusted incorrectly. Start with the manufacturer’s instructions because designs vary, then use the following general sequence.
- Set the torso length: On an adjustable pack, set the harness so the suspension matches your back length.
- Position and tighten the hipbelt: Place it securely around the upper part of your hips and tighten it first so it can carry a substantial part of the load.
- Snug the shoulder straps: Pull them in until they follow your shoulders comfortably without forcing all of the pack weight onto them.
- Adjust the load lifters: If the pack has them, use them to bring the upper load closer to your body without overtightening.
- Fasten the sternum strap: Use it for stability. It should not restrict breathing.
After walking for a few minutes, make small adjustments. Your body and equipment may settle after the initial fit.
Troubleshooting an Uncomfortable Hiking Pack
The Pack Pulls You Backward
Move dense gear closer to your spine and reduce weight hanging from the back of the pack. Tighten the compression straps and check that the load lifters are adjusted appropriately.
The Pack Feels Top-Heavy or Tippy
Check whether dense gear has been packed too high. Move it toward the middle while keeping it close to your back.
Your Shoulders Carry Most of the Weight
Check the hipbelt position and torso length before simply tightening the shoulder straps more. The suspension may not match your body or the hipbelt may be sitting in the wrong position.
The Pack Leans to One Side
Compare the weight in both side pockets and inspect the main compartment for a dense object that has shifted. Re-center the load and tighten the compression straps.
You Cannot Reach Anything Without Unpacking
Move frequently used equipment—rain gear, snacks, navigation, sunscreen, headlamp, first aid, and water treatment—to the lid, hipbelt pockets, side pockets, or top of the main compartment.
Hard Gear Presses Into Your Back
Rotate the item or wrap it with softer clothing. Hard edges should not sit directly against the back panel where they can create pressure points.
Final Checklist: Important Items to Double-Check Before Hitting the Trail
Before leaving, compare your gear with the actual route and forecast rather than relying on the same packing list for every hike.
- Pack and fit: Correct capacity, torso setting, hipbelt position, shoulder straps, load lifters, sternum strap, and compression straps.
- Navigation: Map, compass, GPS or offline map as appropriate, plus adequate battery power.
- Sun protection: Sunscreen, sunglasses, hat, and protective clothing.
- Clothing: Moisture-managing layers, insulation, rain protection, socks, and weather-specific accessories.
- Illumination: Headlamp or flashlight and backup power or batteries.
- First aid: Personal medications, blister care, and a trip-appropriate kit.
- Fire and repair: Legal fire-starting method where appropriate, plus a compact repair kit and multi-tool.
- Food: Meals, trail snacks, and emergency reserve food.
- Water: Starting supply, planned refill locations, and an appropriate treatment system with backup where needed.
- Shelter: Emergency shelter for day hikes and complete tent/tarp/hammock system for overnight trips.
- Sleep system: Sleeping bag or quilt, insulated sleeping pad, and dry sleep clothing for overnight trips.
- Food storage: Bear-resistant container, locker plan, or other method required by the land manager.
- Weather protection: Pack liner, dry bags, or another system for keeping critical equipment dry.
- Trip information: Current weather, trail closures, fire restrictions, permits, camping rules, water availability, and wildlife notices.
- Emergency plan: Leave your route, destination, vehicle information when relevant, and expected return time with someone who is not on the trip.
Finally, lift the pack, walk with it, and listen to what your body tells you. A few minutes spent moving food, water, or clothing at home can prevent hours of discomfort on the trail.
If you’re looking for more travel tips and advice, read this guide to the best carry-on luggage for international travel. Good organization principles can help with both travel luggage and hiking gear, although trail packs need much more attention to weight distribution, weather protection, and emergency access.
Love travel? Join Our Facebook Community
Frequently Asked Questions
What is a hiking pack?
A hiking pack is a backpack designed to carry trail equipment, food, water, clothing, and safety supplies. Larger backpacking models usually add a more substantial hipbelt, frame or framesheet, adjustable suspension, compression straps, and storage intended for overnight equipment.
What should I consider when choosing a hiking pack?
Consider trip length, season, gear volume, expected load, torso length, hipbelt fit, ventilation, weather protection, and the type of terrain you will hike. Pack capacity is only useful when the suspension also fits your body correctly.
How do I pack a hiking pack?
Put bulky, lightweight camp gear near the bottom. Pack dense items such as your food supply, water, and cooking equipment in the core close to your back. Keep rain gear and other on-trail essentials toward the top, place frequently used items in accessible pockets, balance both sides, and tighten the compression straps.
What are the essential items to pack for a hike?
Use the Ten Essentials as a baseline: navigation, sun protection, extra clothing, illumination, first aid, fire, repair tools, extra food, water and treatment supplies, and emergency shelter. Add trip-specific equipment based on weather, terrain, wildlife, regulations, and duration.
How do I adjust and fit a hiking pack properly?
Set the torso length first if the pack is adjustable. Put the loaded pack on, position and tighten the hipbelt around the upper hips, snug the shoulder straps, adjust the load lifters if present, and finish with the sternum strap. The pack should stay close to your body without placing all of the weight on your shoulders.
Where should the heaviest items go in a hiking backpack?
For normal backpacking loads, dense equipment should generally sit in the middle or core of the pack and close to your back. Keep it centered from side to side. Bulky, lighter sleeping gear can go lower, while items needed during the day should remain accessible near the top or in pockets.
How much water should I carry while hiking?
There is no single amount that fits every hiker or route. Temperature, exertion, altitude, body size, trip duration, and available water sources all matter. One current National Park Service planning benchmark is at least 1 liter for every two hours of hiking, but conditions may require more or a different plan.
Sources
- U.S. National Park Service — Ten Essentials — navigation, sun protection, illumination, first aid, repair tools, hydration, extra food, and emergency shelter.
- Great Smoky Mountains National Park — Hiking guidance, updated April 27, 2026 — Ten Essentials and trail water-planning guidance.
- Centers for Disease Control and Prevention — Water Treatment While Hiking, Camping, or Traveling, January 30, 2025 — boiling, filtration, disinfection, UV treatment, and natural-water safety.
- Osprey — Backpack suspension and packing guidance — hipbelt load transfer, load lifters, suspension adjustment, and keeping heavy equipment near the back.
- Gregory Packs — Backpack loading guidance — bottom, middle, peripheral, and quick-access packing zones.
- Yosemite National Park — Backcountry Food Storage — bear-resistant storage and treatment of food, trash, toiletries, and other scented items.

