
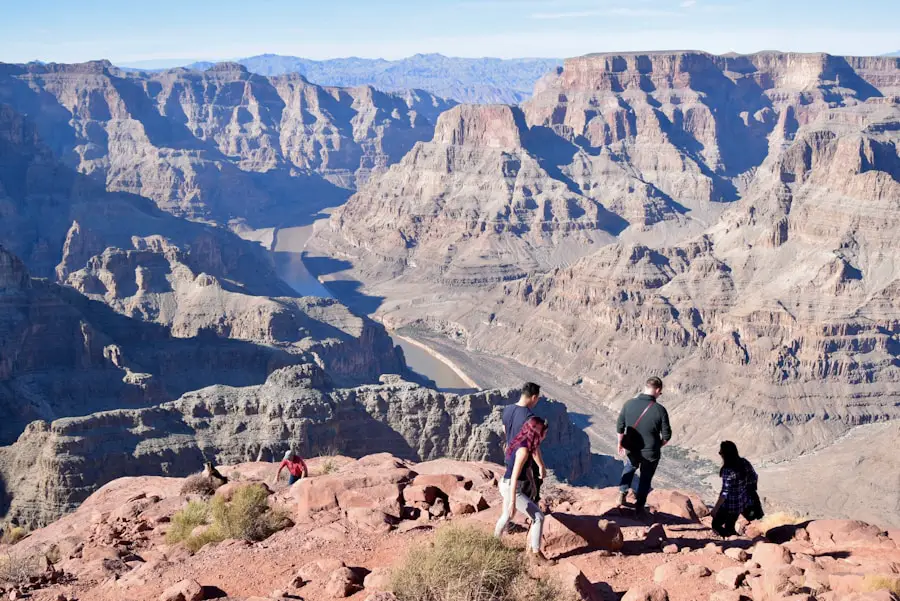
Last Updated on September 10, 2026 by Daniel Globe
Training for a Grand Canyon hike takes more than being able to walk several miles on level ground. Trails below the rim combine long descents, sustained climbs, uneven footing, high elevation at the rims, and—during warmer months—extreme inner-canyon heat. The unusual part is that you often descend while fresh and must make the hardest climb when your legs are already tired.
A good preparation plan therefore combines cardiovascular endurance, leg and core strength, downhill conditioning, loaded hiking, gear practice, and realistic pacing. Your exact training load should match the trail, season, pack weight, and your current fitness rather than following a one-size-fits-all mileage target.
Quick Answer
To train for hiking the Grand Canyon, spend about 8–12 weeks building walking and hiking endurance, stair or hill climbing, leg and core strength, downhill control, and gradually longer hikes with your planned pack. Train specifically for the climb out, practice eating and drinking during long efforts, and taper during the final week.
Key Takeaways
- Train for both directions: Grand Canyon descents stress the quadriceps, while the return climb demands sustained cardiovascular and muscular endurance.
- Use hills, stairs, an inclined treadmill, or a stair machine if you do not have steep trails nearby.
- Gradually practice with the shoes, poles, pack, food, and water system you expect to use on the actual hike.
- Do not let an easy-feeling descent tempt you beyond your ability to climb back out.
- Check current National Park Service trail, weather, heat, and water information immediately before the hike.
At a Glance
| Time Required | About 8–12 weeks for an already-active hiker; longer when building from a low fitness base |
| Difficulty | Moderate to demanding, depending on the planned route and current conditioning |
| Tools Needed | Walking or hiking shoes, backpack, stairs/hills or incline equipment, water; trekking poles and basic weights are useful but optional |
| Cost | Potentially $0 using outdoor hills, stairs, and bodyweight exercises; more if you need equipment, footwear, or gym access |
Disclosure: As an Amazon Associate I earn from qualifying purchases. Some links on this page are affiliate links, at no extra cost to you.
Why Physical Conditioning Matters for a Grand Canyon Hike
Physical conditioning is the foundation of a successful Grand Canyon hike. Regular aerobic activity improves your ability to keep moving for hours, while strength training helps your legs manage repeated climbing and descending. The goal is not simply to become “fit.” It is to become fit for the specific route you plan to hike.
The Grand Canyon reverses the pattern hikers experience on many mountains. Instead of climbing while fresh and descending toward the finish, you often descend thousands of feet first and then climb back toward the rim when fatigue is accumulating. The National Park Service advises hikers to remember that the uphill portion can take roughly twice as long as the downhill portion.
General fitness still matters. Current U.S. physical-activity guidance recommends that adults work toward at least 150 minutes of moderate aerobic activity each week plus muscle-strengthening activity on at least two days. A Grand Canyon training program can build on that base with progressively longer hikes, climbing sessions, and route-specific strength work. See the U.S. Department of Health and Human Services activity guidance for the general fitness baseline.
Regular exercise can also help with confidence, mood, and anxiety. That mental benefit matters when a hike becomes long, hot, steep, or uncomfortable. Physical preparation cannot eliminate every challenge, but it gives you more capacity to make calm decisions instead of operating at your limit.
Pro Tip: Choose your actual Grand Canyon route before setting training targets. A short South Rim day hike and an overnight corridor trip require very different levels of preparation.
Choosing the Right Gear
Your training period is the best time to test the gear you will use in the canyon. Footwear should fit securely, have dependable traction, and already be broken in before the trip. Do not save a brand-new pair of boots or trail shoes for hiking day.
Wear your planned footwear during long training walks, hills, and stair sessions. This gives you time to identify heel slip, toe pressure, hot spots, or blister problems before they become serious on a steep trail.
Clothing should match the season. Lightweight layers and sun protection are useful in warm conditions, while colder months can require insulation and additional traction. The National Park Service warns that upper sections of some trails may become icy during winter and recommends over-the-shoe traction and trekking poles when conditions require them.
Your backpack should fit closely and distribute its load comfortably. Gradually add weight during training rather than jumping immediately to your expected trail load. Practice with the actual water containers or hydration reservoir you intend to carry because water will often be one of the heaviest items in your pack.
Useful Grand Canyon hiking gear may include:
- Broken-in hiking boots or trail shoes with good traction
- Appropriate socks and blister-care supplies
- Daypack or overnight backpack fitted to your torso
- Water bottles or hydration reservoir
- Food and salty snacks
- Map and route information
- Headlamp or flashlight with adequate power
- Sun protection
- First-aid supplies
- Trekking poles, especially if you find them useful on long descents
Train with this equipment rather than merely owning it. Adjust pack straps, learn how to access food and water without unpacking everything, and practice using trekking poles on both climbs and descents.
Understanding the Grand Canyon Terrain
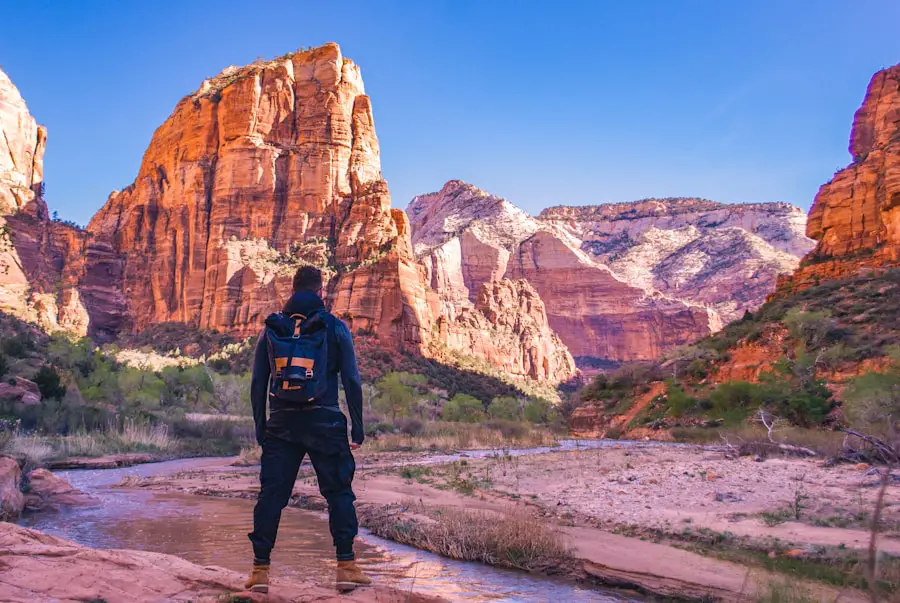
A comprehensive understanding of the terrain is essential because the Grand Canyon is unlike an ordinary rolling trail. The South Rim averages about 7,000 feet above sea level, while the North Rim is around 8,000 feet. Visitors arriving from lower elevations may notice the thinner air during exertion, especially while climbing.
Trails also lose elevation rapidly. That means your quadriceps must repeatedly control your body as you descend before those same legs turn around and climb. Hiking downhill may feel easy to your lungs at first, but it creates substantial muscular fatigue.
At Grand Canyon, do not judge the difficulty of the return trip by how easy the descent feels. The climb back to the rim is the part you must save strength, food, water, and time for.
Route characteristics also vary. The South Kaibab Trail is steep, exposed, has little shade, and has no potable water along the trail below the trailhead. The Bright Angel Trail has more shade and seasonal water locations, but water availability can change because of maintenance or pipeline problems. Check the Grand Canyon National Park Key Hiking Messages immediately before setting out rather than assuming a water source will be operating.
National Park Service hiking-safety guidance also recommends choosing a trail that matches the abilities of everyone in the group, leaving a trip plan, tracking time and distance, and setting a turnaround time.
Note: Trail access, water systems, closures, and services can change. For 2026 trips, check the NPS Key Hiking Messages and your individual trail page shortly before travel. Late-2026 hikers should pay particular attention to scheduled North Kaibab Trail closures that may affect traditional rim-to-rim itineraries.
Nutrition and Hydration
Nutrition and hydration are critical parts of both training and the actual hike. Your long training days are the safest time to learn which foods sit well in your stomach, how often you naturally want to eat, and how much water you tend to use in different temperatures.
| Training-day hydration | Practice drinking according to conditions, effort, duration, and your individual needs rather than relying on a universal “8 glasses” rule. |
| Long hikes | Eat regularly and carry enough energy-dense food for the planned hike plus a reasonable reserve. |
| Hot-weather hiking | Balance fluids with food and electrolytes. Avoid both dehydration and forcing excessive plain water. |
| Food choices | Use familiar foods that provide carbohydrates, some fat and protein, and enough sodium for the conditions. |
| Water sources | Never assume a trail spigot is operating. Verify current NPS water status and carry an appropriate backup plan. |
Carbohydrate-rich foods can provide convenient energy during a long hike, while protein contributes to normal recovery after training. Trail mix, crackers, sandwiches, bars, dried fruit, nut butter, and other familiar foods are common choices. The best trail food is food you already know you can tolerate while exercising.
Grand Canyon National Park specifically emphasizes eating regularly and pairing fluids with adequate food and electrolytes during strenuous hot-weather hiking. Do not treat hydration as a contest to drink as much water as possible; excessive water without enough electrolytes can also become dangerous.
Practice your nutrition strategy during long training hikes. Waiting until the Grand Canyon to discover that a particular bar, drink mix, or large meal upsets your stomach can make an already difficult climb much harder.
Mental Preparation
Mental preparation matters because fatigue, fear, heat, and self-doubt can all appear during a long canyon hike. The goal is not to ignore discomfort. It is to stay calm enough to distinguish normal effort from signs that you need to rest, turn around, or seek help.
Set realistic goals during training. Instead of focusing only on one large objective, use milestones such as completing a 60-minute stair session comfortably, finishing a long hike without excessive soreness, or carrying your planned pack over comparable terrain.
Visualization can also be practical. Think through your trail day before you arrive: when you expect to start, where you will turn around, where reliable water may or may not be available, how you will respond if someone in the group slows down, and what conditions would make you abandon the original plan.
Positive thinking is useful only when paired with sound judgment. Continuing because you are determined is not a substitute for recognizing heat illness, injury, declining weather, or an unrealistic turnaround time.
Note: A successful hike does not require reaching the farthest possible destination. Turning around early when conditions, timing, or your body call for it is good backcountry judgment.
Safety Precautions
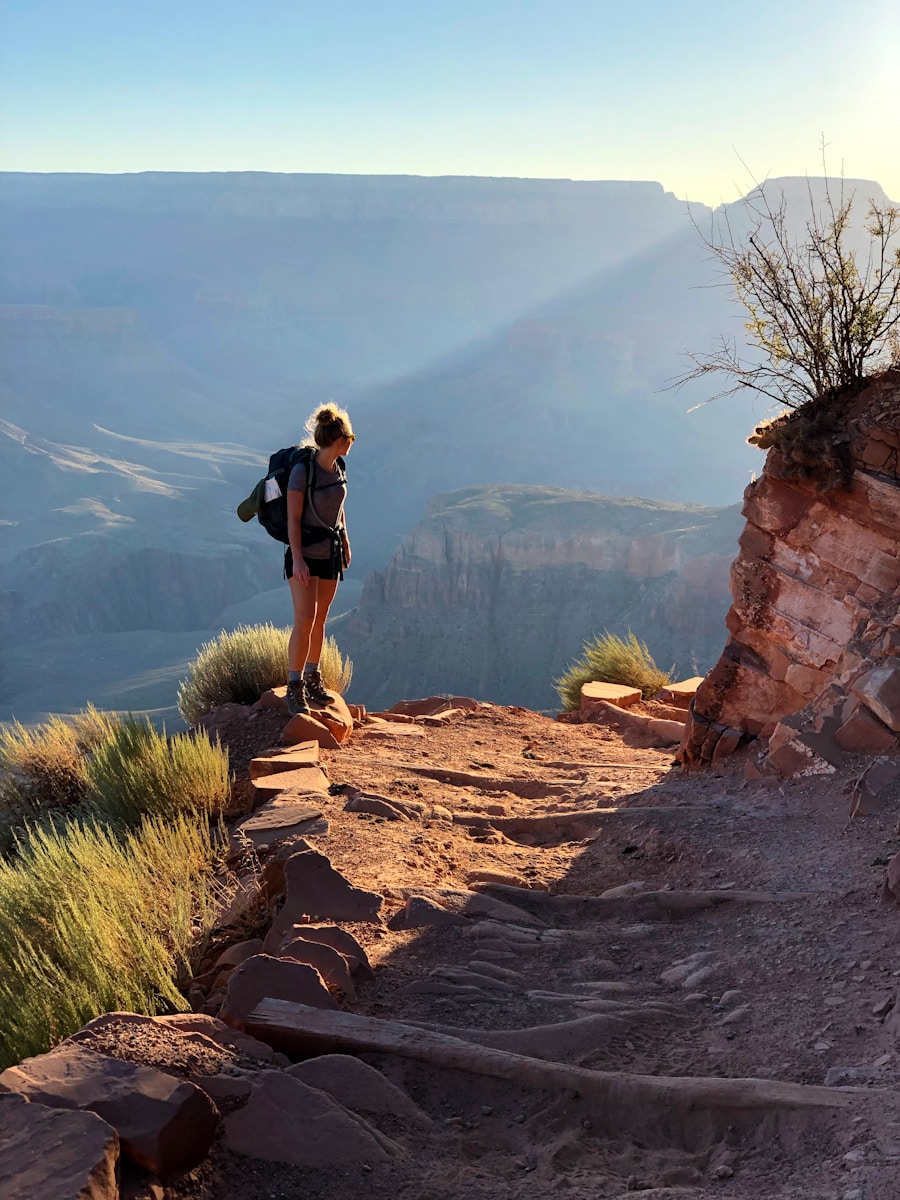
Safety precautions are especially important at the Grand Canyon because heat, elevation, steep terrain, limited shade, winter ice, and long distances from help can turn a small problem into a serious one.
Warning: The National Park Service advises visitors not to attempt a rim-to-river-and-back hike in one day. During summer heat, strenuous inner-canyon hiking can become life-threatening. In June 2026, the park specifically warned hikers to avoid strenuous inner-canyon hiking between 10 a.m. and 4 p.m., when shaded temperatures could reach about 109°F (43°C).
Check the current weather, trail condition, heat risk, and water status before leaving the rim. During warmer months, schedule strenuous movement for cooler hours whenever conditions and your itinerary allow.
Heat preparation also deserves attention before the trip. CDC/NIOSH guidance shows that heat acclimatization develops through repeated, gradually increasing exposure over roughly 7–14 days. This does not make extreme heat safe, but hikers accustomed only to air-conditioned indoor workouts should not assume gym fitness equals desert-heat readiness.
Carry essential safety equipment appropriate to the route, including navigation information, lighting, food, water, first-aid supplies, sun protection, and weather-appropriate layers. Do not rely on a phone alone for navigation or light.
For overnight travel, understand the permit requirements before making plans. Grand Canyon National Park requires a backcountry permit for overnight camping outside developed rim campgrounds. Ordinary noncommercial day hikes do not require a backcountry permit. See the Grand Canyon backcountry permit guidance.
If you have a heart, respiratory, metabolic, joint, or other medical condition that may be affected by strenuous exercise, elevation, or heat, discuss an appropriate hiking plan with a qualified healthcare professional before attempting a demanding route.
Training Schedule and Progression
A structured training schedule should gradually increase the work your body can tolerate. The sample 12-week plan below is intended as a flexible framework for an adult who already performs some regular physical activity. Someone starting from a sedentary baseline may need considerably longer.
Weeks 1–4: Build Your Base
Focus first on consistency. Walk, hike, cycle, or use another aerobic activity three to four days per week. Include two short strength sessions and one gradually lengthening walk or hike.
- 3 aerobic sessions of roughly 30–60 minutes
- 2 strength sessions
- 1 longer walk or hike each week
- At least 1 easier or full rest day
During these weeks, begin using the footwear you plan to wear at the Grand Canyon. If you have access to hills, include moderate elevation changes rather than doing every session on flat ground.
Weeks 5–8: Add Hills, Stairs, and Pack Weight
Now make the program more specific. One or two weekly sessions should include sustained climbing using outdoor hills, stadium stairs, a stair machine, or an inclined treadmill.
Begin carrying a light backpack during selected walks or hikes and increase the load gradually toward your expected trail weight. Do not add large amounts of distance, climbing, and pack weight at the same time.
- 1 hill, stair, or incline workout
- 2 easier aerobic workouts
- 2 strength sessions
- 1 progressively longer hike with varied terrain
- 1–2 recovery days depending on fatigue
Weeks 9–10: Make Training Canyon-Specific
These are your most specific training weeks. Your long hike should include meaningful climbing and descending when possible. Wear your planned footwear, carry a realistic pack, practice with trekking poles if you will use them, and eat and drink the foods you plan to carry.
People who live in flat areas can simulate vertical work by repeating stairs, parking-garage ramps, stadium steps, or an incline treadmill. The goal is not to find a perfect replica of the Grand Canyon; it is to teach your legs to climb and descend repeatedly for a long period.
Week 11: Peak Without Exhausting Yourself
Complete your final demanding long hike far enough before the trip to recover fully. This is a rehearsal, not a fitness test you must barely survive. You should finish tired but still in control.
Review any problems afterward. Hot spots on the feet, painful pack straps, nausea from a particular food, or difficulty managing your water system are all useful discoveries while you still have time to correct them.
Week 12: Taper
Reduce total training volume during the final week. Continue easy walking and light movement, but avoid trying to gain last-minute fitness with a punishing stair workout or unusually long hike. Fitness is built during the preceding weeks; the final days are for arriving rested.
Sample Weekly Training Template
| Monday | Rest or easy mobility |
| Tuesday | Strength training |
| Wednesday | Moderate aerobic workout, 45–60 minutes |
| Thursday | Stairs, hills, or incline workout |
| Friday | Rest or short easy walk |
| Saturday | Long hike or loaded walk with climbing and descending |
| Sunday | Easy aerobic recovery or second strength session, depending on the phase |
Strength Exercises for Grand Canyon Hiking
Your strength work should prepare the legs and trunk to absorb downhill forces and generate repeated uphill steps. Useful exercises include:
- Squats: 2–4 sets of 6–15 controlled repetitions
- Reverse lunges: 2–3 sets of 8–12 repetitions per leg
- Step-ups: 2–4 sets of 8–15 repetitions per leg
- Controlled step-downs: 2–3 sets of 6–12 repetitions per leg
- Calf raises: 2–4 sets of 10–20 repetitions
- Hip hinges or deadlift variations: 2–4 sets of 6–12 repetitions
- Rows or loaded carries: useful for upper-back and pack-carrying strength
- Planks or other trunk-stability exercises: 2–4 controlled sets
Use loads you can control with good technique. You do not need maximum-weight lifting to prepare for hiking. Consistency, gradual progression, and single-leg control are more important.
Pro Tip: Slow, controlled lowering during squats, step-downs, and lunges trains the eccentric strength your quadriceps use while descending. Do not train only for the uphill portion.
Tips for Injury Prevention
Injury prevention begins with sensible progression. Listen to your body and distinguish ordinary training fatigue from persistent or worsening pain. A sudden jump in hiking distance, vertical gain, pack weight, or stair volume can overload tissues that have not had time to adapt.
Warm up before harder sessions with several minutes of easy walking followed by controlled movements such as bodyweight squats, leg swings, or easy step-ups. Static stretching can improve flexibility for some people, but it should not be treated as a stand-alone method for preventing hiking injuries.
Cross-training can help maintain cardiovascular fitness while varying the stress placed on the legs. Cycling, swimming, elliptical training, and easy running can all complement hiking when they fit your abilities.
Footwear also matters. Wear trail shoes or boots that fit well enough to prevent excessive sliding on descents. Keep toenails maintained, test socks before the trip, and address hot spots immediately during training rather than waiting for a blister to form.
Practice descending with control rather than rushing downhill. Short, balanced steps usually reduce braking forces better than repeatedly overstriding. Trekking poles may also help some hikers with balance and load management, particularly on prolonged descents.
Recovery is part of training. Schedule easier days, sleep adequately, and reduce training when persistent fatigue begins affecting normal movement or technique. Training through worsening pain rarely improves your preparation.
Warning: Stop strenuous activity and seek appropriate medical help for concerning symptoms such as fainting, confusion, chest pain, severe shortness of breath, inability to continue safely, or signs of serious heat illness. Fitness training is not a substitute for medical evaluation when symptoms are significant.
If you’re planning a hiking trip to the Grand Canyon, pack weight deserves attention alongside fitness. A lightweight and functional backpack can reduce unnecessary load during a long climb. The existing guide to minimalist travel backpacks offers additional ideas for keeping your carrying system simple, although your final choice should still match the length and safety requirements of your specific Grand Canyon itinerary.
Frequently Asked Questions
What is the best way to train for hiking the Grand Canyon?
Combine aerobic endurance, hills or stairs, two weekly strength sessions, downhill-focused leg work, and progressively longer hikes. As your trip approaches, train with the footwear, trekking poles, food, water system, and pack you expect to use.
How long should I train before hiking the Grand Canyon?
For someone who already exercises regularly, an 8–12 week Grand Canyon-specific progression can provide a useful preparation period. A person beginning from low fitness may need several additional months. Your route, pack weight, season, health, and current hiking ability matter more than a single universal timeline.
What exercises should I include in Grand Canyon training?
Useful exercises include squats, lunges, step-ups, controlled step-downs, calf raises, hip hinges, loaded carries, and core-stability work. Pair strength training with walking, hiking, stair climbing, cycling, or other aerobic exercise.
Where should I train if I do not live near mountains?
Use stadium stairs, parking-garage ramps, an inclined treadmill, a stair machine, pedestrian bridges, or repeated laps on the steepest local hill you can find. Longer flat walks still build time-on-feet endurance, while stairs and strength work supply the missing vertical component.
How should I adjust training as the hike date approaches?
Complete your most specific long hikes during the final few build weeks, then reduce training volume during the last week. Keep moving easily but avoid an unusually hard workout immediately before travel. You want to arrive rested rather than carrying accumulated soreness.
Should I practice hiking downhill?
Yes. Long Grand Canyon descents place repeated eccentric load on the quadriceps. Include controlled downhill hiking, step-downs, and slow lowering during leg-strength exercises so your muscles are prepared for the descent as well as the climb out.
Do I need a permit for a Grand Canyon hike?
A standard noncommercial day hike does not require a backcountry permit. Overnight backcountry camping generally does. Check the National Park Service permit page for the requirements that apply to your exact itinerary.
Can I hike from the rim to the Colorado River and back in one day?
The National Park Service advises hikers not to attempt a rim-to-river-and-back day hike. The combination of steep elevation change, heat exposure, distance, and the strenuous climb out makes this itinerary substantially harder than the downhill portion may initially suggest.
Sources
- Grand Canyon National Park — Hiking Tips — canyon-specific planning, pacing, food, gear, and uphill-return guidance.
- Grand Canyon National Park — Key Hiking Messages — current trail conditions, closures, heat information, and water availability.
- Grand Canyon National Park — Day Hiking — day-hike difficulty and rim-to-river safety guidance.
- Grand Canyon National Park — Backcountry Permits — day-hike and overnight permit requirements.
- CDC/NIOSH — Heat Acclimatization — gradual 7–14 day heat-acclimatization guidance.
- U.S. Department of Health and Human Services — Move Your Way — general aerobic and strength-activity recommendations.

