
Last Updated on July 27, 2026 by Daniel Globe
Approach hiking is often the “before” part of a climbing or backcountry objective, but it deserves the same planning as the main activity. An approach can follow an easy trail, a faint climbers’ path, steep scree, rocky terrain, stream crossings, or seasonal snow. A good plan covers the trip in, the main objective, and the entire return.
Quick Answer
Approach hiking is the hike or scramble used to reach the start of a climbing route, crag, backcountry objective, or other destination that cannot be reached directly by vehicle. A safe approach starts with route research, current conditions, navigation, proper footwear, the Ten Essentials, and enough time and energy for the activity and return.
Key Takeaways
- Choose an approach that matches the least-experienced person in the group and account for distance, elevation gain, terrain, weather, and the main activity that follows.
- Check official route information, current weather, closures, permits, seasonal hazards, and the descent before leaving the trailhead.
- Carry navigation, food, water, weather protection, first aid, illumination, emergency shelter, and the other Ten Essentials appropriate to the route.
- Do not depend on cell service or a crowd-sourced map as your only navigation or emergency plan.
- Turn around when conditions, timing, fatigue, route-finding, or group safety no longer support continuing.
At a Glance
| Time Required | Varies by route. Include the approach, main activity, descent, breaks, and a daylight or weather margin. |
| Difficulty | Easy trail to strenuous scrambling, snow travel, or off-trail navigation, depending on the objective. |
| Tools Needed | Current route information, map and compass or GPS with offline mapping, Ten Essentials, suitable footwear, and activity-specific gear. |
| Cost | Varies by destination. Check parking, permits, transport, entry fees, and required gear before the trip. |
Disclosure: As an Amazon Associate I earn from qualifying purchases. Some links on this page are affiliate links, at no extra cost to you.
What Is Approach Hiking?
Approach hiking is the travel needed to reach the starting point of another outdoor objective. In climbing, that usually means hiking or scrambling from a trailhead, road, parking area, or camp to the base of a rock route, alpine climb, boulder field, or crag.
The approach may be only a few minutes on a maintained trail, or it may take hours over steep and complicated terrain. Longer alpine objectives can involve an approach to a base camp followed by additional travel to the actual climbing route.
Approach Hiking vs. Regular Hiking
Regular recreational hiking often treats the hike itself as the main activity. With approach hiking, the hike is usually one part of a larger objective. That difference affects pacing, equipment, timing, and risk. You need enough energy not only to reach the destination but also to complete the main activity and return safely.
An approach can also involve terrain that looks different from a normal maintained hiking trail. Climbers’ paths may be faint, steep, rocky, or easy to lose. Some approaches include scrambling where hands are occasionally needed for balance. Others cross snow, talus, loose scree, or exposed terrain.
Note: “Approach” does not mean “easy.” A short approach over loose rock, steep slopes, or difficult route-finding can demand more attention than a longer walk on a maintained trail.
Choosing the Right Approach Trail
Selecting the appropriate trail is a fundamental step in creating a safe and enjoyable hiking experience. Start with the skill and fitness level of everyone involved. Trail managers and hiking apps may describe routes as easy, moderate, difficult, or with similar terms, but those labels are not perfectly standardized. Look at the actual distance, elevation gain, terrain, exposure, route-finding demands, and current conditions.
Novice hikers are usually better served by well-marked paths with gradual inclines and manageable distances. A local nature reserve or state park can provide useful practice before attempting a remote or technical approach.
More experienced hikers may choose steep or rugged routes. Long-distance trails such as the Appalachian Trail and Pacific Crest Trail contain sections with substantial elevation change and challenging terrain, but difficulty varies greatly from one segment to another. Always research the specific section you plan to travel rather than treating an entire trail as one difficulty level.
The environment matters too. Some hikers prefer coastal approaches with ocean views, while others enjoy mountain routes overlooking valleys and peaks. Learning about local plants, wildlife, geology, and ecosystems can add interest to the hike without distracting from route-finding and safety.
Season is equally important. Snow, ice, high water, wildfire closures, extreme heat, or storms can make an otherwise straightforward trail difficult or unsafe. Some routes are inaccessible or require specialized skills during part of the year, so check current conditions rather than relying on a route description written for another season.
Preparing for the Hike
Preparation begins well before you reach the trailhead. Assess your fitness and choose a realistic objective. Consider not only the approach but also the activity that follows. A person who can comfortably hike several miles on level ground may still struggle with a steep approach while carrying climbing equipment.
If you are planning a full-day mountain objective, regular walking, jogging, stair climbing, or practice hikes on local hills can help build endurance. Increase difficulty gradually rather than using the actual trip as your first test.
Mental preparation matters too. Review the route before leaving. Identify major junctions, landmarks, water sources, steep sections, possible wrong turns, the start of the main objective, the descent route, and the trailhead return.
Discuss the plan with everyone in the group. Agree on pacing, rest stops, turnaround conditions, and what the group will do if someone becomes tired, injured, separated, or uncomfortable continuing.
Check Current Route Information
Confirm permits, parking rules, trail closures, seasonal restrictions, group-size limits, and wildlife requirements with the agency or land manager responsible for the area. A saved blog post or crowd-sourced route description can be useful background information, but it should not replace current official information.
The National Park Service warns that user-generated hiking information can sometimes mislabel route difficulty or send people onto unofficial routes. For remote trips, download maps before leaving service and know how to use a map and compass as a backup.
Plan the Return Before You Start
On an approach hike, reaching the base of the route is not the end of the day. Estimate how long the main activity and descent may take, then set a turnaround time that protects your daylight, weather, and energy margin.
Pro Tip: Save or photograph key route information before leaving the trailhead, including the approach, descent, emergency contacts, and any confusing junctions. Do not assume you will have data service when you need it.
Packing the Essentials
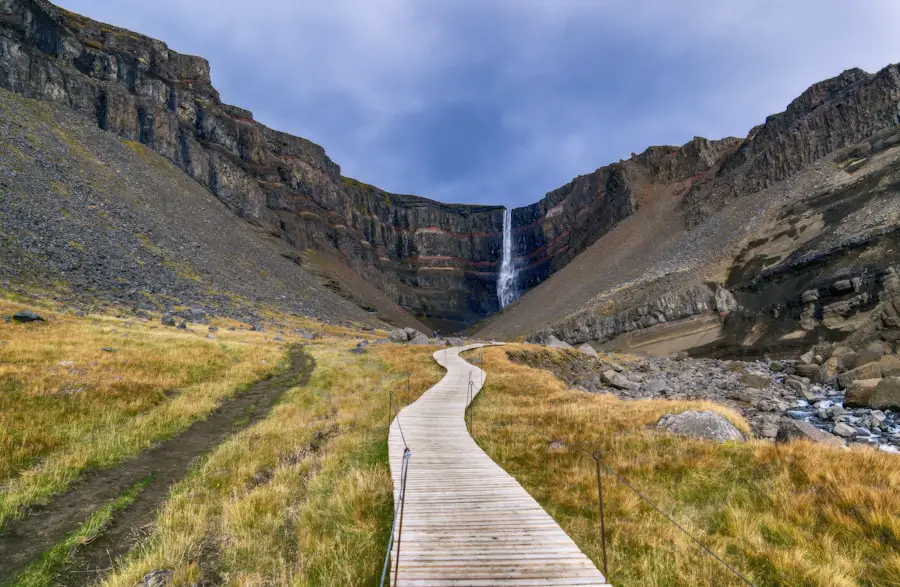
Packing appropriately can make the difference between a manageable problem and an emergency. The National Park Service Ten Essentials provide a useful starting system:
- Navigation: map, compass, GPS, or another navigation system you know how to use.
- Sun protection: sunglasses, sunscreen, a hat, and protective clothing as needed.
- Insulation: extra layers appropriate for expected and unexpected weather.
- Illumination: a headlamp or flashlight, preferably with backup power.
- First aid: supplies appropriate for the group and enough knowledge to use them.
- Fire: a safe emergency fire-starting method where fires are legal and conditions allow.
- Repair kit and tools: items suited to the equipment you are carrying.
- Food: enough for the planned trip plus an emergency margin.
- Hydration: water plus treatment supplies when you may need to use a backcountry source.
- Emergency shelter: an emergency blanket, bivy, tarp, or other shelter appropriate to the environment.
Plan Water for the Actual Route
Avoid treating two liters per person as a universal day-hike rule. Water needs change with heat, humidity, altitude, exertion, route length, body size, and access to reliable water sources. Study the route beforehand and carry enough water for the expected conditions plus a reasonable emergency margin.
If you expect to refill from a natural source, carry a suitable treatment method and confirm that the source is normally available. A stream shown on a map may be seasonal or dry.
Nutritious snacks such as trail mix, energy bars, fruit, tortillas, or other easy-to-carry foods can help maintain energy during breaks. For long climbing days, pack food that remains practical to eat even when you are tired or wearing technical gear.
Choose Footwear for the Terrain
There is no single correct shoe for every approach. Maintained trails may be comfortable in hiking shoes or suitable trail-running footwear. Rocky approaches and scrambling may favor approach shoes with durable construction and grippy rubber. Boots can provide more protection or support for rough terrain, cold conditions, or heavier loads.
Whatever you choose, make sure the footwear fits well, has traction appropriate to the surface, and has been tested before a long objective. New shoes that cause hot spots or blisters can become a major problem several miles from the trailhead.
Carry the Main Activity Gear Efficiently
Approach hikers may also be carrying ropes, helmets, harnesses, climbing shoes, protection, or other activity-specific equipment. Pack heavy items close to your body and secure anything that can swing, snag, or fall. Avoid loading yourself so heavily that the approach leaves you exhausted before the main objective begins.
Navigating the Trail
Note: The trail names and numbers in the table below are illustrative planning examples from the original article, not verified recommendations for specific real-world routes. Use current official data when comparing an actual hike.
| Trail Name | Difficulty Level | Distance (miles) | Elevation Gain (feet) |
|---|---|---|---|
| Mountain View Trail | Intermediate | 3.5 | 800 |
| Forest Loop Trail | Easy | 2.2 | 300 |
| Riverfront Trail | Easy | 4.0 | 200 |
Once on the trail, effective navigation is essential. Maps, compasses, GPS devices, and downloaded offline maps can all help, but only when you understand how to use them.
Well-maintained hiking trails may have signs or blazes at regular intervals. Approach routes can be less obvious. A climbers’ path may split, disappear on rock, cross a drainage, or merge with an animal trail. Watch for major terrain features instead of blindly following a line on your phone.
When cell service is limited, an offline map can be extremely useful. Keep in mind that a phone can still fail because of battery loss, damage, cold, water, or a software problem. A map and compass provide a valuable backup for routes where navigation matters.
Use Trail Etiquette
Navigation also includes moving safely around other trail users. According to National Park Service hiking etiquette, hikers traveling uphill generally have the right of way over hikers descending, unless local signs indicate otherwise. Hikers should also yield appropriately to horses and other pack stock.
Be aware of your surroundings and make note of landmarks, trail junctions, stream crossings, and terrain changes. Talking with other hikers can sometimes provide useful information about conditions ahead, but treat informal reports as supplemental information rather than a replacement for your own route plan.
Safety on the Trail
Safety should remain a priority throughout the approach because even a well-planned trip can encounter wildlife, changing weather, loose terrain, fatigue, injury, or navigation problems.
Before leaving, tell a trusted person where you are going, your planned route, who is with you, and when you expect to return. Give them clear instructions about what to do if you are overdue.
Warning: Do not rely on a mobile phone as your only emergency plan. Remote trails may have little or no cell coverage. For remote approaches, consider a satellite messenger, personal locator beacon, or another communication device suited to the area, and know how to use it before the trip.
Watch the Weather
Mountain weather can change quickly. Check the current forecast shortly before departure and keep watching conditions during the hike. Rain can make rock slick, raise streams, reduce visibility, and cool the body quickly. Heat can increase dehydration and heat-illness risk.
Carry clothing that gives you options. A moisture-managing base layer, insulation when conditions require it, and a waterproof or weather-resistant outer layer can help you respond to changing temperatures and precipitation.
If conditions deteriorate beyond what the group is prepared to manage, turning around is a successful safety decision, not a failed hike.
Snow, Ice, and Avalanche Terrain
An approach that is a simple hiking trail in summer may become a snow route in winter or spring. Snow can hide the trail, cover hazards, change stream crossings, and place hikers on slopes that have avalanche exposure.
If the route enters avalanche terrain, check the current local forecast through Avalanche.org and its U.S. forecast-center network. Traveling in avalanche terrain requires appropriate education, judgment, and rescue equipment. Do not assume that following someone else’s tracks makes a slope safe.
Wildlife and Bear Country
Research the wildlife rules for the exact area you are visiting. In bear country, properly storing food, garbage, and scented items protects both people and bears.
Current National Park Service bear guidance advises visitors to stay alert, avoid approaching bears, store food and trash correctly, make noise where visibility is poor, hike in groups when possible, and carry bear spray where it is recommended and allowed. If you encounter a bear, do not run; follow the specific guidance for the species and location.
Know the Signs That It Is Time to Turn Around
- The group is moving much slower than planned.
- A member of the group is exhausted, ill, injured, or unusually cold or overheated.
- You cannot confidently identify the route.
- Weather is worsening.
- Water or food supplies are becoming inadequate.
- Snow, stream crossings, loose rock, or other terrain exceeds the group’s skills or equipment.
- Continuing would leave too little time or energy for the main activity and descent.
Leave No Trace Principles

Approach routes often lead into sensitive areas with fewer developed facilities. Following the seven Leave No Trace principles helps protect these places.
Plan Ahead and Prepare
Research regulations, weather, terrain, closures, wildlife rules, permits, and group needs before leaving. Good planning reduces the chance that an emergency or poor decision will damage wildlife or vegetation. When an established trail exists, use it rather than creating unnecessary shortcuts.
Travel and Camp on Durable Surfaces
Stay on established trails where required. In areas where off-trail travel is permitted and necessary, choose durable surfaces and follow local guidance. Avoid widening paths or trampling fragile vegetation simply to keep footwear clean.
Dispose of Waste Properly and Keep Natural Spaces Clean
Pack out what you pack in. That includes wrappers, fruit peels, leftover food, tissues, and other trash. Follow local rules for human and pet waste. Keeping natural areas clean protects wildlife and makes the route more enjoyable for the next visitor.
Leave What You Find
Leave rocks, plants, cultural objects, and natural features where they are. Photographs preserve the memory without removing part of the place.
Minimize Campfire Impacts
Use existing fire facilities where fires are permitted, and follow all current restrictions. On many approach hikes, a stove or no-fire plan is more appropriate than building a new fire.
Respect Wildlife
Observe animals from a distance. Do not approach, feed, chase, or block them. Feeding wildlife can change natural behavior and create dangerous encounters for both animals and people.
Be Considerate of Other Visitors
Keep noise reasonable, follow right-of-way practices, control pets according to local rules, and avoid blocking narrow trails or climbing access points with gear.
Dealing with Challenges on the Trail
Challenges are part of hiking, and the way you respond often matters more than the original problem. Weather can change rapidly in mountainous areas, so rain protection, warm layers, and lightweight emergency shelter can give you options when conditions turn unexpectedly.
If bad weather develops, assess whether continuing still makes sense. Seeking a safer location or turning around early is often better than pushing deeper into difficult terrain simply because the group planned to reach a specific destination.
If Someone Is Injured
Blisters, sprains, falls, and cuts are common hiking problems. Carry a first aid kit and learn basic first aid before traveling into remote areas.
For a minor sprain, rest, a wrapped cold pack when available, appropriate compression, and elevation can help with pain and swelling. Do not place ice directly on skin. Inability to bear weight, severe pain, deformity, numbness, loss of function, or worsening symptoms may indicate a more serious injury and should prompt medical evaluation.
A buddy system gives hikers another person to help with first aid, route decisions, gear, communication, or emotional support. However, a group should avoid separating casually in remote terrain. If someone must leave to get help, make sure the plan and injured person’s location are clear.
If You Become Lost
Stop before a small navigation mistake becomes a large one. Check your map, compass, GPS position, recent landmarks, and terrain. Avoid wandering farther simply because a path “looks right.”
If you cannot confidently relocate the route, staying in a safe location can make you easier to find than continuing to move unpredictably. Use your emergency communication device when the situation requires outside assistance.
Note: Search and rescue may take time to reach remote terrain. Carrying emergency shelter, extra food, insulation, illumination, and a reliable communication plan can matter even on a trip you expect to finish in one day.
Enjoying the Hike
Approach hiking is practical, but it can still be one of the most enjoyable parts of an outdoor day. Pay attention to the landscape instead of treating every mile as an obstacle between the trailhead and the main objective.
Listen for birds, notice changes in vegetation, feel the temperature shift with elevation, and stop at safe viewpoints when time allows. These small observations can turn an otherwise routine approach into part of the experience.
Mindfulness can also help you stay aware. Pausing occasionally to look at the route behind you can improve your memory of the descent while giving you a moment to assess weather, fatigue, and group pace.
Sharing the approach with friends or family can build stronger memories and make difficult sections feel more manageable. Conversation is useful, but remain attentive at junctions, stream crossings, loose terrain, and other places where navigation or footing requires concentration.
If you want to enhance the sightseeing side of the hike, a pair of compact binoculars can help you view distant wildlife or landmarks without approaching them. Depending on the route and conditions, suitable waterproof sneakers or other trail footwear may help in wet environments, while a rechargeable hand warmer can add comfort in cold conditions. Treat these as optional accessories rather than substitutes for route-appropriate footwear, clothing, navigation, or emergency gear.
The approach is part of the objective. Save enough time, energy, navigation attention, and safety margin to get all the way back—not just to the start of the climb.
Frequently Asked Questions
What is approach hiking?
Approach hiking is the walk, hike, or scramble used to reach the starting point of a climbing route or another outdoor objective. It may follow a normal hiking trail, a climbers’ path, rocky terrain, snow, or a combination of surfaces.
What is the purpose of approach hiking?
The purpose is to reach a climbing route, crag, base camp, or other outdoor destination that cannot be reached directly by vehicle. The approach connects the trailhead or access point with the main activity.
What are some common features of approach hiking?
Approaches may include maintained trails, forests, steep hills, loose rock, scree, scrambling, stream crossings, faint climbers’ paths, and seasonal snow or ice. Difficulty depends on the specific route and current conditions.
What are some essential items for approach hiking?
Carry the Ten Essentials appropriate to the route, including navigation, sun protection, insulation, illumination, first aid, emergency fire supplies where appropriate, repair tools, food, water and treatment, and emergency shelter. Add climbing or activity-specific equipment when required.
How does approach hiking differ from regular hiking?
Regular hiking often makes the hike itself the main objective. Approach hiking usually leads to another activity such as climbing. That means you must plan energy, equipment, weather, daylight, navigation, and turnaround decisions for the entire objective rather than only the walk in.
Do I need approach shoes?
Not always. Approach shoes can be useful on rocky terrain or scrambling because they combine hiking comfort with grippy rubber and a more precise feel on rock. Hiking shoes, trail-running footwear, or boots may be better for other routes. Choose footwear for the terrain, weather, load, and your own feet.
Can I rely on a hiking app for an approach?
An app can be useful, especially with maps downloaded for offline use, but it should not be your only source. Verify the route against current official information, and carry navigation backup appropriate to the remoteness and complexity of the trip.
What should I do if an approach crosses snow or avalanche terrain?
Check the current local avalanche forecast and determine whether the route enters avalanche terrain. Snow travel can require specialized education, equipment, and route choices. Do not rely on summer descriptions, old tracks, or another party’s decision as proof that a slope is safe.
Sources
- National Park Service — Ten Essentials — navigation, emergency equipment, clothing, food, hydration, and shelter guidance.
- National Park Service — Hike Smart — trip planning, emergency communication, weather, and backcountry safety.
- National Park Service — Hiking Etiquette — general trail right-of-way and shared-trail practices.
- Leave No Trace — Seven Principles — responsible travel, waste, wildlife, durable surfaces, fires, and visitor consideration.
- National Park Service — 2026 Bear Safety Guidance — current bear-awareness, food-storage, group-travel, and encounter guidance.
- Avalanche.org / National Avalanche Center — U.S. avalanche forecasts, education, and backcountry avalanche information.