

Last Updated on July 29, 2026 by Mason Reed
A tent footprint protects the bottom of your tent from grit, sticks, rough ground, mud, and repeated abrasion. For it to work correctly in rain, however, it must remain beneath the tent floor. Any material that sticks out can catch runoff and channel it between the footprint and the tent.
Quick Answer
A tent footprint should not stick out beyond the tent floor. Use a model-specific footprint, or cut a DIY groundsheet about 1–2 inches inside the floor perimeter. If a tarp is larger, fold every exposed edge underneath. This prevents rain from being collected and channeled under the tent.
Key Takeaways
- No part of a standard tent footprint or groundsheet should remain exposed beyond the tent-floor perimeter.
- A model-specific footprint is usually the easiest option because its shape and attachment points match the tent.
- An oversized tarp can still be used, but every edge must be folded beneath the tent.
- Choose flat or nearly level, naturally higher ground rather than a depression, gully, or obvious drainage path.
- Dry the footprint fully before storage and repair cuts before they grow.
At a Glance
| Time Required | About 5–10 minutes during tent setup |
| Difficulty | Easy |
| Tools Needed | Tent, fitted footprint or groundsheet, and stakes or attachment hardware when required by the tent |
| Cost | No extra cost if included with the tent; DIY materials are generally less expensive than a model-specific footprint |
Disclosure: As an Amazon Associate I earn from qualifying purchases. Some links on this page are affiliate links, at no extra cost to you.
Understanding the Purpose of a Tent Footprint

A tent footprint, sometimes called a groundsheet or ground cloth, is a separate layer placed between the ground and the tent floor. Its main job is to reduce wear caused by gritty soil, small sticks, stones, and repeated movement inside the tent.
That extra layer can also keep mud and damp soil off the tent body, making pack-up easier. According to REI’s tent-footprint guidance, footprints are especially useful on abrasive surfaces, during frequent trips, or when a camper wants to extend the working life of a tent floor.
A footprint is not a substitute for an intact waterproof floor, properly sealed seams, a correctly fitted rainfly, or good campsite selection. It adds another line of protection, but it cannot guarantee that a tent will remain dry in every storm.
- Abrasion protection: It separates the tent floor from grit, sticks, stones, and compacted ground.
- Cleaner pack-up: Most soil and mud collect on the removable footprint instead of the tent body.
- Added moisture protection: A correctly fitted footprint provides another barrier between damp ground and the floor.
- Easier site planning: Laying out the footprint first shows how much room the pitched tent will occupy.
Note: A footprint is too thin to provide meaningful cushioning or insulation. Use a sleeping pad for comfort and warmth.
How Large Should a Tent Footprint Be?
The correct footprint follows the shape of the tent floor while staying inside its outer edge. It may appear slightly smaller than the tent body when laid out flat. That is intentional.
There is no single required gap for every tent. A practical DIY target is to keep the material about 1–2 inches inside the floor perimeter. Follow the instructions for your exact tent whenever they provide a different dimension. For example, Big Agnes explains that many of its footprints are designed about 2 inches smaller than the tent body so they do not catch rain and redirect it underneath.
| Footprint Type | Correct Fit | Best Practice |
|---|---|---|
| Model-specific footprint | Matches the floor shape and remains slightly inside its edge | Confirm the exact tent model and production version before buying |
| DIY groundsheet | Cut roughly 1–2 inches inside every floor edge | Pitch the tent at home and trace the actual floor shape before cutting |
| Oversized tarp | Every exposed edge must be folded beneath the tent | Do not leave an edge outside for extra mud or rain coverage |
The footprint may be smaller than the tent floor, but it should never be larger once the shelter is pitched.
How to Size a DIY Tent Footprint
- Pitch the tent on a clean, dry surface at home.
- Place the uncut groundsheet beneath it.
- Trace the shape of the tent floor rather than the rainfly or vestibules.
- Mark a second line about 1–2 inches inside the traced floor outline.
- Cut along the inner line and round sharp corners that may snag.
- Pitch the tent again and inspect every side for exposed material.
Do not copy the dimensions printed for the tent’s rainfly. Vestibules often extend beyond the sleeping-area floor, and a normal footprint does not need to cover those spaces unless the manufacturer designed it to do so.
Managing Water Runoff Effectively

An exposed groundsheet acts like a rain collector. Water landing on that exposed strip can run beneath the tent and remain trapped between two layers. Pressure from people, sleeping pads, or gear may then push water against worn areas, damaged coatings, or leaking seams.
Warning: Do not leave a footprint edge exposed to create a porch, mud mat, or vestibule floor unless that extension is part of a manufacturer-designed footprint. Use a separate mat outside the tent instead.
Choose a Site With Natural Drainage
Footprint placement cannot correct a badly chosen campsite. Look for flat or nearly level ground that is naturally higher than nearby depressions. Avoid gullies, dry stream channels, low spots, and areas showing flattened debris or other signs of earlier flooding.
REI’s tent-setup guidance recommends higher, drier ground and warns against low areas where rain can channel and pool. A gentle natural fall across a site is acceptable, but deliberately pitching on a noticeable slope can cause sleepers and equipment to slide during the night.
Use an established campsite or another durable surface whenever possible. Leave No Trace recommends concentrating use on durable ground rather than damaging living vegetation.
Warning: Never dig a drainage trench around the tent. Leave No Trace advises campers to use an appropriate site instead of excavating, building channels, or reshaping the ground.
Choosing the Right Footprint Material
Material affects weight, packed size, durability, noise, and ease of setup. The fiber name alone does not determine performance. Fabric thickness, denier, coating, seam construction, and the quality of the attachment points also matter.
Model-Specific Footprints
These are commonly made from coated nylon or polyester and cut for one tent model. They are usually the easiest option because the corners, door orientation, buckles, or grommets correspond with the tent.
Check the full model name and production year. A redesigned tent may use different dimensions or attachment hardware even when its name has not changed. A compatible footprint may also be required for a manufacturer’s fast-fly or shelter-mode configuration.
Tyvek Groundsheets
Tyvek is a common DIY choice because it is tough and easy to trim. A new sheet may feel stiff or noisy and can be bulkier than very thin plastic film. Wash or soften it only when the material supplier permits that treatment.
Polycro or Plastic-Film Groundsheets
Thin window-film-style groundsheets are popular with campers who prioritize low weight and a small packed size. They provide a moisture and dirt barrier but are easier to puncture or tear than heavier fabrics. Inspect them carefully after use on sharp or gritty ground.
General-Purpose Tarps
A tarp can work under a tent when it is waterproof, undamaged, and folded to the correct dimensions. Tarps vary widely in weight and bulk, so they are not automatically heavier or lighter than a commercial footprint.
Pro Tip: Mark the front corner of a DIY groundsheet with a small permanent mark. This makes an asymmetrical footprint much faster to orient in wind or fading light.
How to Set Up a Tent Footprint Correctly
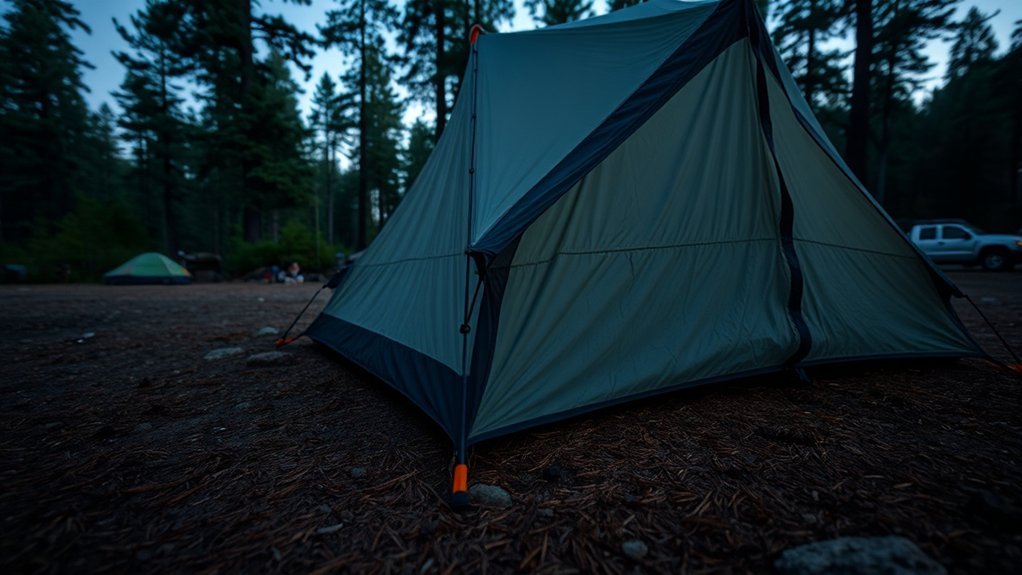
- Inspect the site. Choose durable, flat or nearly level ground away from obvious runoff channels. Remove only loose sticks, stones, and pinecones that could puncture the floor; do not excavate the site.
- Lay out the footprint. Spread it flat without wrinkles or folded corners. Follow the manufacturer’s instructions for which surface faces upward because coatings and labels vary.
- Find the front and back. Match tapered corners, door shapes, colored webbing, labels, or buckles with the corresponding parts of the tent.
- Check the perimeter. Trim or fold the groundsheet until no edge extends beyond the tent floor.
- Attach only compatible hardware. Use shared stakes, pole-tip grommets, buckles, or webbing only when the footprint and tent are designed to connect that way.
- Pitch the tent over it. Center the tent body on the footprint before fully tensioning the corners.
- Inspect all sides. Walk around the shelter and tuck any visible material beneath the floor.
- Recheck after moving the tent. A footprint can detach or shift when a pitched tent is lifted and relocated.
Some custom systems use the footprint as part of a fly-only pitch. In that situation, use the exact instructions supplied for the tent. Big Agnes, for example, specifies model-compatible footprints and attachment points for its fast-fly configurations.
When Is a Tent Footprint Worth Carrying?
A footprint is useful on many trips, but it is not mandatory for every tent or campsite. The decision depends on the floor fabric, site conditions, trip frequency, weather, and how much weight or bulk you are willing to carry.
Consider Bringing a Footprint When
- The ground is gritty, rocky, compacted, or covered with abrasive debris.
- Your tent has a lightweight or thin floor that you want to protect.
- You camp frequently and want to reduce long-term wear.
- The site is muddy or damp and you want a cleaner pack-up.
- The footprint is required for a fly-only or shelter-mode pitch.
- Replacing the tent floor would be much more expensive than carrying the extra layer.
A Footprint May Be Optional When
- You are using a robust tent on a clean, soft, established campsite.
- The weather and ground are dry and the floor is in excellent condition.
- You have inspected the site carefully and accepted the added wear.
- You are minimizing pack weight and the tent manufacturer does not require one.
Rocky or gritty terrain is not a special reason to skip a footprint. It is one of the conditions in which abrasion protection may be most valuable. The choice to leave it behind is a weight-and-durability tradeoff, not a terrain rule.
Tent Footprint Troubleshooting
Water Is Between the Footprint and Tent
Inspect the entire perimeter for an exposed edge. Also check whether the tent sits in a depression or runoff channel. Move to better ground when it is safe to do so rather than trying to build a trench.
The Underside Is Wet but the Tent Is Dry
This is often normal ground moisture or condensation. Separate the footprint from the tent during pack-up and dry both pieces as soon as conditions allow.
Water Is Inside the Tent
Do not assume the footprint is the only cause. Check for condensation, an open door, rainfly contact with the tent body, damaged floor coating, worn seam tape, punctures, and water entering around equipment pressed against the walls.
The Footprint Shifts During Setup
Confirm its orientation and compatibility. Use the shared stakes, webbing, buckles, or grommets supplied for that system. With a plain DIY sheet, center the tent before applying full stake tension.
The Footprint Has a Tear
Clean and dry the damaged area, then use a repair tape or patch compatible with the material and coating. Round the corners of the patch so they are less likely to peel. Replace the footprint when damage is extensive or the waterproof coating is separating.
Cleaning and Storing a Tent Footprint
- Shake off loose dirt, leaves, and grit after each trip.
- Wipe light soil away with a damp cloth.
- For heavier dirt, follow the manufacturer’s washing instructions and use a cleaner approved for coated outdoor fabric.
- Avoid bleach, harsh household detergents, high heat, and aggressive scrubbing unless the product instructions specifically permit them.
- Air-dry the footprint completely before packing it away.
- Check the corners, attachment points, and high-wear areas for cuts or coating damage.
- Store it in a cool, dry location away from long-term direct sunlight.
NEMO’s care guidance recommends fully drying tent components before storage to reduce mildew and waterproof-coating damage. Washing-machine guidance differs by product, so check the footprint label before machine washing.
Frequently Asked Questions
Can I use a tarp instead of a tent footprint?
Yes. A waterproof tarp can serve as a groundsheet, but it must be folded or cut so no material extends beyond the tent floor. Tarps vary in weight, thickness, and packed size, so compare the actual material rather than assuming every tarp is heavier than a fitted footprint.
How do I choose the right footprint material?
Choose according to fit, durability, packed weight, and expected ground conditions. A model-specific coated footprint is convenient and may support special pitching modes. Tyvek is durable for DIY use, thin plastic film is very light, and a general tarp is versatile but may be bulkier.
What if my footprint is slightly larger than my tent?
Fold every exposed edge beneath the tent until the footprint is fully inside the floor perimeter. Do not leave the extra material outside for added coverage because it can collect rain and direct water underneath the shelter.
Do I need a footprint for every camping trip?
No. It is most useful on abrasive, gritty, wet, or muddy sites and when protecting a lightweight tent floor. It may be optional on a clean, soft campsite when the tent has a durable floor and the manufacturer does not require a footprint for the chosen setup.
How do I clean and maintain my tent footprint?
Shake off debris, wipe away light soil, and wash only according to the manufacturer’s care directions. Air-dry it completely, inspect it for cuts or coating damage, repair small tears with a compatible patch, and store it in a cool, dry place.
Which side of a tent footprint faces up?
Follow the manufacturer’s label or instructions because coatings and construction vary. Use logos, corner colors, buckles, grommets, and the floor shape to determine orientation. Do not assume the shiny or coated-looking side always faces the same direction on every product.
Can I put the footprint inside the tent?
A waterproof sheet can be placed inside as a temporary barrier if the floor is leaking, but that does not protect the outside of the tent floor from abrasion or punctures. The normal position for a footprint is beneath the tent.
Conclusion
A tent footprint should fit beneath the tent without showing around the edges. Choose a model-specific footprint or trim a DIY groundsheet slightly inside the floor perimeter. Fold an oversized tarp under, select level ground with natural drainage, and inspect the fit from every side before settling in. These simple steps protect the tent floor without creating a place for rainwater to collect.
Sources
- REI: What Is a Tent Footprint? — footprint purpose, materials, sizing, and use cases
- REI: How to Set Up a Tent — groundsheet fit, tarp folding, campsite selection, and rain management
- Big Agnes: Footprint FAQs — fitted-footprint sizing, model compatibility, attachments, and fast-fly setup
- NEMO: Cleaning, Repairing, and Storing Your Tent — footprint cleaning, drying, repair, and storage guidance
- Leave No Trace: Camping in the Rain — durable-site selection, flood awareness, and no-trenching guidance
