

Last Updated on July 27, 2026 by Daniel Globe
Mice can enter a travel trailer through gaps that are easy to miss, especially around plumbing, wiring, doors, storage compartments, wheel wells, and damaged underbelly material. The most dependable solution is not a scented product or electronic gadget. It is a combination of careful inspection, rodent-resistant repairs, strict food storage, snap traps, and safe cleanup.
Quick Answer
The best way to keep mice out of a travel trailer is to combine exclusion, sanitation, and trapping. Seal every gap about 1/4 inch or larger with rodent-resistant material, remove food and nesting supplies, set snap traps along walls, and clean droppings with disinfectant without sweeping or vacuuming them first.
Key Takeaways
- Inspect openings as small as 1/4 inch, especially around utility lines, doors, slide seals, storage bays, wheel wells, vents, and underbelly seams.
- Use metal mesh, hardware cloth, flashing, or another rigid rodent-resistant repair instead of relying on expanding foam alone.
- Remove food, pet food, crumbs, trash, water, paper, and soft nesting material before storing the trailer.
- Use correctly sized snap traps along walls and keep every trap inaccessible to children and pets.
- Do not rely on peppermint oil, dryer sheets, or ultrasonic devices to solve an infestation.
- Never sweep or vacuum dry mouse droppings. Wet them with disinfectant before wiping them up.
At a Glance
| Time Required | About 1–3 hours for an initial inspection, cleaning, sealing, and trap setup; longer if the underbelly or utility compartments are damaged |
| Difficulty | Easy to moderate for visible gaps; professional service may be needed for ducts, wiring, insulation, or hidden wall cavities |
| Tools Needed | Flashlight, inspection mirror or phone camera, gloves, metal mesh or hardware cloth, suitable caulk or sealant, snips, snap traps, disinfectant, paper towels, and trash bags |
| Cost | Usually low for basic sealing supplies and snap traps; higher if damaged underbelly panels, wiring, ducts, or insulation require repair |
Warning: Do not sweep or vacuum dry mouse urine, droppings, or nesting material. This can send contaminated particles into the air. Ventilate the trailer, wear rubber or plastic gloves, wet the material thoroughly with disinfectant, allow the required contact time, and then wipe it up.
Signs That Mice Are in Your Travel Trailer
You may find evidence of mice before seeing a live animal. Inspect the trailer as soon as you notice any of these warning signs:
- Small, dark droppings in drawers, cupboards, storage bays, or along walls
- Chewed food packaging, paper, fabric, insulation, hoses, or wiring
- Shredded paper, upholstery filling, leaves, or other nesting material
- Greasy rub marks near a gap or along a repeated travel route
- A stale or musky odor inside a cabinet, wall cavity, or compartment
- Scratching or movement sounds at night
- Food crumbs or pet food disappearing from storage areas
Rodents may also nest near air filters, heater ducts, engine compartments, battery compartments, or other protected areas in trailers and motorized RVs that remain unused for long periods.
Common Mouse Entry Points in a Travel Trailer
A mouse can fit through an opening about 1/4 inch, or 6 millimeters, wide. Inspect from the underside upward because many entry routes begin below the living area.
Exterior and Undercarriage Openings
- Gaps where plumbing, drain lines, electrical cables, propane lines, or wiring enter the floor
- Torn, loose, or poorly sealed underbelly material
- Openings beside wheel wells, stabilizer jacks, frame members, and tank penetrations
- Damaged exterior panels, skirting, flashing, or access covers
- Gaps around shore-power cords, water connections, cable hookups, and utility hatches
- Unsealed corners in exterior storage compartments
Doors, Windows, Slides, and Vents
- Worn door sweeps or weather stripping
- Loose seals around windows and emergency exits
- Gaps in slide-out seals, especially at the lower corners
- Damaged vent screens or loose vent covers
- Openings around furnace, refrigerator, water-heater, and appliance compartments
Warning: Never seal a required appliance intake, combustion outlet, exhaust, drainage opening, or ventilation path. Check the trailer manufacturer’s instructions or have an RV technician inspect the area when you are unsure what an opening does.
Interior Inspection Points
- Inside cabinets beneath sinks
- Behind the refrigerator, furnace, stove, water heater, and converter
- Under beds, dinettes, sofas, and removable floor panels
- Along plumbing chases and wiring routes
- Inside pass-through storage and exterior-access compartments
- Near floor-to-wall joints and hidden corners
Pro Tip: Inspect the trailer in daylight while a helper shines a bright flashlight from the opposite side of each compartment. Light showing through a seam can reveal an entry point that is difficult to see from only one direction.
How to Keep Mice Out of a Travel Trailer: Step by Step
Products Worth Considering

1. Great Value: Congratulations! You've found the best value for money copper mesh rodent control kit on the market! Kit includes 2 rolls of copper mesh and 1 pair of scissors. The copper mesh size is 4in x 16ft per roll, for a total of 32ft
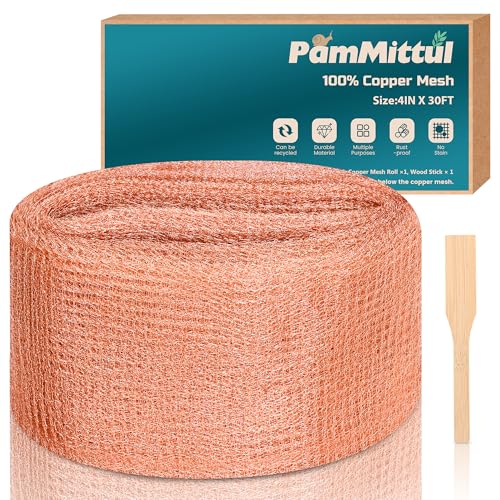
Premium Copper Wool Kit – Package includes a 4in x 30ft copper mesh roll and a packing tool. Crafted with high-grade copper, PamMittul copper mesh provides effective protection against rodents and pests.

Copper Wool Mastery: Unleash the power of 100% pure 5-inch x 35ft copper mesh roll, accompanied by a scissor, gloves and packing tool, meticulously crafted from pure copper. Outshining conventional materials, it provides a barrier against rodents and pests.
Step 1: Inspect the Entire Trailer
Start outside and work in a consistent direction around the trailer. Examine the roofline, side panels, doors, storage compartments, slide seals, utility connections, wheel wells, frame, and underbelly. Then repeat the inspection inside.
Look for gaps, gnaw marks, greasy rub marks, droppings, shredded material, and loose sealant. Use a phone camera or inspection mirror to see behind appliances and inside narrow utility spaces.
Step 2: Seal Cracks, Holes, and Utility Gaps
Small cracks around trim and utility penetrations may be closed with a sealant approved for the material and location. Vulnerable openings should contain a rodent-resistant barrier rather than soft filler alone.
- Small gaps: Pack the opening with copper mesh, stainless mesh, or steel wool where suitable, and secure it with caulk or sealant.
- Larger holes: Repair them with hardware cloth, metal flashing, sheet metal, lath screen, or another rigid material that mice cannot easily chew.
- Doors: Replace worn sweeps and weather stripping so no visible gap remains at the lower corners.
- Underbelly damage: Repair torn panels and seal the edges around pipes and frame openings with materials intended for RV underbody use.
- Storage compartments: Adjust latches and replace compressed seals that no longer make firm contact.
Expanding foam may help fill space or hold metal material in place, but it should not be the only barrier in an opening that a mouse can reach.
Step 3: Remove Food, Water, and Nesting Materials
A clean trailer is less attractive to mice and other pests. Clean spills and crumbs immediately, including food hidden beneath appliances, seat cushions, drawers, and removable storage bins.
- Remove open food before storage.
- Move dry food into hard containers with tight-fitting lids.
- Store pet food and treats the same way.
- Clean the refrigerator, freezer, microwave, stove, toaster, cupboards, and trash area.
- Repair plumbing leaks and dry standing water.
- Remove unnecessary cardboard, paper bags, napkins, loose fabric, and other nesting material.
- Wash food-stained towels, bedding, and clothing before leaving them in the trailer.

Pay special attention to areas that are easy to ignore, such as the space beneath the refrigerator, inside lower drawers, under the dinette, behind the sofa, and around pet-feeding areas.
Step 4: Keep Food and Trash Secure
Use thick plastic, glass, or metal containers with secure lids for any food that must remain in the trailer. Thin bags, cardboard boxes, and lightweight plastic packaging are not reliable mouse barriers.
Use a trash can with a tight-fitting lid and empty it regularly. Do not leave food waste, used paper plates, grease, snack wrappers, or pet bowls in the trailer overnight when mice are active nearby.
Step 5: Set Snap Traps Correctly
When you find droppings, gnawing, or nesting material, sealing the trailer may not remove mice that are already inside. Set appropriately sized snap traps in the areas showing activity.
- Place the trap on the floor directly against a wall.
- Position the baited trigger end next to the wall so the trap forms a T shape with it.
- Use only a small amount of bait, such as a light smear of chunky peanut butter.
- Place traps behind appliances, inside cabinets, beside storage walls, and near suspected entry routes.
- Keep every trap inaccessible to children and pets.
- Check traps at least once each day and remove captured mice promptly.
- Continue trapping until at least one week passes without a capture or new signs of activity.
Do not place traps where they can interfere with wiring, moving slide components, furnace equipment, fans, or other mechanical systems.
Note: The CDC advises against glue traps and live traps for household rodent control. A frightened rodent may urinate, increasing contamination risk, and a glue trap can leave you handling a live, distressed animal.
Step 6: Clean Mouse Droppings and Nests Safely
Use the following method when you find urine, droppings, nesting material, or a dead mouse:
- Open the trailer’s doors and windows and allow it to ventilate before cleaning. Leave the space while it airs out.
- Wear rubber or plastic gloves.
- Do not sweep, vacuum, or use compressed air on dry rodent waste.
- Spray the droppings, urine, nest, or carcass with an EPA-registered disinfectant until thoroughly wet.
- Leave the disinfectant in place for the contact time stated on its label. The CDC generally instructs users to allow at least five minutes when following its rodent-cleanup procedure.
- Wipe up the material with paper towels.
- Place the waste in a covered trash container. Double-bag dead rodents and contaminated nesting material when appropriate.
- Disinfect surrounding hard surfaces, including floors, cabinets, drawers, and countertops.
- Wash gloved hands before removing the gloves, then wash bare hands with soap and warm water.
If rodents have entered heating or cooling ducts, heavily contaminated insulation, inaccessible wall cavities, or a large section of the trailer, contact a qualified pest-control or restoration professional.
Natural Deterrents and Ultrasonic Repellents
Peppermint oil, cloves, dryer sheets, and electronic repellents are frequently promoted as easy mouse-control methods. Their smell or sound may briefly disturb a curious animal, but they should not be treated as dependable barriers.
| Method | Evidence | Practical Role | Main Limitation |
|---|---|---|---|
| Peppermint Oil | Limited evidence for reliable control | Optional temporary scent after proven prevention steps are complete | Odor fades and does not seal an entry point or remove mice already inside |
| Dryer Sheets | Anecdotal; no dependable evidence of lasting mouse control | Not needed in an evidence-based control plan | Can create false confidence while entry points remain open |
| Ultrasonic Devices | Little evidence that they remove established mice from buildings | Should not replace inspection, sealing, sanitation, or trapping | Sound is directional, weakens with distance, and does not pass effectively behind objects |
If you enjoy the scent of diluted peppermint oil, you may use it as a supplementary measure in a location approved for the product. Do not spray it on food surfaces, electrical equipment, upholstery, pets, or areas accessible to children. A pleasant smell is not proof that the trailer is mouse-proof.
A sealed 1/4-inch opening is more valuable than any number of scented dryer sheets or plug-in ultrasonic devices.
Products Worth Considering

The Mouse Free product works very well at preventing mice from entering your RV; It is not designed to get rid of existing mice; ‘Bait and Trap’ methods must be used to reduce any existing population of mice; We recommend immediate action when evidence of rodents are found; Mice can multiply very quickly, and damage to your RV may result

Natural Mouse Repellent - Keep mice out of your home, garage, car, truck, or RV with a time-release peppermint and cinnamon scent that creates a powerfully effective rodent repellent.

KEEP MOUSE AWAY INSTEAD OF KILL THEM: Our mouse repellent for car engines is made of natural peppermint oils ingredients which emit a scent, making mouse dizzy and preventing rats and mice invading your home, car, camper, garage, truck, or RV. Experimental proofs this way to repel mouse is effective.
Regular Maintenance and Long-Term Storage
A trailer that sits unused is more likely to provide mice with a quiet nesting area. Inspect and clean it before storage, after severe weather, and before the next trip.

Pre-Storage Mouse Prevention Checklist
- Remove all food, pet food, spices, snacks, grease, and rubbish.
- Clean the refrigerator and freezer and follow the manufacturer’s storage instructions.
- Wipe shelves, drawers, counters, the stove, and the microwave.
- Check beneath cushions and mattresses for crumbs or nesting material.
- Remove food-stained fabric, cardboard, paper bags, and unnecessary soft material.
- Inspect underbelly seams, wheel wells, storage bays, door seals, slide seals, and utility connections.
- Repair cracks, loose covers, torn screens, and damaged weather stripping.
- Set protected snap traps in areas with a history of activity.
- Store the trailer away from tall grass, leaf piles, spilled birdseed, open trash, and other shelter or food sources when possible.
- Reinspect the trailer about once a month during extended storage and after storms or nearby construction.
Before starting a stored motorhome or operating trailer appliances, inspect accessible air intakes, filters, compartments, and wiring for nests or chewing. Ask a mechanic or RV technician for help when rodents may have reached electrical, engine, propane, or ventilation systems.
Troubleshooting Continued Mouse Activity
Products Worth Considering

READY TO USE: Max-Catch Glue Traps are intended for use without bait. For best use, leave trap with paper on so pests can acclimate to the trap, then place glue boards along known or suspected rodent pathways. The traps are designed to attract insects, ants, mice, rats, roaches, spiders, crickets and other pests and rodents.

PROFESSIONAL STRENGTH GLUE: Our sticky mouse traps utilize a professional-strength glue formulation that has immediate grip and stretchable hold
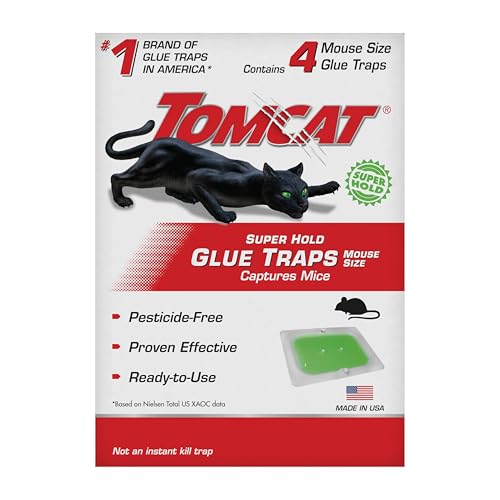
Tomcat Super Hold Glue Traps Mouse Size effectively capture mice and other household pests like cockroaches, spiders, or scorpions
New Droppings Appear After Sealing
A mouse may already be trapped inside, or another entry point may remain open. Clean the new droppings safely, reset snap traps, and reinspect nearby wall, floor, and utility penetrations.
The Bait Disappears but the Trap Does Not Fire
Use a smaller amount of sticky bait and confirm that the trap is the correct size. Place the trigger end against the wall. Replace damaged or insensitive traps rather than repeatedly adding more bait.
A Mouse Avoids New Traps
House mice may investigate traps quickly, but some rodents are cautious. Leave a trap baited but unset briefly, then set it after the bait has been disturbed. Do not leave unsecured traps where a child or pet could reach them.
Scratching Continues Inside a Wall or Duct
Do not open a wall, duct, appliance enclosure, or underbelly panel unless you can do so safely. Hidden contamination, damaged wiring, or inaccessible carcasses may require professional pest-control and RV-repair work.
Using Rodent Poison Safely
Prevention and snap traps should normally be attempted first. Poison bait can create additional risks because children, pets, and wildlife may reach the bait or a poisoned rodent.
If an infestation continues and you decide to use a rodenticide:
- Use only an EPA-registered product labeled for the intended location and pest.
- Keep the bait secured inside the ready-to-use or tamper-resistant station supplied with the product.
- Follow every label direction and placement restriction.
- Keep the station inaccessible to children and pets.
- Do not place loose bait inside cabinets, drawers, ducts, wall cavities, or food-storage areas.
- Check for and promptly dispose of dead rodents according to the product label and local requirements.
- Contact a licensed pest-control professional when safe placement is not possible.
When to Hire a Pest-Control Professional
Professional help is appropriate when:
- Fresh droppings or gnawing continue after a week of properly placed traps and renewed inspection.
- Mice are active in ducts, walls, ceilings, insulation, or inaccessible underbelly spaces.
- Wiring, propane lines, plumbing, appliance systems, or structural panels are damaged.
- The infestation is widespread or produces a strong persistent odor.
- Children, pets, or other conditions make trap or bait placement unsafe.
- You cannot identify or close the entry route without affecting required ventilation or equipment.
Choose a licensed pest-control provider that understands RV or travel-trailer construction. Ask the technician to identify entry points and recommend permanent exclusion work rather than relying only on repeated pesticide treatments.
For general outdoor gear planning, you can also read this guide to compact binoculars for hiking. Binoculars are useful for observing wildlife at a distance, but they do not help detect hidden entry points or replace any mouse-control step in this guide.
Frequently Asked Questions
What are the most common mouse entry points in a travel trailer?
Common entry points include gaps around plumbing and wiring, torn underbelly material, wheel-well openings, worn door sweeps, slide-out seals, utility compartments, storage-bay doors, and damaged vent screens. Inspect any opening about 1/4 inch or larger.
What should I use to seal mouse holes in an RV?
Use rodent-resistant materials such as copper or stainless mesh, steel wool where suitable, hardware cloth, metal flashing, or sheet metal. Secure small repairs with an appropriate sealant. Do not rely on expanding foam alone, and never block a required vent, exhaust, drain, or appliance opening.
Do peppermint oil and dryer sheets keep mice out of a travel trailer?
They are not dependable mouse-control methods. Peppermint oil may produce a temporary odor that some animals avoid, while dryer-sheet claims are mainly anecdotal. Neither remedy seals an entry point, removes food, or catches mice already inside.
Do ultrasonic mouse repellents work in travel trailers?
They should not be relied on. Ultrasound weakens with distance, is blocked by cabinets and furniture, and has little evidence of driving established mice out of buildings. Sealing, food removal, snap traps, and monitoring are more dependable.
What should I do when I find mouse droppings in my trailer?
Ventilate the trailer, wear rubber or plastic gloves, and do not sweep or vacuum the dry droppings. Wet them thoroughly with an EPA-registered disinfectant, allow the label’s contact time, wipe them up with paper towels, disinfect nearby surfaces, dispose of the waste, and wash your hands.
How often should I inspect a stored travel trailer for mice?
Inspect before storage, after severe weather, and before the next trip. During extended storage, a check about once a month can help you find new droppings, trap activity, damaged seals, leaks, or nesting material before the problem spreads.
Are snap traps better than glue traps for mice?
Yes. The CDC recommends traditional snap traps for reducing household rodent populations and advises against glue and live traps. Place snap traps against walls, keep them away from children and pets, check them daily, and clean captured rodents safely.
Should I use mouse poison inside my travel trailer?
Try sealing, sanitation, and snap traps first. If poison is necessary, use only an EPA-registered product inside its labeled tamper-resistant bait station. Keep it inaccessible to children and pets, follow the label, and consider professional service for safe placement.
Sources
- CDC: How to Seal Up to Prevent Rodents — mouse entry size, inspection points, and rodent-resistant sealing methods
- CDC: How to Trap Up to Remove Rodents — snap-trap selection, placement, monitoring, and glue-trap guidance
- CDC: How to Clean Up After Rodents — ventilation, disinfecting, droppings cleanup, carcass disposal, and vehicle inspection
- EPA: Options for Dealing With Rodent Infestations — prevention, traps, poison bait, and tamper-resistant station precautions
- University of Missouri Extension: Controlling House Mice — limitations of ultrasonic and sound-based rodent-control devices
- Winnebago: Storing an RV for Winter — food removal, cleaning, seal inspection, and periodic storage checks
