

Last Updated on July 26, 2026 by Daniel Globe
Winter hiking clothing has to do two jobs at once: keep you warm when you stop and prevent sweat buildup while you move. The safest approach is an adjustable system of moisture-managing base layers, insulating midlayers, and windproof or waterproof outer layers, supported by winter-ready footwear, traction, eye protection, navigation, food, water, and emergency supplies.
Quick Answer
Wear a wool or synthetic base layer, an adjustable fleece or insulated midlayer, and a windproof, waterproof shell. Add warm socks, waterproof boots, gloves or mittens, a hat, and a neck gaiter. Carry extra dry insulation, traction devices, sunglasses, food, water, navigation tools, and emergency gear.
Key Takeaways
- Use three adjustable clothing layers: a moisture-managing base, an insulating middle, and a weather-blocking shell.
- Choose wool or synthetic clothing instead of cotton, which stays wet and loses much of its insulating value.
- Waterproof boots and warm socks help, but hard-packed snow and ice often require over-the-shoe traction devices.
- Avoid overdressing at the trailhead. Vent or remove a layer before heavy sweating starts.
- Winter safety also depends on weather checks, route planning, turnaround decisions, navigation, food, water, and emergency supplies.
At a Glance
| Time Required | About 10–15 minutes to check conditions, select layers, and pack essentials |
| Difficulty | Easy to prepare; conditions may make the hike difficult or unsafe |
| Tools Needed | Layered clothing, winter footwear, traction, backpack, navigation, headlamp, and emergency supplies |
| Cost | Varies widely; use reliable gear suited to the forecast and terrain rather than buying by brand alone |
Warning: Winter weather can turn a routine day hike into an emergency. Check the forecast, wind chill, trail conditions, daylight, road access, and any avalanche forecast before leaving. Tell a responsible person your route and return time, and turn around when conditions exceed your skills or equipment.
How to Layer Clothing for Winter Hiking
Layering lets you adjust insulation as your effort level, wind exposure, elevation, and weather change. The goal is not to feel hot. You should feel comfortably cool when you start, then add or remove clothing before you become chilled or soaked with sweat.
1. Start With a Moisture-Managing Base Layer
The base layer sits next to your skin and moves perspiration toward the outer layers, where it can evaporate. Choose merino wool or a quick-drying synthetic fabric such as polyester. The fit should be close without pinching, restricting movement, or slowing circulation.
Avoid cotton underwear, shirts, jeans, and socks for cold, wet outings. Cotton absorbs water and dries slowly, so sweat or precipitation can leave it cold against the skin. Pack a spare dry base layer in a sealed bag on longer or more remote hikes.
2. Add an Insulating Midlayer
The middle layer traps warm air. Fleece is breathable, quick-drying, and useful during active hiking. Synthetic insulated jackets continue to provide useful warmth when damp. Down offers an excellent warmth-to-weight ratio but must be protected from moisture, so it is often best carried as a warm rest layer under a shell.
Match insulation to the conditions and your pace. A light fleece may be enough while climbing, while a puffy jacket can be valuable during breaks, emergencies, or exposed ridgelines. Carrying two lighter insulating pieces often gives you more control than relying on one very heavy garment.
3. Finish With a Windproof or Waterproof Shell
The outer layer blocks wind, rain, and wet snow. For sustained precipitation, choose a waterproof-breathable jacket with a hood, sealed seams, adjustable cuffs, and enough room for the layers underneath. Pit zips or other vents help release heat during steep climbs.
Breathable does not mean sweat-proof. Any shell can feel damp inside when you work hard, especially in cold or humid conditions. Open vents, slow your pace, or remove an insulating layer before moisture builds up.
4. Layer Your Legs Too
Winter hiking clothing should protect the lower body as carefully as the torso. Wear wool or synthetic long underwear under soft-shell hiking pants in cold, dry weather. Add waterproof or windproof shell pants for strong wind, wet snow, brush, or prolonged precipitation. Avoid tight waistbands, socks, and pants that restrict circulation.
Pro Tip: Make clothing changes early. Remove a hat, open a zipper, or shed a midlayer before a climb makes you sweat; add insulation before a long stop makes you shiver.
Insulated Waterproof Boots
Waterproof hiking boots help keep snow, slush, and shallow water away from your feet. Insulation can be useful in sustained cold, but there is no single temperature rating that works for every person. Warmth depends on activity level, circulation, sock thickness, boot volume, wind, moisture, and time outdoors.
Choose boots with enough toe room to wiggle without heel lift. A boot that becomes tight after adding thick socks can reduce circulation and make your feet colder. Test the complete sock-and-boot system before the hike, and make sure the outsole is suitable for the terrain.
Deep tread improves grip in loose snow and mud, but ordinary boot lugs are not dependable on hard ice. The National Park Service recommends over-the-shoe traction devices for icy or snow-packed routes.
Products Worth Considering
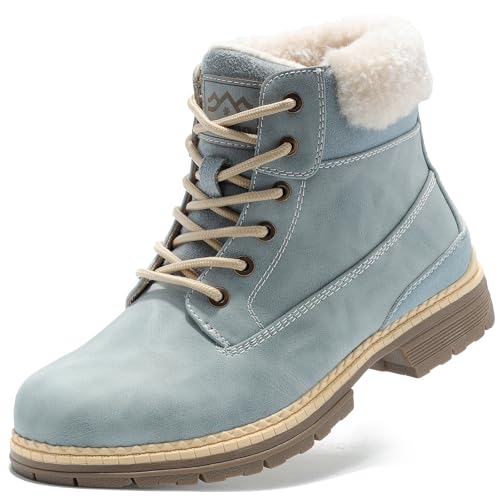
CLASSIC DESIGN: Premium synthetic leather with fashion plaid pattern fabric, classic double color lace with antique brass metal eyelet, padded collar lets this boots never out of time.

WATERPROOF: The boots are made from waterproof mesh upper and XPETI-DRY Membrane waterproof.Moisture-wicking mesh lining. Keeps your feet dry and warm during walks through mud and snow.
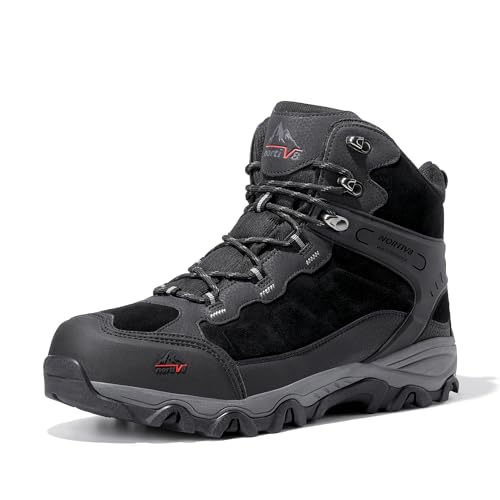
Waterproof Build: These men’s hiking boots feature a waterproof membrane construction that keeps your feet dry when trudging through any mud or water.
Thermal Socks

Hiking socks designed for cold conditions use wool or synthetic fibers to manage moisture, cushion the foot, and retain warmth. Merino-wool blends are popular because they feel soft, resist odor, and insulate better than cotton when damp. Synthetic blends often dry quickly and can be highly durable.
Choose sock thickness to match the boot’s available space. One well-fitting pair is usually safer than stacking thick socks until the boot feels tight. A thin liner sock can reduce friction for some hikers, but use it only when the boot still allows free toe movement and normal circulation.
Carry a dry spare pair in a waterproof bag. Change socks if they become soaked, and address hot spots early with tape or blister treatment before they become painful.
Products Worth Considering

MAKE HIKING A COMFORTABLE EXPERIENCE These Merino wool hiking socks are built to provide you with total support and comfort during your hiking trips, no matter the weather. Each pair of these hiking boot socks is ideal for the rugged terrain, allowing these to be great mens or women's hiking socks

[PREMIUM MERINO WOOL SOCKS]:Crafted with high-quality thick wool socks for exceptional softness and natural stretch, these mens socks deliver all-day comfort. The breathable fibers gently hug your feet without restriction, providing flexible support whether you're active or relaxing.

HIGH QUALITY : The womens wool socks for hiking are blend of premium natural wool and cotton. These winter hiking socks for women are heavy, soft, comfortable, breathable, warm, cozy and durable.
Waterproof Outer Shell
| Waterproof Outer Shell Metric | What the Value Means |
| Waterproof rating | 10,000 mm is an example hydrostatic-head rating, not a universal winter-hiking requirement. Longer exposure, pressure from pack straps, and severe weather may justify a more protective shell. |
| Breathability rating | 10,000 g/m²/24 h is an example moisture-vapor transmission value. Test methods differ, so compare numbers cautiously and prioritize ventilation and fit. |
| Seam sealing | Fully taped seams are preferred for sustained rain, sleet, or wet snow. |
| Material | Waterproof-breathable nylon or polyester with a membrane or coating; choose durability and construction for the intended terrain. |
A good shell protects the inner layers from precipitation and slows heat loss caused by wind. It should fit over your base and midlayers without compressing insulation or restricting arm movement. A hood that turns with your head, cuffs that close over gloves, and a hem that seals out drafts add useful protection.
Do not judge a jacket by a single fabric number. Waterproof ratings, moisture-vapor ratings, seam construction, face fabric, ventilation, condition, and fit all affect real-world performance. Keep the shell clean and follow the manufacturer’s care instructions because dirt and a worn durable water-repellent finish can reduce comfort.
Products Worth Considering

【Water-resistant & Breathable】Men's softshell jacket fabric is treated to repel water while maintain breathability, effectively prevents rainwater into the garment and keep you dry and comfortable. Repels light rain, moisture and snowflake.(Water may leak through the stitching parts of the jacket while wearing in the heavy rain.)

Waterproof and Breathable: The fleece lined jacket women is made of TPU film combined with lamination technology, can effectively prevent wind, provide good breathability, and effectively resist outdoor or extreme weather conditions, keeping it dry and comfortable.
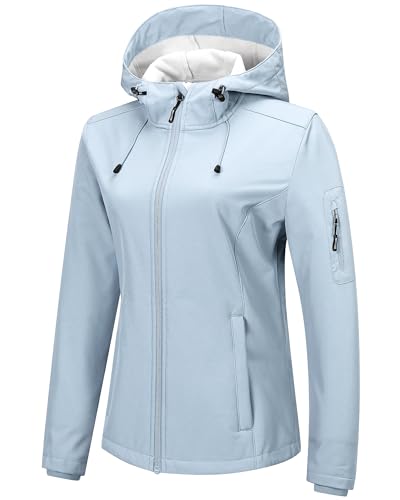
Waterproof and Breathable: The fleece lined jacket women is made of TPU film combined with lamination technology, can effectively prevent wind, provide good breathability, and effectively resist outdoor or extreme weather conditions, keeping it dry and comfortable.
Insulated Gloves or Mittens
Cold hands lose dexterity quickly, which makes zippers, navigation, food preparation, and emergency tasks harder. Use an insulating glove or mitten system that matches the temperature and expected moisture. Mittens are often warmer because the fingers share heat, while gloves provide more control.
A practical system may include thin liner gloves for handling gear, insulated gloves or mittens for warmth, and a waterproof shell layer for wet snow or wind. Carry a spare dry pair in a sealed bag. Reinforced palms improve durability and grip when using trekking poles.
Wool or Fleece Hat

A wool or fleece hat reduces heat loss from exposed skin and protects the ears from wind and frostbite. Merino wool manages moisture well, while fleece is lightweight and quick-drying. Choose a hat that fits under your hood without blocking vision or hearing.
The common claim that people lose most of their body heat through the head is misleading. Heat escapes from any exposed area. A hat still matters because the head, ears, and face are often the only uncovered parts of an otherwise insulated body.
Neck Gaiter or Scarf
A neck gaiter seals the gap between a jacket and hat and can be pulled over the cheeks or nose when wind increases. Wool blends and quick-drying synthetic fleece are useful choices. Avoid long, loose scarves around branches, moving equipment, or strong wind; tuck loose ends securely inside the jacket.
Carry a dry replacement on very cold trips because breath moisture can freeze in face coverings. Make sure any covering allows easy breathing and does not fog your glasses so badly that vision becomes unsafe.
Hand Warmers
Disposable air-activated warmers and rechargeable electric hand warmers can add comfort during breaks or prolonged cold exposure. Place them according to the manufacturer’s directions, and keep a fabric layer between a very hot warmer and bare skin.
Hand warmers are supplements, not substitutes for insulated gloves, dry clothing, movement, or an early turnaround. Do not use them to push through numbness, white or waxy skin, confusion, uncontrolled shivering, or other signs of cold injury.
Trekking Poles
Trekking poles can improve balance, provide extra points of contact, and reduce stress during climbs and descents. Adjustable poles are useful when snow depth or slope angle changes. Snow baskets help prevent the tips from sinking deeply into soft snow.
Poles do not replace footwear traction. Use carbide tips or the attachment recommended by the pole manufacturer, and pair the poles with suitable traction devices when the trail is icy. Practice adjusting the straps and length while wearing gloves.
Gaiters
Gaiters cover the top of the boot and lower leg, helping keep snow, slush, mud, and debris out of footwear. Tall waterproof gaiters are useful in deep or wet snow, while shorter gaiters may be enough on packed trails.
Fit the instep strap and top closure securely without restricting circulation. Gaiters may reduce drafts around the ankle, but their main job is moisture and debris protection rather than providing substantial insulation.
Traction Devices, Snowshoes, and Crampons
Winter footwear must match the surface. Over-the-shoe traction devices are useful on hard-packed snow and ordinary icy trails. Snowshoes spread your weight over soft, deep snow. Technical crampons and an ice axe are specialized tools for steeper terrain and require suitable boots, training, and judgment.
- Packed snow or mild ice: use a trail traction device designed for walking.
- Deep, unconsolidated snow: use snowshoes and consider flotation, slope angle, and avalanche exposure.
- Steep, firm snow or alpine ice: do not rely on casual trail spikes; use appropriate technical equipment and skills or choose another route.
The National Park Service advises hikers to carry traction because even a short, unexpected icy section can create a serious fall hazard. Inspect the fit at home and carry the device where it can be reached without unpacking the entire bag.
Sunglasses, Goggles, and Sun Protection
Snow reflects intense light, and winter sun can affect the eyes and exposed skin even when the air feels cold. Wear sunglasses or goggles with UV protection, use sunscreen on exposed skin, and protect the lips. Wraparound lenses or side shields provide better coverage in bright, windy environments.
Carry a backup if a broken or lost pair would make travel unsafe. Fogging can be reduced by venting clothing, keeping face coverings below the lens, and using eyewear designed for the activity.
Food, Water, and Temperature Management
Cold air can reduce the urge to drink, but hiking still requires water. Carry enough for the route, prevent bottles and hydration tubes from freezing, and drink regularly. Wide-mouth bottles stored upside down can be easier to open because ice forms first near the top.
Pack energy-dense foods that remain edible in cold conditions. Eat before you feel exhausted, and keep a snack where you can reach it without a long stop. Extra food is part of the National Park Service Ten Essentials.
Plan the Route Before You Dress
Clothing choices depend on more than the temperature shown at the trailhead. Check the hour-by-hour forecast, wind, precipitation, elevation change, trail surface, water crossings, road access, sunset time, and recent condition reports. The National Weather Service wind-chill guidance helps explain how wind increases heat loss from exposed skin.
Carry a paper map and compass or a reliable offline navigation device, and know how to use them. Snow can hide trail markers and erase familiar features. Share your route, vehicle information, planned turnaround point, and expected return time with someone who will act if you do not check in.
In avalanche terrain, clothing is not the main safety decision. Check the local avalanche forecast, avoid terrain you are not trained to assess, and obtain education before traveling in the backcountry. Avalanche rescue equipment is effective only when every group member carries it and knows how to use it.
Note: A portable WiFi hotspot may be useful during travel where compatible cellular service exists, but it does not create coverage on remote trails. Do not rely on a phone or hotspot as your only navigation or emergency plan. The separate guide to a portable WiFi hotspot for international travel is travel-planning information, not a substitute for offline navigation or a satellite emergency device.
Emergency Kit
A winter emergency kit should support an unexpected delay, injury, route-finding problem, or weather change. The exact contents depend on trip length and remoteness, but a day-hiking kit should normally cover the Ten Essentials and winter-specific hazards.
- Navigation: map, compass, offline GPS, and spare power.
- Illumination: headlamp with spare batteries, even for a daytime hike.
- Insulation: extra dry base layer, warm midlayer, spare gloves and socks, and an emergency bivy or blanket.
- First aid: blister care, bandages, personal medication, and supplies matched to the group.
- Food and water: extra calories, sufficient water, and a way to prevent or manage freezing.
- Fire and repair: weather-protected fire starter where fires are legal, a knife or multi-tool, tape, and repair items for traction or snowshoes.
- Communication and signaling: whistle, signal mirror, and, where appropriate, a satellite messenger or personal locator beacon.
Pack critical clothing and electronics in waterproof bags. Test equipment before departure, and keep emergency items accessible rather than buried under the contents of the backpack.
Recognize Hypothermia and Frostbite
Hypothermia can occur even above 40°F when a person is chilled by rain, sweat, or cold-water exposure. Warning signs include shivering, exhaustion, confusion, fumbling hands, memory loss, slurred speech, and drowsiness. Hypothermia is a medical emergency. Get the person out of the wind and wet conditions, replace wet clothing with dry insulation, protect the head and neck, and seek emergency help.
Frostbite often affects fingers, toes, ears, cheeks, nose, and chin. Redness or pain may be an early warning; numbness, unusually firm or waxy skin, and white or grayish-yellow color are more serious signs. Protect the area, get to warmth, and seek medical care. Do not rub frostbitten skin or walk on frostbitten feet unless absolutely necessary.
The best winter clothing system is the one you can adjust before sweat, wind, or wet fabric turns discomfort into a cold-weather emergency.
Frequently Asked Questions
What should I wear for winter hiking?
Wear a wool or synthetic base layer, a fleece or insulated midlayer, and a windproof or waterproof shell. Add non-cotton pants or long underwear, warm socks, waterproof boots, gloves or mittens, a hat, and a neck gaiter. Carry extra dry insulation and traction suited to the trail.
What are the best materials for winter hiking clothing?
Merino wool and quick-drying synthetics such as polyester or nylon are dependable choices. Fleece works well as an active midlayer, synthetic insulation handles damp conditions, and down is highly efficient when kept dry. Avoid cotton for cold, wet trips because it absorbs water and dries slowly.
How should I layer my clothing for winter hiking?
Start with a close-fitting wool or synthetic base layer, add an insulating fleece or puffy layer, and finish with a weather-resistant shell. Use the same approach on your legs. Vent or remove clothing before sweating heavily, then add insulation before breaks or exposed sections.
What kind of footwear is best for winter hiking?
Choose waterproof boots with adequate room for warm socks and enough support for the route. Insulated boots are useful in sustained cold, but fit matters more than a generic temperature label. Add trail traction for packed snow or ice and snowshoes for deep, soft snow.
Should I wear two pairs of socks?
Only when the boot still fits without pressure. A liner sock can reduce friction for some hikers, but two thick pairs may compress the foot, restrict circulation, and make it colder. Test the full system at home and carry a dry spare pair instead of forcing extra thickness into a tight boot.
Are trekking poles enough for icy trails?
No. Poles improve balance, but they do not provide dependable grip under your boots. Use over-the-shoe traction designed for the trail surface. Steep snow or alpine ice may require technical crampons, an ice axe, and training rather than ordinary hiking equipment.
What accessories are essential for winter hiking?
Bring insulated hand protection, a hat, neck gaiter, UV-protective sunglasses or goggles, sunscreen, gaiters when snow is deep, traction, a headlamp, navigation, first aid, extra food and water, spare dry layers, emergency shelter, and reliable signaling equipment.
When should I turn around on a winter hike?
Turn around when weather or trail conditions worsen, daylight is running short, navigation becomes uncertain, equipment fails, the group is moving slower than planned, or anyone becomes wet, unusually cold, exhausted, confused, numb, or uncoordinated. A conservative turnaround is a successful safety decision.
Sources
- U.S. National Park Service: Winter Hiking Tips — clothing, traction, route planning, eye protection, food, water, and winter essentials.
- U.S. National Park Service: Ten Essentials — navigation, illumination, insulation, first aid, food, water, fire, tools, and emergency shelter.
- Centers for Disease Control and Prevention: Preventing Hypothermia — risk conditions, warning signs, and emergency response.
- Centers for Disease Control and Prevention: Preventing Frostbite — symptoms, prevention, and immediate actions.
- National Weather Service: Understanding Wind Chill — how wind accelerates heat loss and increases cold exposure risk.
- Avalanche.org: Avalanche Basics — avalanche awareness, education, and backcountry decision-making.
