
Last Updated on September 10, 2026 by Daniel Globe
Packing a hiking backpack well is about more than fitting everything inside. The goal is to keep the load stable, put frequently used gear within easy reach, protect critical items from moisture, and adjust the pack so your hips and shoulders share the load comfortably. A few minutes of planning before you leave can make a noticeable difference once you are on the trail.
Quick Answer
To pack a hiking backpack, put light and bulky camp gear near the bottom, dense or heavy items close to your back in the pack’s core, and frequently used items near the top or in accessible pockets. Balance both sides, protect moisture-sensitive gear, tighten compression straps, and adjust the hip belt before the shoulder straps.
Key Takeaways
- Choose a backpack that matches your torso length, gear volume, trip duration, and expected load.
- Keep dense gear close to your back and use lighter gear to fill space around it.
- Keep water, snacks, navigation tools, rain gear, and other frequently used items easy to reach.
- Balance weight from left to right and tighten compression straps so the load cannot sway.
- Protect your sleeping system, spare clothing, electronics, and other critical gear with a pack liner or waterproof dry bags.
- Carry the Ten Essentials and check the route, weather, water availability, trail alerts, and local food-storage rules before leaving.
- There is no single backpack-weight percentage that is ideal for every hiker; carry the lightest practical load that meets your safety and trip needs.
- Fine-tune the hip belt, shoulder straps, load lifters, and sternum strap after the backpack is fully loaded.
At a Glance
| Time Required | About 15–30 minutes once your gear is laid out |
| Difficulty | Easy |
| Tools Needed | Backpack, trip gear, gear checklist, and optional scale, pack liner, dry bags, or stuff sacks |
| Cost | Usually $0 with gear you already own; optional organizers or waterproofing accessories vary in price |
Disclosure: As an Amazon Associate I earn from qualifying purchases. Some links on this page are affiliate links, at no extra cost to you.
Choose the Right Backpack Size and Fit
Start with fit rather than capacity alone. Backpack sizing is commonly based on torso length, and overall height is not a reliable substitute. Osprey’s current pack-fitting guidance, for example, measures from the C7 vertebra at the base of the neck to the level of the iliac crest at the top of the hip bones.
To find C7, tilt your head forward and feel for the prominent vertebra near the base of your neck. Next, place your hands on the top of your hip bones and imagine a horizontal line across your lower back. Measure from C7 down to that line, then compare the result with the sizing chart for the specific pack you are considering.
Capacity is measured in liters, but there is no single correct volume for every trip. Lightweight day hikers may need only a small pack, while a full day involving extra clothing, water, camera equipment, or winter gear can require considerably more space. Weekend backpacking packs often fall around 30–50 liters, while many three- to five-night trips use roughly 50–80 liters. Trips with winter gear, bulky equipment, or five or more nights of supplies may justify 70 liters or more.
Note: Capacity ranges are starting points, not rules. Your shelter, sleeping system, climate, food requirements, water carries, photography equipment, children’s gear, and packing style can change the amount of space you need.
Once the torso length is correct, check the hip belt and shoulder harness. The padded portion of the hip belt should wrap securely around the upper part of your hip bones with enough adjustment remaining to tighten or loosen it. Shoulder straps should follow the shape of your shoulders without leaving a large gap or creating painful pressure points.
Plan the Trip Before You Pack
Efficient packing begins before anything goes into the backpack. Check the weather forecast, current trail conditions, closures, expected temperatures, water availability, terrain, and local regulations. The National Park Service Hike Smart guidance recommends checking conditions and carrying equipment appropriate to the specific hike rather than relying on a generic list alone.
Lay all your gear out where you can see it. Separate it into four groups:
- Essential safety gear: navigation, illumination, first aid, sun protection, insulation, repair tools, fire-starting equipment where appropriate, emergency shelter, food, and water.
- Trip-specific gear: shelter, sleep system, cooking equipment, food storage, traction, trekking poles, or other equipment required by the destination.
- Frequently used trail items: water, snacks, map, phone or GPS, rain shell, sunscreen, insect repellent, sunglasses, and first-aid supplies.
- Optional items: comfort or entertainment gear that can be removed if the pack becomes unnecessarily heavy or crowded.
Before loading the pack, ask whether each optional item earns its weight and space. A slightly smaller, simpler load is usually easier to balance and organize.
Organizing Your Gear for Easy Access
Accessibility Is Key
Items you expect to use while walking should not be buried beneath your sleeping bag. Snacks, water, navigation tools, rain gear, sunscreen, a headlamp, and small first-aid items are better placed in hip-belt pockets, side pockets, the lid, or near the top of the main compartment.
Emergency gear also needs to remain accessible. A first-aid kit is of little use if reaching it requires unloading the entire backpack onto the trail.
Utilize Compartments and Pockets
Use compartments according to function rather than filling every pocket simply because it is available. Side pockets work well for water bottles or gear you can reach during a break. Hip-belt pockets are useful for snacks, lip balm, sunscreen, or a small camera. A top lid can hold navigation or weather-related items, but avoid filling it with so much dense gear that the backpack becomes top-heavy.
If your pack uses a hydration reservoir, install and fill it before the main compartment is tightly packed. A full reservoir can be difficult to slide into place after everything else has been compressed around its sleeve.
Streamline Your Hiking Experience
Stuff sacks or packing bags can make categories easier to identify, but too many small sacks can waste space. Use them where they provide a clear benefit, such as separating sleeping clothing, food, electronics, or wet items.
Try to keep most equipment inside the backpack. Loose objects hanging from the exterior can swing, snag on branches, catch on rock, or pull the load off balance. Use external attachment points mainly for gear that is too long, dirty, wet, or specifically designed to ride there.
Packing Lightweight and Compact Items
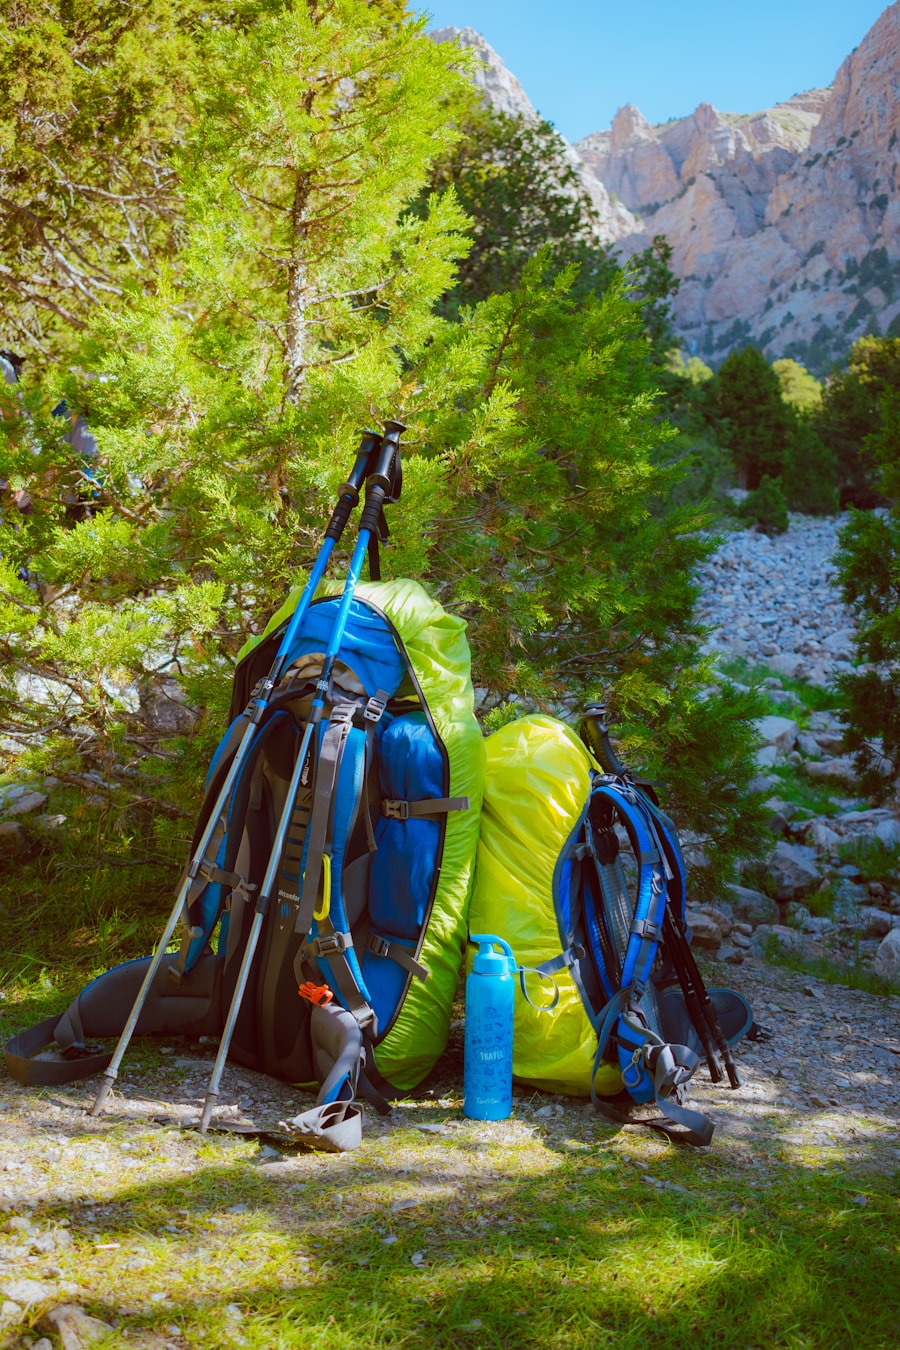
Reducing unnecessary weight can improve comfort and make the backpack easier to organize. Start with the largest and heaviest pieces of equipment because a lighter shelter, sleeping system, or cooking setup can save more total weight than trimming a collection of tiny accessories.
Compact backpacking tents, quilts, sleeping bags, and cooking equipment are available in many weight ranges. Down sleeping bags are popular because down is generally light and highly compressible for its warmth, but it costs more than many synthetic fills and needs careful protection from moisture. Synthetic insulation is usually bulkier for comparable warmth but performs better when damp.
A minimalist approach also helps. A multi-tool may replace several individual tools when its functions match your needs. Dehydrated or low-moisture backpacking meals can reduce carried food weight, although they also require enough water and, in many cases, fuel for cooking or rehydration.
Pro Tip: Pack your actual trip gear before buying a larger backpack. Empty space is easy to fill with “just in case” items, and an oversized pack can encourage unnecessary weight.
How to Distribute Weight in a Hiking Backpack
The basic principle is to keep dense equipment close to your back while surrounding it with lighter or softer items. Osprey’s packing guidance recommends putting the sleeping bag toward the bottom, heavy items close to the spine, and easy-access items on the exterior.
A practical packing sequence is:
- Bottom zone: sleeping bag, sleep clothing, down jacket, or other light and compressible gear you will not need while hiking.
- Core zone: dense food, cook kit, water reservoir, tent components, and other heavy equipment close to the back.
- Top zone: insulating layer, rain shell, first-aid kit, water treatment, or other equipment that may be needed before camp.
- Accessory pockets: snacks, navigation, sunscreen, water bottles, headlamp, insect repellent, and other small frequently used items.
Balance the load from left to right as well. A heavy bottle or piece of equipment on one side can make the backpack lean and force your body to compensate. Fill gaps with soft clothing so dense objects cannot move, then tighten the compression straps.
Think “dense weight close, light gear around it, trail essentials within reach.” A compact load that cannot sway is easier to carry than the same equipment packed loosely.
Pack specifications also show why one blanket weight recommendation does not work for every backpack. The examples below use current manufacturer information and are reference points rather than buying recommendations.
| Brand | Current Model | Published Weight | Manufacturer Load Guidance |
|---|---|---|---|
| Osprey | Atmos AG 65 | 4.613 lb S/M; 4.807 lb L/XL | 30–40 lb |
| Deuter | Aircontact Core 65+10 | 2,340 g (about 5.16 lb) | 15–20 kg (about 33–44 lb) |
| Gregory | Baltoro 65 | 4.70 lb for the referenced current model | Maximum carry weight listed as 60 lb |
Specifications can vary by pack size, revision, and model year, so always check the manufacturer’s current page for the exact backpack you own.
How Heavy Should a Hiking Backpack Be?
There is no single pack-to-body-weight percentage that is ideal for every hiker. Body-weight rules are rough planning tools, not universal safety limits. The amount you can comfortably carry depends on your conditioning, terrain, distance, pack suspension, fit, weather, gear requirements, and experience.
A better goal is to carry the lightest load that still provides the equipment, food, water, insulation, and emergency supplies required for the trip. Also stay within the backpack manufacturer’s load guidance when one is provided.
Warning: Sharp pain, persistent numbness, major instability, or a pack that repeatedly drags you backward is a reason to stop and adjust or reduce the load rather than simply tightening every strap.
Protecting Your Gear from the Elements
Rain can reach gear through openings, seams, zippers, or a wet pack fabric. For items that must remain dry, such as sleeping insulation, spare clothing, electronics, medications, and fire-starting supplies, use a waterproof pack liner or individual waterproof dry bags.
A backpack rain cover adds useful exterior protection and can help keep the pack fabric from becoming saturated. Some modern backpacks include one, while others require a separate cover. A cover is best treated as one layer of a moisture-management system rather than the only protection for critical gear.
Organize waterproof storage by importance. Your sleeping bag and dry camp clothing deserve more protection than a cook pot or rain shell. Keep wet gear separate from dry insulation whenever practical.
Packing Essential Safety and Navigation Tools
Safety equipment should be chosen for the route and conditions, but the National Park Service Ten Essentials provide a strong baseline. The ten systems cover navigation, sun protection, insulation, illumination, first aid, fire, repair tools, food, hydration, and emergency shelter.
- Navigation: appropriate map, compass, GPS device, or phone-based navigation, plus the knowledge to use them.
- Sun protection: sunglasses, sunscreen, hat, or protective clothing as conditions require.
- Insulation: extra clothing and weather protection suitable for expected and unexpected conditions.
- Illumination: a headlamp or flashlight, with adequate battery capacity.
- First aid: supplies appropriate for the group, trip length, and personal medical needs.
- Fire: appropriate fire-starting or emergency-warmth equipment where legal and suitable.
- Repair tools: a knife or multi-tool and basic repair materials matched to your equipment.
- Food: enough food for the planned outing plus a reasonable contingency.
- Hydration: adequate water and, where necessary, a treatment method.
- Emergency shelter: protection that can help during an unexpected delay or overnight stay.
Before leaving, tell someone your route and expected return time. Check current weather and trail alerts. On remote routes, consider whether a satellite communicator or personal locator device is appropriate for the level of risk and available cellular coverage.
Planning for Food and Water on the Trail
Choose foods that provide useful energy without excessive bulk. Nuts, dried fruit, energy bars, jerky, nut-butter packets, tortillas, and other compact foods are easy to eat during breaks. For overnight trips, dehydrated meals can reduce food weight, but remember that they may increase your water and fuel requirements.
Water planning must be specific to the route. Distance is only one factor; heat, humidity, altitude, sun exposure, exertion, reliable water sources, and emergency delays can all change how much you need. Check destination-specific guidance rather than relying on one universal liters-per-hour rule.
If you plan to refill from a stream, lake, or spring and are not certain the water is safe, treat it. According to the CDC’s backcountry water-treatment guidance, boiling is the most reliable way to kill germs. When boiling is impractical, filtration followed by disinfection provides broader protection than many portable filters alone. Always follow the treatment product’s instructions.
Warning: Clear-looking mountain water is not automatically safe to drink. Portable filters also differ in what they remove, and boiling or disinfecting cannot make water contaminated with harmful chemicals safe.
Plan for Wildlife and Food-Storage Rules
Food storage is destination-specific. In some parks and wilderness areas, an approved bear-resistant food container is required; elsewhere, different storage systems may be permitted. The National Park Service bear-safety guidance advises checking the rules for the exact area you are visiting and treating food, trash, toiletries, and other scented items appropriately.
If you need to carry a bear canister, place it in a stable position close to your back rather than attaching a heavy canister where it can swing. Pack food compactly and follow the destination’s rules for storing the container once you reach camp.
Adjusting and Fine-Tuning Your Pack for Comfort
Fit the backpack while it is carrying a realistic load. An empty pack may feel very different once water, food, shelter, and overnight gear are added.
A common adjustment sequence is:
- Loosen the major straps slightly before putting the pack on.
- Position and tighten the hip belt first. Center its padding over the upper part of your hip bones so the pack can transfer much of the load into your pelvis.
- Tighten the shoulder straps. They should hold the pack close without crushing your shoulders or restricting movement.
- Adjust the load lifters. Use them to bring the upper pack closer and reduce backward pull without overtightening them.
- Fasten the sternum strap. It should stabilize the shoulder straps without restricting breathing.
Walk around with the loaded backpack before the trip. Use stairs or a short hill if available. The pack should remain stable instead of bouncing, swinging, or leaning to one side.
Troubleshooting Common Fit Problems
- The pack pulls backward: move dense gear closer to your back, check the torso setting, and adjust the load lifters.
- One shoulder works harder: check left-to-right weight balance and make sure the shoulder straps are adjusted evenly.
- Too much weight sits on the shoulders: recheck hip-belt position and torso length.
- The pack bounces: tighten compression straps and stabilize loose contents before overtightening the harness.
- The hip belt slides down: confirm that the pack and hip-belt size match your body and that the belt is positioned over the hip bones.
- Straps cause tingling or numbness: stop, loosen the affected straps, and reassess the fit and load.
As food and water are consumed, the pack’s balance can change. Rearrange the remaining contents when necessary instead of letting dense gear settle to one side or away from your back.
Pro Tip: Take a five-minute test walk with your fully packed backpack before leaving home. Fixing a lopsided load in your driveway is much easier than unpacking everything halfway up the trail.
Related Gear and Travel Resources
If electronics are part of your backpacking setup, see our guide to the best solar charger for backpacking. For air travel before or after a hiking trip, these wired noise-cancelling earbuds may be useful on the flight. Families combining a hiking vacation with sightseeing can also review our guide to the best double stroller for travel for non-trail portions of the trip.
Love travel? Join Our Facebook Community
Frequently Asked Questions
What are the essential items to pack in a hiking backpack?
Use the Ten Essentials as a baseline: navigation, sun protection, insulation, illumination, first aid, fire or an appropriate emergency-warmth method, repair tools, food, hydration, and emergency shelter. Add route-specific equipment based on weather, terrain, wildlife, trip duration, and local regulations.
How should I organize my hiking backpack?
Put light, compressible camp gear toward the bottom; dense equipment close to your back in the core; and items you may need while hiking near the top or in exterior pockets. Keep the left and right sides balanced and tighten compression straps so the contents cannot shift.
What is the recommended weight for a hiking backpack?
There is no universal percentage that is ideal for every hiker. Aim for the lightest practical load that still covers the trip’s safety requirements, stay within the backpack manufacturer’s load guidance, and consider terrain, distance, conditioning, equipment, weather, and fit. Body-weight percentages are rough planning rules rather than universal safety limits.
How do I adjust the straps on a hiking backpack?
With the pack loaded, position and tighten the hip belt first. Then snug the shoulder straps, adjust the load lifters to bring the upper pack closer, and fasten the sternum strap without restricting breathing. Recheck the fit after walking for several minutes.
What are some tips for packing a hiking backpack efficiently?
Lay out your gear first, remove unnecessary items, use lightweight equipment where practical, fill gaps with soft gear, keep dense items close to your back, reserve easy-access pockets for things used during the day, and minimize loose gear strapped to the exterior.
What should go at the bottom of a hiking backpack?
The bottom is best for light, bulky, compressible items that you normally will not need until camp, such as a sleeping bag, sleep clothing, or other soft insulation. Avoid letting your densest gear settle at the very bottom where it can make the pack sag or pull awkwardly.
Is a backpack rain cover enough to keep gear dry?
A rain cover is useful exterior protection, but critical gear is safer with a waterproof pack liner or individual dry bags as well. Give your sleeping insulation, spare dry clothing, electronics, medications, and emergency fire-starting supplies the strongest moisture protection.
Where should a bear canister go in a backpack?
When a bear-resistant canister is required, carry the dense canister in a stable position inside the pack and close to your back when possible. Exact food-storage rules vary by destination, so check the land manager’s current requirements before the trip and follow those rules at camp.
Sources
- National Park Service — Ten Essentials — essential safety systems, navigation, first aid, food, hydration, and emergency preparation.
- National Park Service — Hike Smart — trip planning, weather, trail conditions, water, food, and route preparation.
- Centers for Disease Control and Prevention — Water Treatment When Hiking and Camping — boiling, filtration, disinfection, and limitations of portable water-treatment methods.
- Osprey — Backpack Size and Fit — torso measurement, hip-belt fit, and pack sizing.
- Osprey — Volume and Packing — placement of sleeping gear, dense items, and easy-access equipment.
- National Park Service — Bear Safety: Storing Food — food, trash, scented-item storage, and destination-specific bear regulations.

