
Last Updated on July 27, 2026 by Daniel Globe
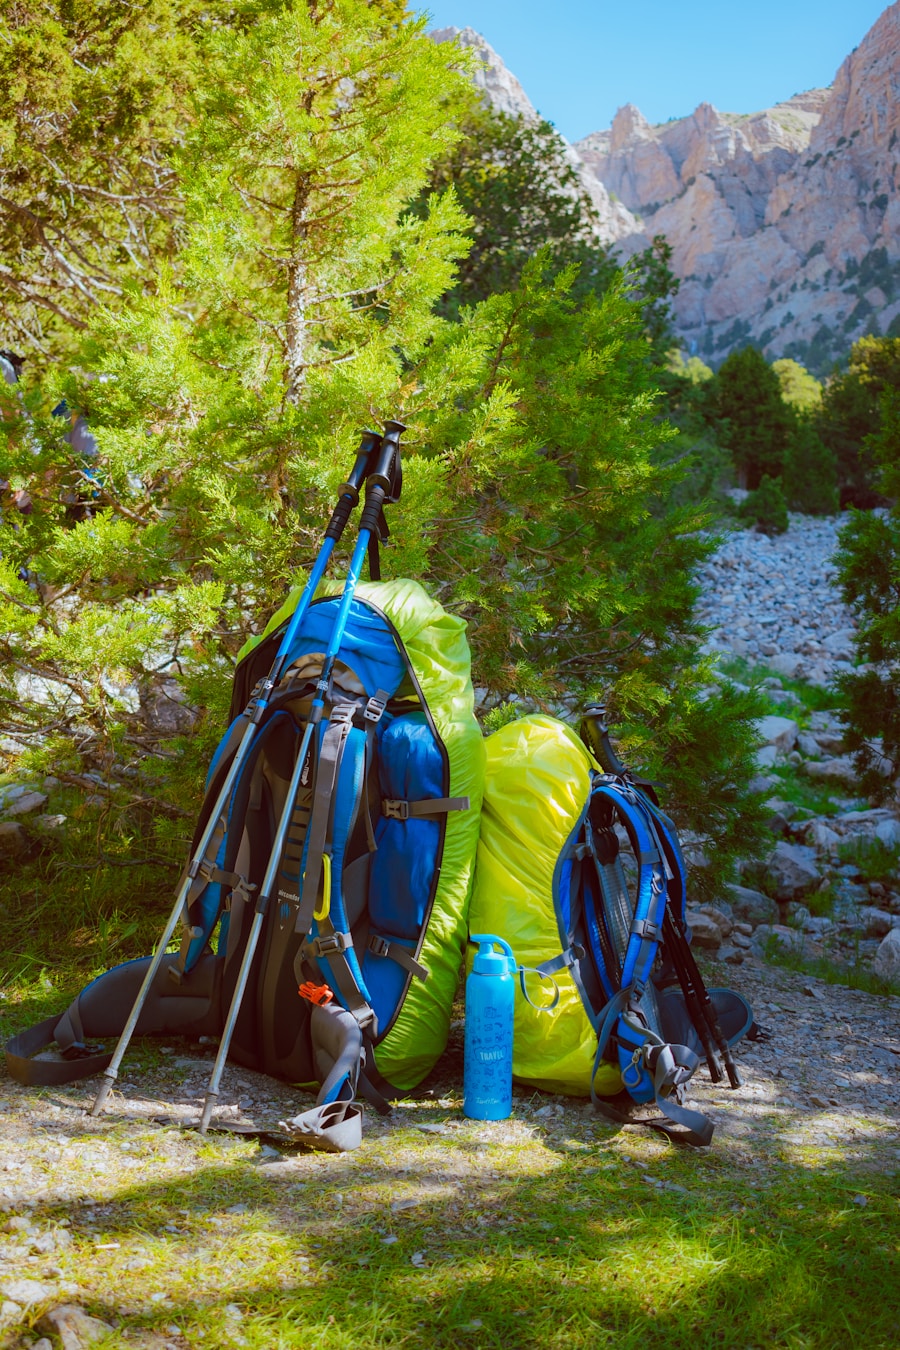
A hiking backpack should do more than carry snacks. It should help you handle a wrong turn, a weather change, a minor injury, or an unexpected delay. Start with the core safety systems every hiker needs, then add clothing, water, food, hygiene, shelter, and trip-specific gear based on the trail, forecast, season, distance, and time away from help.
Quick Answer
Pack the Ten Essentials first: navigation, sun protection, extra clothing, light, first aid, fire supplies where legal, repair tools, extra food, water plus treatment, and emergency shelter. Then add footwear, hygiene, power, and trip-specific gear. Overnight hikes also need a tent or shelter, sleeping bag, sleeping pad, stove, and more food.
Key Takeaways
- Use the National Park Service Ten Essentials as your baseline, even for a day hike.
- Check the route, weather, trail alerts, permits, water availability, wildlife guidance, and fire restrictions before packing.
- Carry a physical navigation backup and enough power for electronic devices; do not depend on cell service.
- Treat water from lakes, rivers, and streams unless an official source says it is potable.
- Choose clothing, footwear, food, and shelter for the hardest conditions you could reasonably face—not just the conditions at the trailhead.
- For an overnight trip, add a full sleep system, cooking equipment where permitted, extra food, and any required food-storage gear.
At a Glance
| Day-Hike Baseline | Ten Essentials, weather-appropriate clothing, suitable footwear, identification, and any personal medication. |
| Overnight Add-Ons | Tent or other primary shelter, sleeping bag, sleeping pad, stove and fuel where allowed, more food, hygiene supplies, and required food storage. |
| Before Leaving | Check weather, trail alerts, closures, permits, water sources, wildlife guidance, and fire rules; leave a trip plan with a trusted contact. |
| Water Planning | Estimate needs from trip length, heat, effort, and reliable refill points; carry treatment if you may use natural water. |
| Packing Goal | Keep the load balanced, protect items from water, and place safety gear where you can reach it quickly. |
Disclosure: As an Amazon Associate I earn from qualifying purchases. Some links on this page are affiliate links, at no extra cost to you.
Before You Pack Your Hiking Backpack
Start with the trip, not the gear closet. The National Park Service Trip Planning Guide recommends checking the environment, weather, terrain, water, alerts, regulations, permits, and your own abilities before an outing. Those details determine what belongs in your pack.
- Route: Know the distance, elevation gain, trail type, turnaround points, and likely time on trail.
- Weather: Check the forecast close to departure and prepare for meaningful changes in temperature, wind, rain, snow, or thunderstorms.
- Current conditions: Look for closures, fire restrictions, high water, snow, washed-out bridges, wildlife activity, and other alerts.
- Permits and rules: Some trailheads, wilderness areas, campsites, food-storage zones, and fires require permits or have special restrictions.
- Trip plan: Tell a trusted person where you are going, your route, who is with you, and when you expect to return.
- Personal needs: Pack prescribed medication, allergy supplies, corrective lenses, mobility items, and other essentials specific to you.
Pro Tip: Lay everything out before it goes into the pack. It is easier to spot a missing headlamp, rain shell, water treatment method, or first-aid item when the whole kit is visible.
Hiking Backpack Essentials Checklist
A strong packing list starts with ten safety systems rather than ten specific products. The NPS groups them as navigation, sun protection, extra clothing, illumination, first aid, fire, repair tools, nutrition, hydration, and emergency shelter.
The 10 Essentials
- Navigation: Route map, compass, GPS or offline map, plus the skill to use them.
- Sun protection: Sunglasses, sunscreen, a brimmed hat, and sun-protective clothing as conditions require.
- Extra clothing: An insulating layer, rain shell, hat, gloves, and other layers suited to the coldest or wettest realistic conditions.
- Illumination: A headlamp or flashlight with spare batteries or dependable backup power.
- First aid: A kit matched to the group, trip length, and medical needs.
- Fire: Waterproof matches, a lighter, or another ignition method for emergency use where fires are legal.
- Repair kit and tools: Multi-tool or knife, duct tape, small repair materials, and trip-specific tools.
- Nutrition: Easy-to-eat food plus extra food for an unexpected delay.
- Hydration: Water, carrying capacity, and treatment supplies if natural water may be used.
- Emergency shelter: A tarp, bivy, emergency blanket, or other compact shelter suitable for the environment.
Useful Day-Hike Extras
- Phone in a protective case
- Portable phone charger or power bank
- Whistle
- Small trash bag or resealable bag
- Trekking poles when useful for the terrain
- Insect repellent when bugs are active
- Identification, permit, and a small amount of emergency cash where useful
Overnight Add-Ons
- Tent, tarp, hammock system, or other primary shelter appropriate to the site and weather
- Sleeping bag or quilt suited to expected temperatures
- Insulating sleeping pad
- Stove, fuel, lighter, pot, and eating utensil where stove use is permitted
- Additional meals and snacks
- Water treatment and enough capacity between reliable sources
- Toiletries, sanitation supplies, and a trowel or required waste system
- Food-storage system required for the area, such as a bear-resistant container where mandated
- Extra socks and clothing needed for overnight temperature changes
Clothing and Footwear
Outdoor clothing works best as a system. A moisture-managing base layer moves sweat away from the skin, an insulating layer such as fleece or a suitable puffy jacket helps retain warmth, and an outer shell blocks wind and precipitation. You may not need every layer on a warm, short hike, but the pack should cover the conditions you could reasonably encounter.
Merino wool and many synthetic fabrics work well for base layers because they manage moisture better than absorbent cotton in cool or changeable conditions. For insulation, choose a layer that fits the forecast and activity level. For wet or windy weather, carry a shell that provides the protection you need without making the rest of your system unnecessarily heavy.
Footwear is just as trip-specific. Hiking shoes or trail-running shoes can work well on maintained trails, while boots may offer useful structure and protection on rough terrain or when carrying a heavier load. Waterproof footwear can help in cold, wet conditions, but breathable or quick-drying footwear may be more comfortable in hot weather or repeated stream crossings.
Whatever you choose, prioritize fit, traction, and comfort. Wear moisture-managing socks, carry a spare pair when conditions justify it, and test new footwear on shorter outings before committing to a long hike. A shoe that fits your foot and terrain is more important than simply choosing the heaviest boot.
Navigation and Safety
Navigation and Communication
A topographic map can show trails, contour lines, elevation changes, water features, and other terrain details. A compass provides a navigation method that does not depend on batteries. GPS devices and phone apps add useful positioning and route information, but electronics can fail, break, or run out of power.
Cellular service is not required for every GPS function, and many map apps can work with maps downloaded in advance. Still, the NPS recommends carrying a physical map as a backup and keeping enough battery power for your electronics. In remote areas, consider whether a satellite messenger or personal locator beacon is appropriate for the trip.
Weather, Wildlife, and Route Safety
Know the hazards specific to the place you are visiting. Wildlife behavior, river crossings, heat, snow, altitude, cliffs, tides, flash floods, and lightning all require different preparation. Check official local guidance rather than relying on one universal rule for bears, snakes, or other animals.
Warning: A tent, picnic shelter, or rocky overhang is not reliable lightning protection. The National Weather Service advises getting to a substantial building or a hard-topped vehicle when thunder is heard. Plan early enough that you are not trapped above treeline or far from safe shelter.
Carry a whistle where it is easy to reach. If you become lost or injured, a whistle can signal farther with less effort than repeated shouting. Most importantly, leave a trip plan with someone who will notice if you do not return on schedule and knows what information to give rescuers.
Hydration and Nutrition
How Much Water Should You Carry?
There is no single correct water amount for every hike. Needs change with temperature, humidity, altitude, pace, body size, sweat rate, trip duration, and whether reliable refill points exist. As one current benchmark, Great Smoky Mountains National Park advises at least 1 liter for every 2 hours of hiking, but hotter, drier, longer, or more strenuous trips may require more.
Plan the full route before deciding how much to carry. If you expect to refill from a natural source, confirm that the source is reliable for the season and pack a treatment method. A collapsible water container can add carrying capacity for long dry stretches or camp.
How to Treat Backcountry Water
Do not assume clear-looking stream or lake water is safe. The CDC’s backcountry water guidance says boiling is the best way to kill germs. When boiling is not practical, filtering and then disinfecting provides broader protection than relying on many portable filters alone.
Different filters, chemical treatments, purifiers, and UV devices work against different germs. Follow the product instructions and know its limits before your trip. Water contaminated with harmful chemicals or toxins cannot necessarily be made safe by normal backcountry treatment methods, so use a different source when contamination is suspected.
Food for the Trail
High-energy foods that are lightweight and easy to pack are practical for hiking. Trail mix, nuts, energy bars, jerky, nut-butter packets, dried fruit, tortillas, and other durable foods can provide energy without taking much space. Choose foods you already know you tolerate well while active.
For longer trips, balance carbohydrates, protein, and fat across the day and pack food that is simple to prepare. Dehydrated meals can reduce carried water weight in food, but only when you have enough safe water and fuel to prepare them. Keep a few snacks in an easy-access pocket so you do not have to unpack the whole bag at every break.
For a hiking backpack, “extra” food and water are safety margins, not wasted weight. Build them around the route, weather, remoteness, and realistic chance of delay.
Shelter and Sleeping
Shelter needs are different for a day hike and an overnight trip. Day hikers should still carry compact emergency shelter because an injury, navigation problem, sudden storm, or delayed exit can keep them outside much longer than planned. A tarp, bivy sack, or emergency blanket can reduce exposure to wind and precipitation; an emergency blanket helps limit heat loss but does not create heat on its own.
Day-Hike Emergency Shelter
Choose an emergency shelter that fits the environment. In a mild forest setting, a compact tarp or bivy may be enough for an unexpected delay. In colder, wetter, or more exposed terrain, you may need a more protective system. Keep it dry and accessible rather than burying it under the entire pack.
Overnight Sleeping System
| Primary Shelter | Tent, tarp, hammock shelter, or another system suited to weather, insects, terrain, and local rules. |
| Sleeping Bag or Quilt | Choose warmth appropriate to the forecast, campsite exposure, and your own cold tolerance. |
| Sleeping Pad | Adds cushioning and, more importantly in cold conditions, insulation from the ground. |
| Campsite Choice | Use designated or durable sites where required, avoid obvious flood and falling-object hazards, and follow local setback and food-storage rules. |
A three-season tent can suit many spring-through-fall trips, while winter or alpine conditions may require a shelter designed for stronger wind and snow loading. Tent labels alone do not replace checking the actual forecast and terrain. Practice setting up your shelter before the trip so you can pitch it quickly in wind, rain, or fading light.
Leave No Trace guidance also matters when choosing camp. The National Park Service Leave No Trace guidance recommends using established or durable surfaces and protecting water sources. Local regulations always take priority, especially in high-use or sensitive areas.
First Aid Kit
A first-aid kit should match the number of people, trip length, remoteness, and known medical needs. A basic hiking kit often includes adhesive bandages, gauze, medical tape, wound-cleaning supplies, blister treatment, gloves, and any personal medications. Pain relievers may be useful for people who can safely take them and understand the label directions.
Supplies are only part of the plan. Know how to use what you carry and check expiration dates before the trip. Basic first-aid or wilderness first-aid training can help you make better decisions when professional help is far away. For a serious injury, severe allergic reaction, breathing problem, major bleeding, altered mental status, or other emergency, seek professional help as soon as possible.
Note: This packing guide provides general outdoor-safety information. It is not a substitute for medical advice, first-aid training, or instructions from local rangers and emergency services.
Personal Care and Hygiene
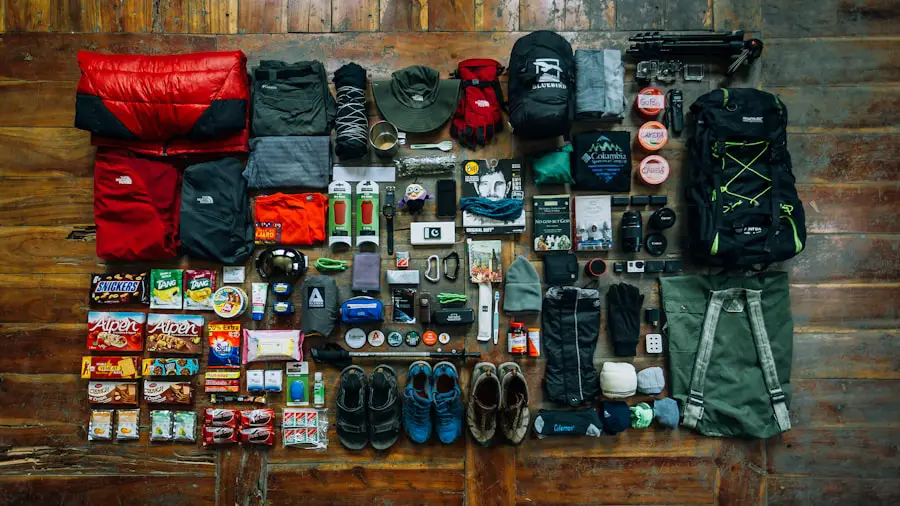
Small hygiene items can prevent a minor annoyance from becoming a bigger problem. Pack sunscreen, insect repellent when needed, hand sanitizer, a toothbrush and toothpaste for overnight trips, menstrual products when applicable, toilet paper or wipes, and a sealable bag for packing out waste.
Biodegradable soap should not be used directly in a stream or lake. NPS Leave No Trace guidance says to carry wash water at least 200 feet away from natural water and use only a small amount of biodegradable soap. Pack out hygiene products and trash.
For human waste, use toilets whenever available. Where catholes are allowed, common NPS Leave No Trace guidance calls for a hole about 6 to 8 inches deep and at least 200 feet from water, camps, and trails, with toilet paper and hygiene products packed out. Some environments require different practices or a pack-out waste system, so check the rules before you go.
Tools and Accessories
A multi-tool or knife can handle small gear repairs, food preparation, and other routine trail tasks. Pair it with a compact repair kit that may include duct tape, zip ties, cord, patches, a needle and thread, or repair parts specific to your sleeping pad, tent, stove, or other gear.
A headlamp is usually more useful than a handheld flashlight because it keeps both hands free. Carry spare batteries or enough backup power for the planned trip and a reasonable delay. A lightweight tarp can serve as rain protection, a ground cover, or an emergency shelter when conditions and setup allow.
For overnight trips, a portable camp stove can make meal preparation faster and more predictable than a campfire. However, stoves and open flames are not permitted everywhere. Check current fire restrictions before the trip and again at the trailhead when conditions are dry or changing quickly.
How to Pack Your Hiking Backpack
Good organization makes a backpack more comfortable and keeps emergency items reachable. There is no single layout that fits every pack, but this arrangement works well as a starting point:
- Bottom: Bulky items you will not need while walking, such as an overnight sleeping bag or camp clothing.
- Core: Dense, heavier items placed close to your back so the load feels stable. Keep hard or sharp objects from pressing directly into your spine.
- Top: Layers, lunch, first-aid supplies, or other items you may need during the day.
- Hip-belt and quick-access pockets: Snacks, sunscreen, lip balm, small navigation items, and other frequently used gear.
- Outer pocket: Rain shell, wet tarp, water-treatment items, or other gear that benefits from fast access or separation.
Keep water balanced from side to side. Protect clothing, sleeping gear, electronics, and fire-starting supplies with waterproof liners or dry bags where needed. Before leaving home, put on the fully loaded pack, tighten the hip belt and shoulder straps, and walk around long enough to catch pressure points or shifting gear.
Emergency Supplies
Emergency gear should help you stay warm, visible, oriented, and able to signal for help. A whistle, headlamp, backup power, emergency shelter, extra food, water treatment, repair materials, and first-aid supplies cover many common problems. A signaling mirror can be useful in open terrain, while a bright layer or pack cover can improve visibility.
Fire-starting supplies are part of the Ten Essentials, but they are not permission to light a fire. Carry them for emergency capability and use them only when conditions and local rules allow. During fire restrictions, ignition sources can create serious wildfire risk and may be prohibited.
An emergency bivy or space blanket can help reduce heat loss and block wind, but it does not replace insulation, dry clothing, or a real shelter in severe conditions. Choose emergency gear based on the environment rather than relying on one universal survival item.
Optional Extras That Can Make a Hike Better
Once the safety essentials are covered, add comfort or activity-specific items without overloading the pack. Traveler pants can be useful because they are durable, flexible, and offer pockets for small items; see this guide to traveler pants for more detail. Compact binoculars are a practical addition for birdwatching or distant scenic views, and a portable phone charger is useful when your phone handles maps, photos, or communication.
Other optional items include a camera, field guide, sit pad, trekking poles, notebook, or small towel. Each extra should justify its weight and space after water, clothing, navigation, first aid, shelter, food, and other safety systems are covered.
Frequently Asked Questions
What should I put in my hiking backpack?
Start with the Ten Essentials: navigation, sun protection, extra clothing, light, first aid, fire supplies where legal, repair tools, extra food, water and treatment, and emergency shelter. Then add personal medication, hygiene items, phone power, and gear specific to the trail, weather, and trip length.
How much water should I carry in my hiking backpack?
There is no universal amount. Great Smoky Mountains National Park gives a baseline of at least 1 liter per 2 hours of hiking. Increase your plan for heat, dry air, strenuous terrain, long distances, or uncertain refill points, and carry treatment if you may use natural water.
What kind of food should I pack for a hiking trip?
Choose lightweight foods that are easy to eat and that you tolerate well while active. Trail mix, nuts, energy bars, jerky, nut-butter packets, dried fruit, sandwiches, tortillas, and similar foods work well. Pack extra food for an unexpected delay, especially on remote hikes.
What navigation tools should I bring in my hiking backpack?
Carry a route map and a navigation method you know how to use. A compass, GPS device, or phone with offline maps can be useful, but electronics need power and can fail. A physical map is a smart backup, particularly in unfamiliar or remote terrain.
What should I include in my first aid kit for hiking?
A basic kit can include adhesive bandages, gauze, medical tape, wound-cleaning supplies, blister care, gloves, and personal medications. Adjust it for group size, trip length, known medical needs, and how far you will be from professional help.
What extra clothing should I pack in my hiking backpack?
Pack for the coldest, wettest, or windiest realistic conditions on the route. Depending on season, that may mean a rain shell, insulating layer, hat, gloves, sun hat, and spare socks. Avoid packing only for the temperature at the trailhead.
What emergency supplies should I carry in my hiking backpack?
Carry a headlamp, whistle, first-aid kit, emergency shelter, extra food, water treatment, repair tools, navigation backup, and fire-starting capability where legal. Add a satellite messenger or personal locator beacon when remoteness and communication needs justify one.
How should I organize a hiking backpack?
Keep dense items close to your back, bulky camp items lower in the pack, and frequently used gear near the top or in outer pockets. Balance water from side to side and keep navigation, rain gear, first aid, food, and emergency items easy to reach.
Do I need emergency shelter on a day hike?
Yes, especially when a delay could leave you exposed to cold, wind, rain, or darkness. The NPS lists emergency shelter among the Ten Essentials. A compact bivy, tarp, or emergency blanket can provide a safety margin if you cannot exit the trail as planned.
Sources
- U.S. National Park Service — Ten Essentials — core hiking safety systems, including navigation, food, water, shelter, first aid, illumination, tools, and fire.
- U.S. National Park Service — Trip Planning Guide — route planning, alerts, permits, offline maps, trip plans, and emergency preparation.
- Centers for Disease Control and Prevention — Backcountry Water Treatment — boiling, filtering, disinfection, UV treatment, and water-safety limitations.
- U.S. National Park Service — Leave No Trace — campsites, catholes, waste, soap use, food storage, and wildlife-impact practices.
- U.S. National Park Service — Great Smoky Mountains Hiking — current hiking checklist and a practical water-planning baseline.
- National Weather Service — Lightning Safety — thunderstorm avoidance and safe shelter guidance.

