
Last Updated on July 27, 2026 by Daniel Globe
Knowing what to put in a backpack for hiking can make the difference between a comfortable day on the trail and a difficult situation when weather, navigation, or minor injuries do not go as planned. The best hiking pack is not simply the one that holds the most gear. It should fit your torso, carry the load comfortably, and contain the supplies needed for your specific route, weather, duration, and group.
Quick Answer
A hiking backpack should contain the Ten Essentials: navigation, sun protection, extra clothing, illumination, first aid, fire, repair tools, extra food, water and water-treatment supplies, and emergency shelter. Add route-specific items such as medications, insect protection, trekking poles, or overnight gear based on the trail and conditions.
Key Takeaways
- Choose a backpack by torso fit and trip length, not simply by your height or the largest capacity available.
- Carry the complete Ten Essentials even on familiar day hikes because delays, weather changes, injuries, and navigation mistakes can extend a trip.
- Plan water around hiking time, heat, altitude, exertion, and reliable water sources rather than following one universal liters-per-day rule.
- Do not assume every portable filter removes every type of germ. Match the treatment method to the water risk and follow the manufacturer’s instructions.
- Keep dense gear close to your back, quick-access safety items near the top or in exterior pockets, and camp-only items lower in an overnight pack.
- Check the forecast, official trail alerts, fire restrictions, and your route before leaving, then share your trip plan with a trusted person who is not on the hike.
At a Glance
| Time Required | About 15–30 minutes for a basic day-hike packing check; longer for an overnight or unfamiliar route |
| Difficulty | Easy, but route-specific planning is essential |
| Tools Needed | Fitted backpack, packing checklist, route map/navigation tools, Ten Essentials, and any trip-specific equipment |
| Cost | Varies widely; many essentials can be reused, borrowed, or rented instead of purchased for every trip |
What to Put in a Hiking Backpack: Complete Checklist
The National Park Service Ten Essentials provide a practical foundation for day hikes and backcountry trips. The exact equipment within each category should change with your route, season, weather, group, and expected time outdoors.
- Navigation: topographic or trail map, compass, GPS device or offline phone map, plus backup power when appropriate.
- Sun protection: sunglasses, sunscreen, brimmed hat, lip protection, and sun-protective clothing when needed.
- Extra clothing: insulation and weather protection suitable for conditions that may become colder, wetter, or windier than expected.
- Illumination: headlamp or flashlight with adequate battery power or spare batteries.
- First aid: a kit suited to the group, duration, environment, and personal medical needs.
- Fire: lighter, waterproof matches, or another reliable fire starter where fires are legal and appropriate.
- Repair kit and tools: multi-tool or knife, tape, cord, and any gear-specific repair items you may need.
- Nutrition: enough food for the planned hike plus extra no-cook food in case the trip lasts longer than expected.
- Hydration: drinking water plus an appropriate treatment method if you may need to collect water from natural sources.
- Emergency shelter: an emergency bivy, tarp, space blanket, or another shelter appropriate to your environment.
Warning: The Ten Essentials are a starting point, not a guarantee of safety. Check the official land manager’s current trail conditions, closures, permits, fire restrictions, weather hazards, wildlife guidance, and water availability before every trip.
Products Worth Considering

Lightweight Emergency Kit: This ultralight medical kit fits easily in your pack's side pocket for convenient access; includes supplies to clean and bandage wounds, aid muscle aches, dress blisters, and treat other common outdoor discomforts

ESSENTIALS FOR EMERGENCIES: Be prepared for unexpected situations with this first aid kit featuring 150+ essential supplies. It includes a variety of bandages, gloves, povidone-iodine prep pads, metal tweezers, a tourniquet, and more.

COMPLETE 100-PIECE EMERGENCY KIT: Stay prepared for cuts, scrapes, burns, sprains, and outdoor emergencies with essential medical supplies packed into one compact first aid kit for home, travel, camping, hiking, and boating.
Choosing the Right Backpack Size and Fit
Choosing the right backpack is a critical part of preparing for an outdoor adventure, whether you are taking a short day hike or an extended trek through rugged terrain. The best fit is about comfort, load control, access to gear, and the ability to move naturally while carrying everything you need.
Backpack capacity is normally measured in liters. A compact pack in roughly the 20- to 30-liter range can work well for many day hikes, while overnight and multi-day trips usually require substantially more room. There is no single correct volume because bulky cold-weather gear, food, bear-resistant storage, water carries, and shared group equipment can change the amount of space you need.
Fit matters more than simply choosing a pack by your height. REI’s backpack-fitting guidance emphasizes torso length as a primary sizing measurement. A pack should sit securely against your back, transfer much of the load through the hip belt, and allow the shoulder straps to follow your shoulders without creating painful pressure points.
Products Worth Considering

【Lightweight & Foldable for Travel and Outdoor Adventures】Available in 15L and 20L sizes, this foldable backpack packs down compactly for easy storage and portability. Designed for both men and women, it works perfectly as a hiking backpack, daypack, travel backpack, camping backpack, or backup backpack for weekend trips and everyday use.

Compact & Packable: This 20L hiking backpack measures 11.4 × 5.1 × 18.5 inches, weighs only 0.64 lbs, and folds down to just 6.3 × 7.1 inches. It easily packs into its own inner pocket and fits neatly in your suitcase, larger backpack, or car

【Please Note】This 30L backpack suited for teens & adults [158‑182cm / 5'2''‑6'0''], unisex for slim‑medium builds. Adjustable shoulder straps fit varying torso lengths. Not ideal for users under 155cm or broad‑shoulder heavy‑build people. And it has a zipper at the bottom and a foldable Rain-cover inside.
How to Check Backpack Fit
- Measure your torso according to the pack manufacturer’s sizing method.
- Load the backpack with realistic weight before judging the fit.
- Position the hip belt so it supports the load around the top of your hips according to the pack design.
- Tighten the shoulder straps until the pack is stable without using them to carry all the weight.
- Adjust the sternum strap and load-lifter straps, if present, so the pack stays close without restricting breathing or arm movement.
- Walk, climb stairs, and bend while wearing the loaded pack to check for rubbing, shifting, or pressure points.
Pro Tip: Test a new backpack with the weight you expect to carry. A pack that feels comfortable while empty may fit very differently once food, water, and overnight gear are inside.
Plan the Hike Before You Pack
Your gear list should be based on the trip rather than copied blindly from another hiker. Before packing, review the route, distance, elevation change, terrain, expected duration, water availability, forecast, trail closures, permit requirements, and hazards for the area.
The National Park Service Trip Planning Guide recommends checking official alerts and weather, understanding your limits, confirming that your equipment works, and sharing a trip plan with a trusted contact who is not going with you.
Your trip plan should include where you are going, the intended route, who is in the group, when you expect to return, and enough information for the trusted person to contact authorities if you become overdue.
Check the forecast again shortly before departure. The National Weather Service advises checking weather before outdoor trips and seeking substantial shelter if thunderstorms threaten. Exposed ridges, summits, open terrain, and isolated trees can become particularly dangerous when lightning is nearby.
Pack for the conditions you could realistically face, not only the conditions you expect when you leave the trailhead.
Navigation Tools: Maps, Compass, and GPS
Navigating unfamiliar terrain requires tools you know how to use. A topographic map can show trails, terrain shape, elevation changes, water features, junctions, and other landmarks. A compass provides a reliable way to orient the map and maintain direction without relying on cellular service.
GPS receivers and smartphone mapping applications can make route tracking easier, but electronic navigation should not be your only plan. Phones can run out of power, break, become wet, or lose service. Download maps for offline use before leaving coverage and carry appropriate backup power.
NPS guidance also recommends carrying a physical map as backup and knowing how to use your navigation tools before entering the backcountry. GPS does not replace route knowledge or judgment.
Note: Airplane mode can reduce unnecessary battery drain in areas with weak cellular service, but confirm that your downloaded maps and GPS functions work offline before the hike.
Products Worth Considering

KEY FEATURES: This manual magnet compass consists of Acrylic Baseplate with Azimuth bearing and 360 degree rotating bezel. With the help of a magnetic needle which consists of a liquid-filled capsule (bubble free) helps to swing fast and freely point you towards north. The Magnifying Glass is used for reading and navigating geological maps. Along with this, it has the compass Ruler Scale of 1:24000 for precise route mapping

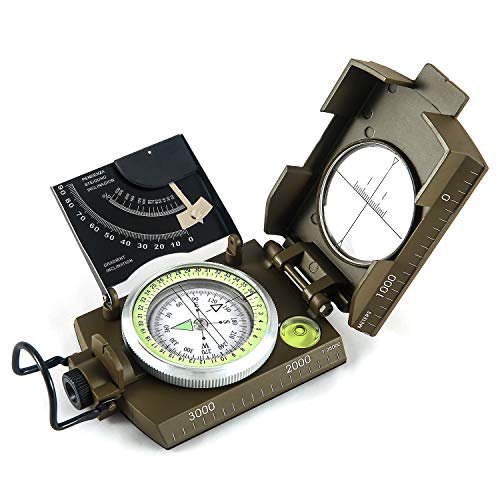
✔️EASY TO HANDLE & READ - A liquid-filled compass with an integrated bubble level, it delivers reliable and accurate readings, thanks to the luminous dial, adjustable luminous marching line, thumb hold and magnifying viewer, you can get a fast and easy read.
Hydration: Water Bottles and Purification Systems
Staying hydrated is important during any hike because exertion, heat, sun exposure, altitude, dry air, and trip duration can all increase fluid needs. When choosing water bottles, consider capacity, durability, ease of drinking, weight, and whether the bottle fits your pack’s pockets or hydration system.
Do not rely on one universal number of liters for every hike. Water planning should account for how long you will be moving, temperature, humidity, elevation, exertion, individual needs, and whether dependable water is available along the route. Some parks provide route-specific recommendations that are much higher during extreme heat.
How to Treat Backcountry Water
Natural water that looks clean can still contain disease-causing organisms. The CDC’s backcountry water-treatment guidance states that boiling is the most reliable way to kill germs. When boiling is not practical, the appropriate treatment depends on the organisms involved and the equipment being used.
- Boiling: CDC recommends bringing clear water to a rolling boil for 1 minute, or 3 minutes at elevations above 6,500 feet.
- Filters: capabilities vary. Some common portable filters remove parasites but may not remove viruses or all bacteria. Check the filter’s specifications and certifications.
- Filter plus disinfect: CDC identifies filtering followed by disinfection as the next-best option when boiling is not possible.
- Chemical disinfectants: effectiveness varies by chemical and organism, so follow the label directions and required contact time.
- UV treatment: portable UV units can treat small amounts of clear water when used correctly. Cloudy water should be filtered first so suspended material does not interfere with treatment.
Warning: Boiling or disinfecting does not make water contaminated with harmful chemicals, toxins, or radioactive materials safe. Use a different water source when chemical contamination is suspected.
Nutrition: Lightweight Snacks and Meals
| Snack/Meal | Approx. Calories | Protein (g) | Fat (g) | Carbohydrates (g) |
|---|---|---|---|---|
| Apple with Almond Butter | 190 | 4 | 8 | 27 |
| Greek Yogurt with Berries | 150 | 15 | 1 | 20 |
| Turkey and Cheese Roll-Ups | 200 | 18 | 12 | 5 |
| Quinoa Salad | 220 | 8 | 8 | 29 |
Nutrition values above are example estimates. Actual calories and macronutrients vary with serving size, recipe, and brand, so check the label or recipe for the food you pack.
Food for hiking should provide useful energy without taking excessive space or requiring complicated preparation. Trail mix remains a practical option because nuts, dried fruit, granola, seeds, and similar ingredients combine carbohydrates and fats in an easy-to-carry form.
Energy bars, nut or seed butter packets, dried fruit, tortillas, jerky, crackers, and other durable foods can also be convenient. Choose foods you already know you tolerate well during exercise rather than experimenting with an unfamiliar diet on a long trail day.
For overnight trips, dehydrated and freeze-dried meals can reduce bulk and preparation time. Brands such as Mountain House sell meals designed to be rehydrated with water; preparation time and water volume vary by recipe, so follow the instructions on each pouch.
NPS guidance also recommends carrying extra food in case your trip lasts longer than expected. No-cook foods are especially useful because they do not depend on a working stove.
Shelter: Tents, Sleeping Bags, and Tarps
Shelter needs depend on whether you are taking a day hike or intentionally spending the night outside. For an overnight backpacking trip, a tent, sleeping bag, and sleeping pad form the core of a typical sleep system. A day hiker may not need a full tent but should still consider lightweight emergency shelter appropriate to the environment.
Tents come in different sizes and designs for different seasons and group sizes. Ultralight models reduce pack weight, while larger shelters may provide more interior room at the cost of greater weight and bulk.
Sleeping bags should be selected for the expected temperatures and conditions. Down insulation is valued for its warmth-to-weight ratio and compressibility, but it needs protection from moisture. Synthetic insulation tends to retain useful performance more readily when damp, although it is often bulkier for a similar warmth level.
Tarps can provide a flexible rain or wind barrier and can also serve as part of an emergency shelter. A tarp, bivy sack, or reflective emergency blanket takes much less space than a full tent and can provide important protection if an unexpected delay forces a day hike to extend into the night.
Clothing: Layering for Comfort and Protection
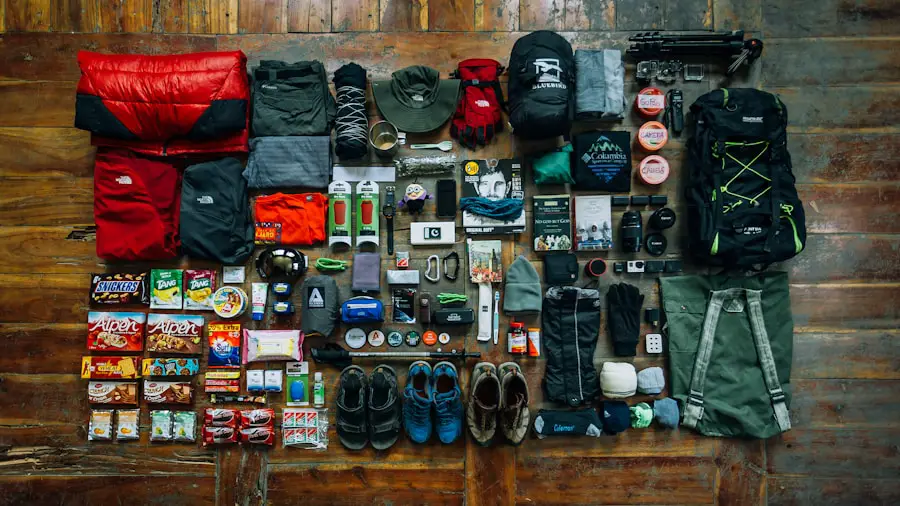
Layering makes it easier to adapt to changing temperatures, wind, precipitation, sun, and activity level. Instead of relying on one heavy garment, combine layers that can be added or removed as conditions change.
Base Layer
The base layer manages moisture next to your skin. Merino wool and synthetic fabrics are common choices because they dry more effectively than ordinary cotton when wet.
Insulating Layer
The middle layer provides warmth. Fleece, synthetic insulation, or a down jacket can work depending on the temperature, precipitation risk, and how much insulation you need.
Outer Layer
The outer layer protects against wind and precipitation. Waterproof-breathable shells, including garments made with Gore-Tex and similar materials, are common choices for wet or windy conditions.
Sun Protection
Do not overlook sun exposure simply because the weather feels cool. Pack sunscreen, sunglasses, a hat, and protective clothing when appropriate. The NPS includes sun protection as one of its Ten Essentials.
Note: Pack at least one extra layer appropriate to the coldest or wettest realistic conditions you could encounter rather than dressing only for the trailhead temperature.
First Aid Kit: Essential Supplies for Safety
A first aid kit should match the length of the hike, group size, environment, and medical needs of the people traveling with you. A basic hiking kit commonly includes adhesive bandages, gauze, medical tape, antiseptic supplies, blister treatment, tweezers, scissors, pain relievers, gloves, and personal medications.
Check the kit before each trip. Replace used or expired supplies, make sure medications are current, and confirm that you know how to use the items you carry.
In tick country, clean fine-tipped tweezers are especially useful. The CDC recommends removing attached ticks promptly by grasping the tick close to the skin and pulling away with steady, even pressure rather than twisting, burning, or covering it with substances.
Emergency Essentials: Whistle, Fire Starter, Light, and Shelter
Emergency equipment should help you signal, stay warm, navigate after dark, make basic repairs, and protect yourself if your hike takes longer than expected.
Whistle
A whistle is a simple signaling device that requires much less effort than repeatedly shouting. Keep it somewhere you can reach without unpacking your backpack.
Fire Starter
Waterproof matches, a lighter, or another dependable fire starter can provide heat or an emergency signal where fires are legal and conditions make fire use appropriate. Practice with your equipment before the trip.
Always check local restrictions first. Wildfire danger, seasonal bans, or land-management rules may prohibit open flames even in an emergency-oriented packing list.
Headlamp or Flashlight
Carry a headlamp or flashlight even when you expect to finish before sunset. Delays caused by navigation errors, injuries, slow travel, or trail conditions can turn a daytime hike into an after-dark return. A headlamp is especially practical because it leaves both hands free.
Emergency Blanket, Bivy, or Tarp
Reflective blankets, emergency bivy sacks, and tarps are compact ways to reduce exposure to wind, precipitation, and cold when you cannot return as planned. They are emergency tools rather than substitutes for a proper sleep system on a planned overnight trip.
Repair Kit and Multi-Tool
A small repair kit may include strong tape, cord, patches, zip ties, a knife or multi-tool, and any special repair item required by your stove, shelter, trekking poles, footwear, or other equipment. Choose tools because they solve likely problems on your trip rather than selecting a multi-tool simply because it has the most attachments.
How to Pack a Hiking Backpack
A well-packed backpack should feel stable and keep frequently needed gear easy to reach. There is no single packing layout that works for every pack, but REI’s backpack-loading guidance describes a useful bottom, core, and top-zone system.
1. Put Bulky Camp Gear Near the Bottom
For an overnight pack, sleeping gear and other bulky items that you will not need until camp can usually go low in the pack.
2. Keep Dense, Heavy Gear Near Your Back
Place heavier items in the pack’s central core and close to your back where the pack is designed to support them. This can reduce excessive backward pull and help the load remain stable.
3. Keep Quick-Access Gear Near the Top
Rain gear, insulation, first aid, food, navigation tools, and other items you may need during the hike should not be buried beneath your entire camp setup.
4. Use Exterior Pockets Carefully
Side or hip-belt pockets are useful for water, snacks, sunscreen, a phone, or other frequently used items. Secure equipment so it cannot fall out or snag on brush.
5. Keep Emergency Gear Reachable
Your headlamp, first aid kit, navigation backup, extra layer, and emergency signaling equipment should remain accessible without unloading the whole pack.
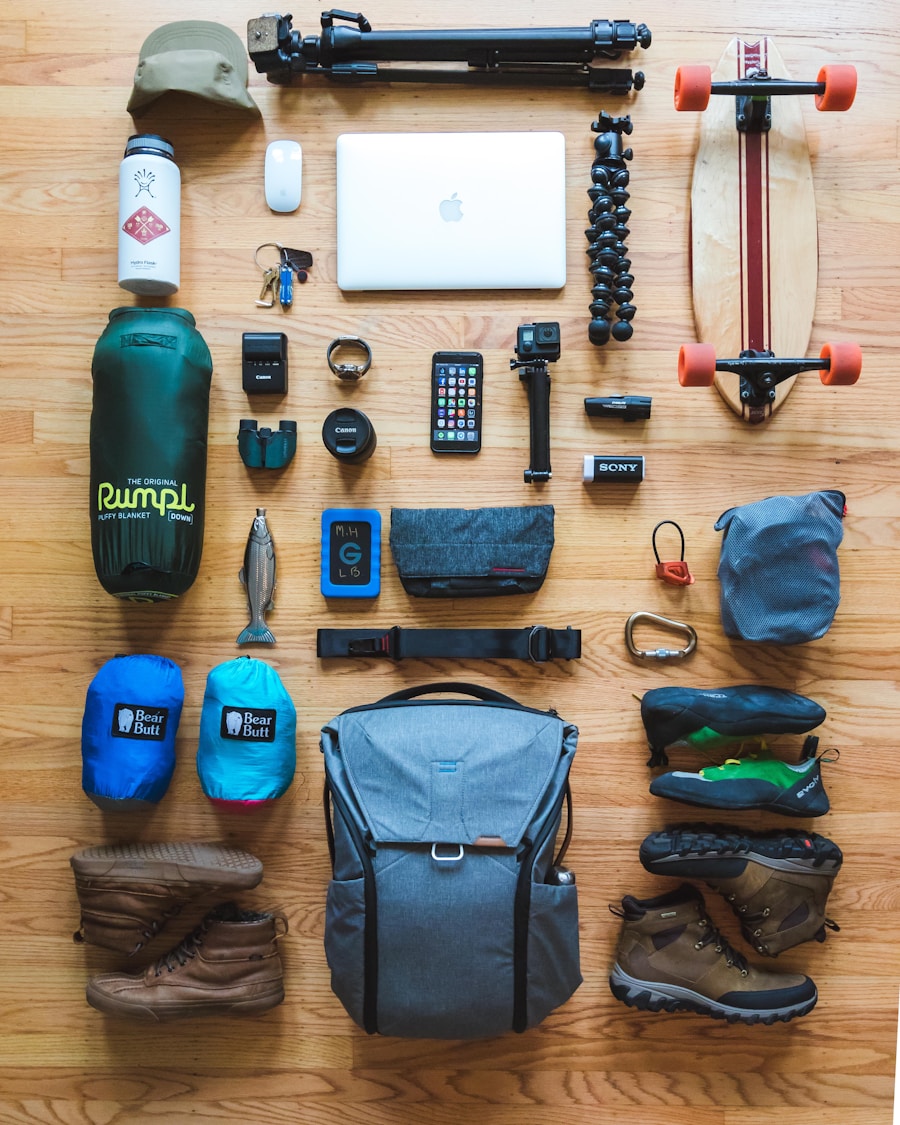
Pro Tip: Lay all your gear on the floor before packing. It becomes much easier to spot duplicate items, forgotten essentials, unnecessary weight, or equipment that should be moved into a quick-access pocket.
Final Backpack Check Before You Leave
- Confirm the route, distance, expected hiking time, elevation gain, and difficulty.
- Check the current weather forecast and official trail alerts.
- Confirm permits, parking requirements, seasonal rules, and fire restrictions.
- Verify your water supply and any dependable refill locations.
- Test your navigation equipment and download offline maps before losing service.
- Check headlamp and device batteries.
- Inspect your first-aid kit and personal medications.
- Make sure food, extra clothing, shelter, and repair equipment fit the expected conditions.
- Adjust the backpack while loaded.
- Leave your route and expected return time with a trusted contact who is not on the trip.
When preparing for a hiking trip, water, food, first aid, navigation, lighting, layers, sun protection, tools, and emergency shelter should come first. On colder outings, a rechargeable hand warmer for travel may also improve comfort, although it should not replace proper insulating layers. Families planning outdoor travel with young children may also find this guide to double travel strollers for spring adventures useful for trips where a stroller is appropriate. For broader destination planning, see this guide on how to choose the best travel guidebook.
Frequently Asked Questions
What are the essential items to put in a backpack for hiking?
Start with the Ten Essentials: navigation, sun protection, extra clothing, illumination, first aid, fire, repair tools, extra food, water and water-treatment supplies, and emergency shelter. Add medications and route-specific equipment based on the terrain, weather, wildlife, duration, and group.
How much water should I pack for a hiking trip?
There is no safe universal amount for every hike. Plan water according to hiking time, heat, humidity, elevation, exertion, individual needs, and reliable refill opportunities. Check route-specific guidance from the park or land manager, especially in hot or dry environments, and carry appropriate treatment equipment if you intend to use natural water sources.
What type of food is best to pack for a hiking trip?
Choose foods that are compact, durable, easy to eat, and familiar to your stomach. Trail mix, nuts, dried fruit, bars, tortillas, jerky, crackers, and nut or seed butter are common choices. For longer trips, dehydrated or freeze-dried meals can reduce bulk. Carry extra no-cook food for unexpected delays.
Why is it important to pack a map and compass for hiking?
A paper map and compass provide navigation that does not depend on cellular coverage or battery power. GPS and offline phone maps are useful additions, but electronics can fail, become damaged, or run out of power. Learn how to use your backup navigation tools before the trip.
What should be included in a first aid kit for hiking?
A basic kit may contain adhesive bandages, gauze, medical tape, blister supplies, antiseptic materials, gloves, tweezers, scissors, pain relievers, and any personal medications. Adjust the kit for group size, trip length, remoteness, known allergies, and environmental hazards.
Why is it important to pack extra clothing for a hiking trip?
Temperatures and weather can change quickly, especially with elevation or approaching storms. An extra insulating or weather-resistant layer can help you stay warm and dry if the hike takes longer than expected or the forecast changes.
What type of multi-tool is best for hiking?
Choose a compact tool with functions you can realistically use for your equipment, such as a blade, scissors, screwdriver, or pliers. Pair it with simple repair supplies such as strong tape, cord, patches, or zip ties when those items fit your trip.
Why is sunscreen important to pack for a hiking trip?
Hikers may spend hours exposed to ultraviolet radiation, including during cool or windy weather. Sunscreen, sunglasses, a hat, and sun-protective clothing help reduce exposure. Sun protection is one of the National Park Service Ten Essentials.
Why should I pack a whistle for hiking?
A whistle gives you a simple way to signal without repeatedly using the energy required to shout. Keep it somewhere you can reach quickly rather than buried at the bottom of the pack.
Do I need a headlamp on a daytime hike?
Yes, carrying a small headlamp is prudent even when you plan to finish before dark. Injuries, navigation problems, weather, or slower-than-expected travel can delay your return, and a headlamp provides hands-free illumination after sunset.
Can I rely only on my phone for hiking navigation?
A phone can be an excellent navigation tool when maps are downloaded for offline use, but it should not be your only plan on a remote route. Batteries fail, devices break, and service can disappear. Carry an appropriate physical-map backup and know how to use it.
Sources
- National Park Service — Ten Essentials — essential hiking equipment, navigation, illumination, food, hydration, first aid, clothing, tools, and shelter.
- National Park Service — Trip Planning Guide — route preparation, weather, alerts, offline maps, equipment checks, and trip plans.
- CDC — Water Treatment When Hiking, Camping, or Traveling — boiling, filtration, disinfection, and UV treatment guidance.
- CDC — What to Do After a Tick Bite — proper tick-removal technique.
- National Weather Service — Outdoor Lightning Safety — forecast checks and thunderstorm safety.
- REI — Backpack Sizing and Fit Guide — backpack capacity, torso sizing, and fit fundamentals.
