Last Updated on September 10, 2026 by Daniel Globe
Hiking trails give you a defined way to explore forests, mountains, parks, deserts, coastlines, and other natural areas on foot. Some are short, level paths near visitor centers, while others climb steep terrain for many miles. Choosing the right trail means looking beyond scenery and checking distance, elevation gain, terrain, weather, current conditions, and your own ability before you leave the trailhead.
Quick Answer
To find a good hiking trail, start with an official park or land-manager website, then compare distance, elevation gain, terrain, difficulty, weather, closures, and permit requirements. Choose a route that matches the least-experienced person in your group, carry the Ten Essentials, download or carry a map, and set a firm turnaround time.
Key Takeaways
- Trail difficulty labels are not standardized. Always check the land manager’s definition and compare distance, elevation gain, surface, exposure, and current conditions.
- Use official park, forest, recreation-area, or land-management pages to confirm closures, alerts, permits, parking rules, and seasonal hazards.
- Carry navigation, water, food, insulation, sun protection, a first-aid kit, light, fire-starting supplies where appropriate, repair tools, and emergency shelter—the systems commonly called the Ten Essentials.
- Do not assume blaze colors indicate difficulty. Colors usually identify a route or permitted trail use according to a local system.
- Turn around when weather, water, daylight, fatigue, trail damage, or route-finding problems make continuing unsafe.
At a Glance
| Planning Time | About 10–30 minutes for a familiar day hike; longer for remote, technical, permit-controlled, or overnight routes. |
| Difficulty | Varies from flat, accessible paths to steep backcountry routes. Local ratings are not universal. |
| Tools Needed | Trail map or offline navigation, appropriate footwear and clothing, water, food, first aid, light, and the other Ten Essentials appropriate to the trip. |
| Cost | Many trails are free, but entrance fees, parking fees, reservations, or permits may apply. |
Disclosure: As an Amazon Associate I earn from qualifying purchases. Some links on this page are affiliate links, at no extra cost to you.
What Are Hiking Trails?
Hiking trails are established routes designed or managed for travel through natural and recreational areas. They can be found in national parks, state parks, forests, Bureau of Land Management areas, local preserves, municipal parks, and private recreation areas. Trails vary widely in distance, surface, elevation, scenery, and permitted uses.
Established trails also help manage visitor impact. By concentrating foot traffic on durable routes, trail systems can reduce unnecessary trampling of vegetation and damage to sensitive areas. Hikers can help by staying on established trails where required and following Leave No Trace principles.
Trail crews and land managers may use signs, posts, painted blazes, cairns where appropriate, maps, bridges, drainage structures, and other features to keep routes usable. Conditions can still change after storms, fires, floods, snow, rockfall, or maintenance work, so a marked trail should never be treated as automatically safe.
Note: A trail being open does not guarantee that it is suitable for every hiker. Your fitness, experience, equipment, weather, daylight, altitude, and current trail conditions all affect the real difficulty.
How to Find Hiking Trails Near You
Start with the agency or organization that manages the land. Official sources are usually the best place to confirm whether a trail is open, whether permits are required, and whether recent fires, storms, construction, wildlife activity, or seasonal conditions have changed access.
For U.S. national parks, the National Park Service hiking resources link to individual park websites and the NPS app. The NPS notes that park information can be downloaded in advance for areas with limited cell service.
Other useful sources include state park systems, U.S. Forest Service offices, Bureau of Land Management field offices, local park departments, visitor centers, guidebooks, outdoor clubs, and established trail organizations. Commercial trail apps and community reviews can help with discovery, but verify important safety information with the responsible land manager before leaving.
Check These Details Before Choosing a Trail
- Round-trip distance: Confirm whether the listed mileage is one way or total.
- Elevation gain: A short trail with a large climb can be harder than a longer, flatter route.
- Surface: Look for pavement, packed dirt, loose rock, roots, sand, mud, snow, scrambling, or stream crossings.
- Exposure: Some routes pass cliffs, narrow ledges, steep drop-offs, or open ridges.
- Altitude: Higher elevations can make exertion feel harder and can bring colder or faster-changing weather.
- Shade and water: Desert and exposed routes may have little protection from heat or sun.
- Accessibility: Review grade, cross-slope, surface, width, obstacles, and facilities when those factors affect your needs.
- Pets: Do not assume dogs are allowed. Rules vary by park and trail.
- Season: Snow, ice, monsoon storms, wildfire closures, high water, heat, and mud can change a trail dramatically.
Researching and Planning Your Hiking Adventure
Before embarking on a hiking adventure, research the specific route rather than relying only on a general description or star rating. Read the official trail page, check current alerts and weather, study the map, and understand how long the route is likely to keep you away from the trailhead.
Photos, hiking websites, forums, social-media groups, and trail apps can provide useful first-hand reports. Guidebooks can also help compare routes by length, scenery, and difficulty. However, crowd-sourced reports may be old or may not reflect an official closure, so use them as supplementary information rather than the final authority.
Plan the Logistics
Confirm the trailhead location, parking rules, opening hours, entrance fees, reservations, permits, shuttle schedules, and whether your vehicle can reach the access road. Some high-demand routes require advance permits or timed access, and a permit does not guarantee that weather or trail conditions will remain safe.
Check the forecast for the trail’s actual elevation rather than only the nearest town. Mountain weather can differ sharply from conditions below. Also note sunset time and establish a turnaround time before starting.
Pro Tip: Save or screenshot the route, trailhead directions, emergency information, and permit details before leaving home. Cell service may disappear long before you reach the trail.
Exploring Different Types of Hiking Trails

Hiking trails come in several common layouts. Understanding the route type helps you estimate transportation needs, total mileage, and how easy it will be to turn back.
Loop Trails
A loop trail begins and ends at roughly the same place without requiring you to retrace the full route. Loops can provide more varied scenery, but they can also make a late turnaround less straightforward once you pass the halfway point.
Out-and-Back Trails
An out-and-back trail follows the same route to a destination and back. These trails make distance management simple because you can turn around at any point. A four-mile one-way route, however, becomes an eight-mile hike, so confirm how mileage is listed.
Point-to-Point Trails
A point-to-point trail begins and ends at different locations. These hikes may require two vehicles, public transportation, a shuttle, or another arranged pickup. Never assume transportation will be available at the far end.
Backpacking and Wilderness Routes
Multi-day routes require additional planning for shelter, food, water, overnight permits, food storage, waste disposal, and changing weather. Some wilderness routes may be lightly marked or completely unmarked and demand stronger navigation skills.
Multi-Use Trails
Some trails are shared by hikers, bicyclists, horses, or other permitted users. The National Park Service notes that permitted uses vary by trail, so check signs and local regulations before starting.
Understanding Trail Difficulty Levels
Difficulty ratings are useful, but they are not standardized across every park, app, or trail system. One park may use “easy, moderate, strenuous,” while another uses five or more categories. Shenandoah National Park, for example, combines distance and elevation gain in its own rating method and still notes that the formula is imperfect.
For that reason, read the trail description behind the label. Compare mileage, elevation gain, grade, footing, altitude, exposure, water crossings, scrambling, technical obstacles, and current conditions.
| Typical Label | What It May Mean |
| Easy | Usually shorter, more gradual, and less technical, but heat, altitude, snow, or accessibility needs can still make the route demanding. |
| Moderate / Intermediate | May include longer distances, steady climbing, roots, rocks, uneven surfaces, or other obstacles. |
| Difficult / Strenuous | Often involves substantial climbing, rough footing, longer mileage, exposure, scrambling, or conditions that demand good fitness and judgment. |
| Expert / Very Strenuous | A local label sometimes used for long, steep, remote, technical, exposed, or otherwise serious routes. Confirm the land manager’s exact definition. |
A trail’s difficulty label is only a starting point. Distance, elevation gain, terrain, altitude, weather, exposure, and your own experience determine how hard the hike will actually feel.
Packing the Essentials for a Safe Hiking Experience
Even a short day hike can turn into a longer outing because of weather, a navigation mistake, injury, or a closed route. The National Park Service recommends carrying the Ten Essentials and adjusting them for the specific activity and environment.
The Ten Essential Systems
- Navigation: Map, compass, GPS, or another suitable navigation system—and the skill to use it.
- Sun protection: Sunglasses, sunscreen, hat, and protective clothing as conditions require.
- Insulation: Extra layers for colder, wetter, or windier conditions than expected.
- Illumination: Headlamp or flashlight plus adequate battery power.
- First aid: Supplies appropriate to the group and trip, plus personal medications.
- Fire: A reliable way to start an emergency fire where fires are legal and appropriate.
- Repair kit and tools: Items needed for common gear failures.
- Nutrition: Enough food for the hike plus extra for an unexpected delay.
- Hydration: Water plus treatment supplies when your plan depends on natural water.
- Emergency shelter: A tarp, bivy, emergency blanket, or other suitable protection.
How Much Water Should You Carry?
There is no single amount that works for every hike. Heat, humidity, altitude, pace, distance, body size, and available water sources all matter. In hot, dry desert conditions, Saguaro National Park advises hikers to plan for about one quart of water per hour, which shows why a fixed half-liter rule can be inadequate in some environments.
Research reliable water availability before leaving. Do not assume a stream or lake is safe to drink from. The CDC recommends treating water when its safety is uncertain. Boiling is highly effective for killing germs; properly selected filtration and disinfection methods can also be used depending on the hazard and equipment.
Warning: Never depend on an unverified spring, stream, or seasonal water source as your only drinking supply. Sources can dry up, freeze, become contaminated, or be inaccessible when conditions change.
Navigating Hiking Trails: Maps, Markers, and Signage
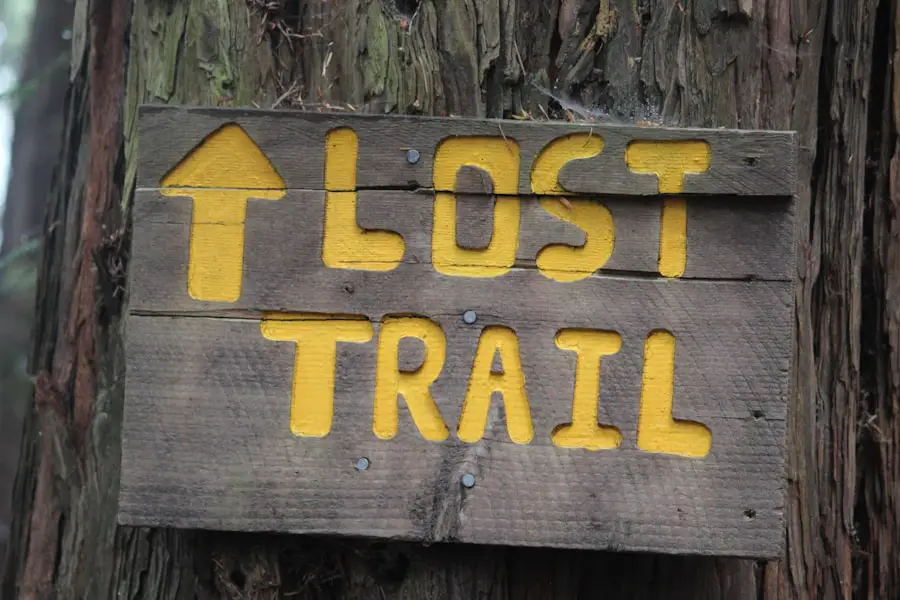
Good navigation starts before the hike. Review the route, major junctions, landmarks, elevation changes, water crossings, and bailout options. The U.S. Geological Survey provides current topographic map resources that show terrain with contour lines and can help hikers understand elevation and landforms.
Smartphone navigation can be useful, especially when maps are downloaded for offline use. However, batteries fail, phones break, cold weather reduces battery performance, and cellular service can disappear. Carry an independent backup appropriate to the route, such as a paper map and compass, and know how to use it.
Do Trail Blaze Colors Show Difficulty?
Not reliably. Trail blaze systems are local. A color may identify a particular route, a side trail, or the type of use permitted. For example, the Appalachian Trail uses white blazes for its main route and blue for many side trails, while other parks use entirely different color legends.
Read the map, trailhead sign, or official park description before interpreting any blaze color. If you have gone farther than expected without seeing the marker you were following, stop and confirm your location rather than continuing on the assumption that the trail must be ahead.
Weather, Closures, and When to Turn Around
Trail conditions can change quickly. Check weather forecasts, alerts, closures, fire restrictions, water availability, road access, and trail notices as close to departure as practical. Conditions at higher elevations can be very different from those at the trailhead or nearby town.
Thunderstorms and Lightning
The National Weather Service states that there is no safe place outdoors when thunderstorms are in the area. If you hear thunder, move toward a substantial enclosed building or hard-topped vehicle when one is accessible. Exposed peaks and ridges are especially poor places to be as a storm approaches.
Flash Floods
Rain does not have to fall directly on your location for water to rise downstream. The National Weather Service advises moving to higher ground when flooding threatens and never entering floodwater on foot or in a vehicle. This is especially important in canyons, washes, and routes with stream crossings.
Snow, Ice, Heat, and Mud
Snow and ice can turn an otherwise moderate trail into a serious route requiring traction, winter navigation, and additional clothing. Extreme heat can increase water needs and heat-illness risk. Wet or muddy trails can be slippery and vulnerable to damage; if use will widen the trail or destroy the tread, turn around and return when conditions improve.
Pro Tip: Set a turnaround time before leaving the trailhead. Turn back at that time even if the summit, waterfall, or viewpoint is still ahead. A destination is optional; getting back safely is not.
Staying Safe and Respecting Nature on the Trails
Tell a trusted person where you are going, which route you plan to use, who is with you, and when to expect you back. The NPS includes this step in its hiking-safety guidance because cell service is unreliable in many outdoor areas.
Stay with your group and let the slowest hiker set a sustainable pace. Watch your time and distance so that the return trip does not leave you hiking unexpectedly after dark. Be willing to change plans when someone is exhausted, injured, too hot, too cold, or uncomfortable with the terrain.
Respect wildlife by giving animals space, storing food correctly where required, and never approaching an animal for a photograph. Rules differ by destination, so follow posted wildlife-distance and food-storage requirements.
Follow Leave No Trace practices by traveling on durable surfaces, staying on designated trails where required, leaving natural and cultural objects where you find them, and carrying out your trash. Food scraps and other “biodegradable” litter should not be left behind simply because they may eventually decompose.
What to Do If You Get Lost
If you realize you are off route, stop before wandering farther. Take a breath and calmly assess your location. Check your map, compass, GPS, and visible landmarks. If you can safely identify where you made the wrong turn, retracing your steps may return you to the established route.
If you cannot determine a safe way back, seek help. The National Park Service advises lost visitors who need rescue to provide 911 with their location information, trail or starting area, visible landmarks, clothing, equipment, and relevant medical information. Once rescue is needed, staying put generally makes you easier to locate unless remaining there creates an immediate threat to life.
Warning: Do not keep moving simply because your phone’s map shows a road, trail, or straight-line shortcut nearby. Cliffs, rivers, private property, dense vegetation, or other hazards may lie between you and that point.
Trail Etiquette and Shared-Use Trails
Good trail etiquette reduces conflict and helps protect both people and the landscape. Follow posted right-of-way signs because individual parks can have specific rules.
As a general guideline, the National Park Service advises downhill hikers to yield to uphill hikers when it is safe to do so. Hikers should also yield to horses and other pack stock, while bicyclists generally yield to hikers and horses.
When approaching horses, stay calm, communicate with the rider, and avoid sudden movements. When passing another hiker from behind, announce yourself politely. Keep music and voices low enough that other visitors can enjoy the trail and you can still hear approaching users, wildlife, or changing weather.
Hiking With Pets and Accessibility Needs
Pet rules vary widely. Some parks allow dogs on many trails, others allow them only in developed areas, and leash rules differ. Check the specific destination before bringing a pet, carry water for the animal, and pack out pet waste as required.
For accessibility planning, a simple “easy” label may not provide enough information. Useful details include grade, cross-slope, trail width, surface material, steps, roots, rocks, bridge widths, obstacles, resting areas, and accessible parking or restrooms. The National Park Service increasingly publishes detailed accessibility information for individual trails, so review the destination’s current trail page when those details matter.
Finding and Joining Hiking Communities
Hiking communities can make it easier to discover routes, improve outdoor skills, and meet people with similar interests. Local hiking clubs often organize outings for different experience levels, while Meetup groups, social-media groups, trail associations, outdoor retailers, and conservation organizations may host group hikes, skills sessions, or volunteer events.
Organized hikes can be especially helpful for newer hikers because experienced members can demonstrate navigation, pacing, trail etiquette, layering, and safe decision-making in real conditions. Still, every participant should understand the route and carry appropriate personal gear rather than relying entirely on the group leader.
Trail-maintenance projects and clean-up events are another way to learn how trails are built and protected while contributing to the places you use.
If you’re looking for hiking trails, you may also be interested in finding the best travel pants with hidden pockets. These pants can provide useful storage for small essentials while traveling or walking outdoors. Check out this article on the best travel pants with hidden pockets for more information on staying organized during outdoor adventures.
Love travel? Join Our Facebook Community
Frequently Asked Questions
What are hiking trails?
Hiking trails are established routes used for walking through parks, forests, mountains, deserts, preserves, and other outdoor areas. They range from paved and accessible paths to steep, rugged backcountry routes.
How can I find hiking trails near me?
Start with official national, state, county, or city park websites and local land-management agencies. Trail apps, outdoor clubs, guidebooks, and visitor centers can help you discover routes, but confirm closures, permits, weather-related restrictions, and current conditions with the organization that manages the trail.
What should I consider when choosing a hiking trail?
Compare round-trip distance, elevation gain, grade, trail surface, exposure, altitude, weather, daylight, water availability, accessibility, current conditions, permit requirements, and the fitness and experience of everyone in your group.
What are some popular resources for finding hiking trails?
Official land-manager websites should be your primary source for regulations and current conditions. Commercial services such as AllTrails, Hiking Project, TrailLink, Gaia GPS, Komoot, and Outdooractive can also help with discovery and route planning. ViewRanger was formerly popular but its app and website were switched off in February 2022 and its services moved to Outdooractive.
How can I ensure my safety while hiking on trails?
Research the route, check weather and closures, carry the Ten Essentials, tell someone your itinerary and return time, stay on the correct trail, monitor your water and daylight, and turn around when conditions exceed your ability or equipment. Carry offline navigation and do not depend on cell service.
Do trail blaze colors tell you the difficulty?
Not universally. Blaze colors usually identify a trail, route, side trail, or permitted use according to a local system. Always read the official map or trailhead legend instead of assuming that a particular color means easy, moderate, or difficult.
How much water should I bring on a hike?
Water needs depend on heat, humidity, altitude, exertion, distance, body size, and reliable refill points. Hot desert hikes can require far more water than a cool, short walk. Plan for the specific route, carry a reserve, and treat natural water whenever its safety is uncertain.
What should I do if I get lost while hiking?
Stop, stay calm, and use your map, compass, GPS, and landmarks to identify your location. Safely retrace your route if you know where you went wrong. If you cannot safely self-rescue, call 911 when possible and provide your location and route information. Once rescue is needed, staying put usually makes you easier to find unless you face an immediate danger.
Sources
- National Park Service — Ten Essentials — hiking preparation, navigation, hydration, first aid, lighting, insulation, and emergency equipment.
- National Park Service — Hike Smart — route planning, current conditions, turnaround time, group pacing, and hiking safety.
- U.S. Geological Survey — Topographic Maps — topographic mapping and terrain-navigation resources.
- National Weather Service — Lightning Safety — thunderstorm and outdoor lightning guidance.
- Centers for Disease Control and Prevention — Water Treatment While Hiking and Camping — treatment of uncertain backcountry drinking water.
- Leave No Trace — Seven Principles — trail stewardship, waste disposal, durable surfaces, and wildlife protection.