Last Updated on September 10, 2026 by Daniel Globe
Keeping your hiking shoes clean is about more than appearance. Dirt, grit, mud, and moisture can affect the tread, wear down upper materials, hold moisture against the shoe, and shorten the life of your footwear. Regular cleaning also makes it easier to spot worn soles, damaged seams, and other problems before your next hike.
Quick Answer
To clean hiking shoes, remove the laces and insoles, knock and brush off loose dirt, then hand-clean the uppers and outsoles with lukewarm water and a footwear-safe cleaner. Rinse away residue and air-dry at room temperature away from direct heat. Reproof only when needed, using a treatment that matches the shoe material.
Cleaning matters because hiking shoes are designed to handle dirt, rocks, water, and rough terrain. Grit can work deeper into leather and fabric as the shoe flexes, while mud left on the outsole can fill tread channels and reduce the sole’s ability to make clean contact with the ground.
Moisture and dirt can also accelerate wear. Leather can become dry or stiff if it is repeatedly neglected, and damp interiors can develop odors or mold. Cleaning and fully drying your shoes after demanding trips helps preserve the materials and keeps them ready for your next outdoor adventure.
Key Takeaways
- Brush off mud, soil, and plant material after hikes instead of letting heavy dirt remain on the shoes.
- Remove laces and removable insoles before a deeper clean so the tongue, eyelets, lining, and footbed area can dry properly.
- Use lukewarm water, a soft brush, and a cleaner that is compatible with the shoe’s leather, textile, suede, nubuck, or waterproof membrane.
- Do not put the shoes themselves in a washing machine unless the shoe manufacturer explicitly says otherwise.
- Air-dry at room temperature and keep footwear away from radiators, fires, clothes dryers, and strong direct sunlight.
- Reapply a compatible water-repellent treatment when water stops beading on the outer material, following the treatment manufacturer’s directions.
At a Glance
| Time Required | About 15–30 minutes of active cleaning, plus several hours or overnight for air-drying; heavily saturated footwear can take longer |
| Difficulty | Easy |
| Tools Needed | Soft-bristled brush or old toothbrush, cloth or sponge, lukewarm water, footwear-safe cleaner, basin or bucket, absorbent paper, and towel |
| Cost | Minimal if you already have a brush and cloth; specialty footwear cleaner or reproofing treatment costs vary by brand and material |
Disclosure: As an Amazon Associate I earn from qualifying purchases. Some links on this page are affiliate links, at no extra cost to you.
Materials Needed for Cleaning Hiking Shoes
Gather everything before you start so you do not have to handle dirty shoes while searching for supplies. For most hiking shoes, you will need:
- A soft-bristled shoe brush, vegetable brush, or old toothbrush
- A clean cloth or sponge
- Lukewarm water
- A footwear-specific cleaner suitable for the shoe material
- A basin or bucket for water and for washing removable components
- A towel
- Plain absorbent paper or newspaper for drying, if permitted by the footwear manufacturer
- An optional material-compatible DWR or waterproofing treatment
A basin is useful for holding wash water and cleaning the laces or removable insoles, but avoid automatically submerging the entire shoe. Some leather, glued, or membrane-equipped footwear is better cleaned with running water, a damp cloth, and a brush rather than prolonged soaking.
Note: Check the footwear manufacturer’s care instructions before choosing a cleaner. GORE-TEX footwear care guidance permits lukewarm water with a small amount of liquid detergent for compatible footwear but advises against bleach and machine washing. Leather shoes may require different products.
Step 1: Removing the Laces and Insoles
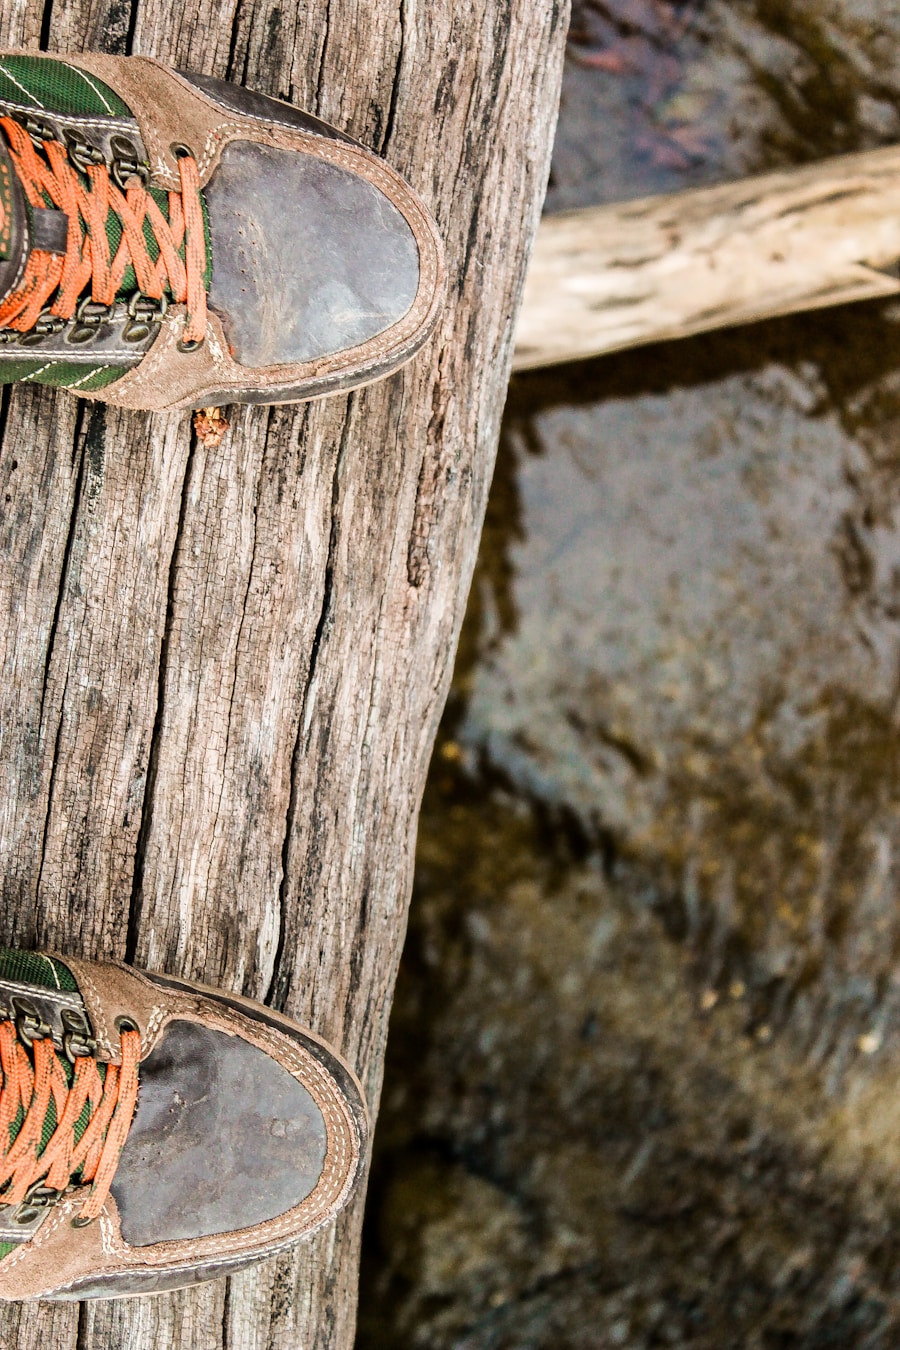
Start by completely removing the laces. This exposes the tongue, eyelets, and folds that can trap dust and mud, and it prevents the laces from tangling while you clean the shoe.
Next, remove the insoles or footbeds if they are designed to come out. Shake loose any sand, gravel, or debris from inside the shoes. Removable insoles also dry much faster outside the shoe, reducing the chance of lingering dampness and odor.
Inspect the laces and insoles while they are out. Replace badly frayed laces or insoles that are cracked, compressed, or no longer comfortable. Keep both components aside for separate cleaning in Step 4.
Step 2: Brushing Off Dirt and Debris
Before adding much water, use a soft brush to remove dry or loose dirt from the uppers, seams, tongue, eyelets, rand, and outsole. This keeps loose soil from turning into muddy slurry during washing.
Pay special attention to the tread. Brush the outsoles firmly and dislodge small stones that are wedged between the lugs. For stubborn, caked-on mud, you can briefly wet or soak just the outsole and then rinse it with running water.
Cleaning the tread also has an environmental benefit. USDA APHIS advises outdoor recreationists to brush dirt, seeds, and plant material from boots and other gear because soil and debris can carry weed seeds, plant diseases, and other pests between locations.
Clean tread protects more than your shoes: removing soil and seeds before leaving a recreation area can also reduce the spread of invasive pests to the next trail you visit.
Use an old toothbrush around narrow seams, lace hardware, and textured areas where a larger brush cannot reach. Once loose dirt is gone, the shoes are ready for washing.
Step 3: Cleaning the Exterior of the Shoes
Wet a soft brush, cloth, or sponge with lukewarm water and apply a small amount of footwear-compatible cleaner. Work over the upper with gentle pressure, paying extra attention to dried mud, stains, seams, and the area where the upper meets the sole.
Do not assume the same cleaner is suitable for every hiking shoe. Leather, textile, suede, nubuck, and waterproof-breathable membranes can require different care products. When the shoe manufacturer’s directions differ from generic cleaning advice, follow the manufacturer.
Warning: Do not put hiking shoes in a washing machine unless the footwear manufacturer specifically allows it. GORE-TEX, Salomon, REI, and Mammut all recommend hand-cleaning hiking footwear because machine washing can damage materials, shape, membranes, or bonded construction. Also avoid bleach and other harsh stain removers unless the manufacturer explicitly approves them.
How to Clean Different Hiking Shoe Materials
- Synthetic or mesh uppers: Use lukewarm water and a soft brush or sponge. A compatible footwear cleaner is the safest default. Rinse cleaner residue thoroughly.
- GORE-TEX or similar waterproof-membrane footwear: Follow the shoe maker’s instructions first. GORE-TEX recommends hand washing with lukewarm water and a small amount of liquid detergent when appropriate, and says not to use bleach or wash the shoes in a washing machine.
- Full-grain leather: Use a cleaner intended for leather. After cleaning, full-grain leather may also need a compatible conditioner if it looks dry or begins to crack. Avoid over-conditioning, which can make leather too soft.
- Suede or nubuck: Use products intended for rough leather. Full-grain leather conditioners can change the texture and appearance of suede or nubuck, so follow the footwear maker’s care directions.
After cleaning, wipe or rinse the shoes with clean water until visible cleaner residue is gone.
If you notice mold on a shoe that can tolerate the treatment, REI’s hiking-boot care guidance recommends a mixture of about 80% water and 20% vinegar. Apply it to the affected area and rinse thoroughly afterward. Check the shoe manufacturer’s instructions first when dealing with delicate leather, specialty finishes, or unusual materials.
Step 4: Cleaning the Insoles and Laces
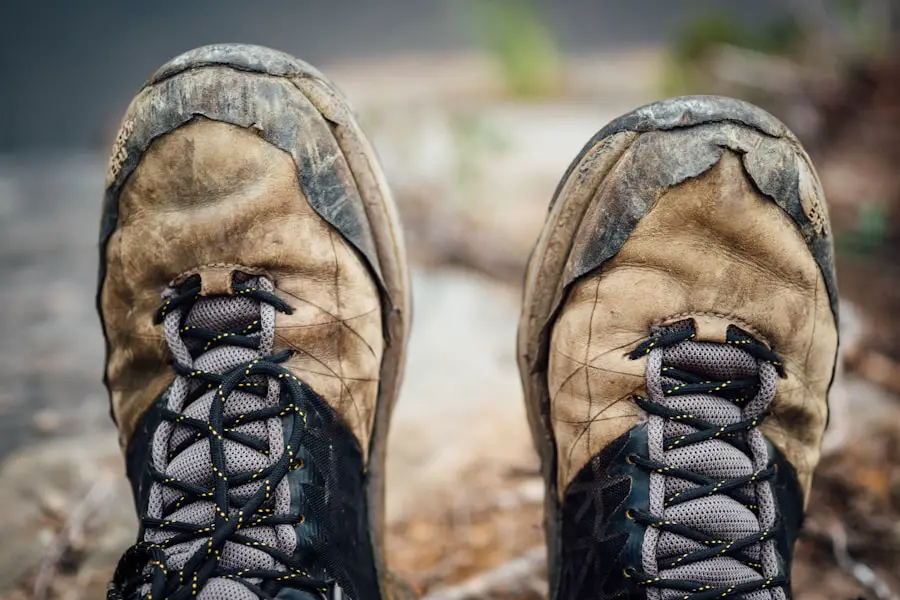
Clean removable insoles separately so sweat, dirt, and odor do not remain trapped inside otherwise clean shoes. The safest general method is to wash them gently by hand with lukewarm water and a small amount of compatible cleaner, then rinse them thoroughly.
Some footwear manufacturers allow certain removable sockliners or insoles to be machine washed, but that permission is not universal. Check the shoe or insole care instructions before using a washing machine.
Laces can be soaked briefly in lukewarm soapy water and rubbed between your fingers or cleaned gently with a small brush. If the lace manufacturer permits machine washing, a mesh laundry bag can keep them from tangling.
You can also wipe the inside lining with a damp cloth or gently clean it according to the shoe manufacturer’s instructions. Avoid leaving excess detergent inside because residue can irritate skin and attract more dirt.
Rinse the insoles and laces thoroughly and lay them flat or hang them in a ventilated place to air-dry. Do not reinstall the insoles until both the shoes and insoles are fully dry.
Step 5: Drying and Storing Your Hiking Shoes
Proper drying is as important as cleaning. Place the shoes in a well-ventilated area at normal room temperature. Avoid radiators, fireplaces, campfires, clothes dryers, heaters, and strong direct sunlight because excessive heat can age leather, distort components, or weaken adhesives.
Remove the insoles while drying. To speed up moisture removal, loosely stuff the shoes with clean absorbent paper or newspaper if the manufacturer’s instructions permit it. Replace damp paper as needed instead of packing it tightly enough to restrict airflow.
Depending on how wet the footwear became, drying can take several hours, overnight, or longer. Before storing the shoes, feel inside the toe area and beneath the tongue to make sure no hidden moisture remains.
Once dry, store hiking shoes in a cool, dry, ventilated area where temperatures remain fairly stable. Avoid attics, damp basements, garages, or hot car trunks for long-term storage.
Pro Tip: Reproof hiking shoes when water stops beading on the outer material rather than automatically treating them after every wash. Many treatments are designed for clean, damp footwear, but application varies by product and upper material. Follow the waterproofing product and shoe manufacturer’s instructions.
How Often Should You Clean and Reproof Hiking Shoes?
There is no single “twice per season” schedule that fits every hiker. Cleaning frequency should depend on where the shoes have been and how dirty or wet they became.
- After an ordinary dry hike: Knock out loose debris, brush the tread and uppers, remove plant material, and let the shoes air out.
- After a muddy or very wet hike: Remove mud promptly and give the shoes a more complete hand cleaning.
- After salty conditions: Rinse away salt or salty residue with fresh water because repeated salt exposure can be hard on footwear materials.
- When water stops beading: Clean the shoes and restore the outer water-repellent treatment with a product compatible with the shoe.
- Before long-term storage: Clean off dirt, make sure the shoes are completely dry, and store them somewhere cool and ventilated.
Mammut recommends removing dirt after outings, especially after wet, muddy, snowy, or salty conditions. Salomon likewise recommends routine dirt removal and cleaning whenever hiking footwear becomes muddy or visibly dirty.
Tips for Maintaining Your Hiking Shoes
Good maintenance between deep cleans can extend the useful life of hiking footwear and reduce the amount of scrubbing needed later.
- Dry shoes after every hike. Remove damp insoles and let the footwear air out before storage.
- Brush off dirt promptly. Dried mud and grit are easier to remove before they become packed into seams and tread.
- Inspect the outsole. Look for worn lugs, uneven wear, cracking, or areas where the outsole is beginning to separate from the upper.
- Check laces and eyelets. Replace frayed laces before they break on the trail and look for damaged hooks or eyelets.
- Use material-specific treatments. Leather conditioner, rough-leather treatments, and membrane-compatible DWR products are not interchangeable.
- Rotate footwear when practical. A second pair gives heavily damp shoes more time to dry completely before reuse.
- Consider replacement insoles for fit or support. Choose insoles that work with the volume and shape of your hiking shoes, and remove them for separate drying after wet hikes.
- Rinse after salt exposure. Fresh water helps remove salt picked up on coastal trails, winter roads, or other salty environments.
Full-grain leather deserves particular attention. REI’s leather boot guidance recommends conditioning full-grain leather when it becomes dry or cracked, while suede and nubuck generally require different care.
Common Hiking Shoe Cleaning Mistakes to Avoid
- Putting the shoes in a washing machine: Agitation can damage bonded construction, membranes, leather, and shape.
- Using bleach or aggressive stain removers: Strong chemicals can damage fabrics, finishes, leather, or waterproof membranes.
- Soaking the whole shoe unnecessarily: Hand cleaning is usually sufficient. Follow the manufacturer if a deeper rinse is needed.
- Using direct heat: Radiators, fires, heaters, dryers, and intense sun can damage footwear materials and adhesives.
- Using the wrong waterproofing product: A treatment made for full-grain leather may not be suitable for suede, nubuck, textiles, or a breathable membrane.
- Applying too much leather conditioner: Over-conditioning can soften supportive leather more than intended.
- Storing shoes while damp: Trapped moisture encourages odor and mold and can leave materials wet for long periods.
- Ignoring the tread: Mud, rocks, seeds, and soil lodged in the outsole affect cleanliness and can be transported to another trail.
Love travel? Join Our Facebook Community
Frequently Asked Questions
What are the benefits of cleaning hiking shoes?
Cleaning removes mud, grit, salt, and other debris that can remain in the tread or work into the upper as the shoe flexes. It also gives you a chance to inspect the sole, seams, laces, and upper for wear while reducing lingering moisture, odor, and dirt buildup.
How often should hiking shoes be cleaned?
Brush off loose soil, seeds, and mud after outings and let the shoes air out. Give them a deeper hand cleaning whenever they become muddy, heavily soiled, salty, or soaked rather than relying on a fixed number of cleanings per season.
What is the best way to clean hiking shoes?
Remove the laces and removable insoles, brush away loose dirt, then hand-clean the upper and outsole with a soft brush, lukewarm water, and a cleaner that is compatible with the shoe material. Rinse away residue and air-dry the shoes at room temperature away from direct heat.
Can hiking shoes be machine washed?
Generally, no. Major hiking-footwear and membrane manufacturers recommend hand-cleaning the shoes because machine washing can damage materials, adhesives, membranes, or shape. A manufacturer may permit machine washing for a removable sockliner or another component, so check the individual care instructions.
How can I remove odors from hiking shoes?
Remove and clean the insoles, wipe or clean the lining as directed by the manufacturer, and let everything dry completely in moving air. A footwear-compatible deodorizing spray can also help. If the shoe maker permits it, a small amount of baking soda may be used in completely dry shoes and shaken out afterward, but manufacturer-approved products are the safer choice for specialty linings and membranes.
Should hiking shoes be waterproofed after cleaning?
Not after every cleaning. Reproof when water no longer beads on the outer material or when the footwear manufacturer recommends treatment. Many waterproofing products are applied to clean, damp footwear, but application varies by material and product, so follow both the shoe and treatment instructions.
Can I use dish soap on hiking shoes?
Only when the footwear manufacturer allows it. Some care guides permit a small amount of mild liquid cleaner, while others warn that soaps and detergents with additives can harm leather or waterproof membranes. A footwear-specific cleaner matched to the upper material is the safest general choice.
How do I clean GORE-TEX hiking shoes?
Remove the laces and removable footbed, shake out loose debris, and hand-clean the shoes with a soft brush or sponge, lukewarm water, and a small amount of suitable liquid detergent according to the shoe manufacturer’s instructions. Do not use bleach or put GORE-TEX footwear in a washing machine, and dry it naturally away from direct heat.
Sources
- GORE-TEX — Footwear Care Instructions — removing laces and footbeds, hand washing, detergent restrictions, drying, and DWR care
- REI Co-op — How to Clean Hiking Boots — outsole cleaning, mold treatment, washing-machine warning, drying, and storage
- REI Co-op — How to Waterproof Hiking Boots — choosing a treatment, reproofing when water stops beading, and applying many treatments to clean, damp footwear
- REI Co-op — How to Treat & Care for Leather Boots — full-grain leather conditioning, rough-leather care, waterproofing, and storage
- Mammut — How to Clean Hiking Boots: Ultimate Care Guide — cleaning frequency, material-specific care, laces and insoles, drying, and storage
- USDA APHIS — Clean Outdoor Gear Before You Leave — removing soil, seeds, and plant material from boots to reduce the spread of invasive pests