
Last Updated on July 24, 2026 by Daniel Globe
Animated film techniques turn still drawings, models, or digital objects into believable motion. The process starts before you animate: you define the story, design the look, build a storyboard, and test timing in an animatic. You then create the movement with frame-by-frame drawing, rigs, stop motion, 3D animation, or a mix of methods before adding sound, compositing, and final edits.
Quick Answer
The main animated film techniques include frame-by-frame 2D animation, cutout or rigged 2D, rotoscoping, stop motion, 3D CGI, and motion graphics. Strong results depend on clear storyboards, readable key poses, controlled timing and spacing, consistent design, synchronized sound, careful compositing, and export settings chosen before production begins.
Key Takeaways
- Choose an animation method that fits the story, schedule, budget, and skills of your team.
- Test shots, dialogue, and pacing in an animatic before spending time on finished animation.
- Use key poses, breakdowns, in-betweens, timing, spacing, arcs, and follow-through to make movement readable.
- Record important dialogue early, organize files carefully, and review animation with sound at normal playback speed.
- Finish with compositing, color correction, audio mixing, captions when needed, and a delivery test on the target platform.
At a Glance
| Time Required | A few hours for a short test; several days to many months for a finished film |
| Difficulty | Beginner to advanced, depending on the method and project length |
| Tools Needed | Storyboard and animation software, a mouse or drawing tablet, headphones, storage, and optional camera, lights, microphone, or 3D tools |
| Cost | $0 with free software and existing hardware; more for paid apps, actors, equipment, storage, or rendering |
What Are Animated Film Techniques?
Animated film techniques are the creative and technical methods used to produce moving images from drawings, objects, photographs, text, or computer-generated models. They include pre-production planning, animation principles, camera and layout choices, asset creation, performance, sound, editing, compositing, and delivery.
The technique you choose affects the look, cost, speed, and flexibility of the film. A hand-drawn scene can show expressive line work, a cutout rig can reuse character parts efficiently, stop motion can provide real texture, and 3D CGI can support complex cameras, lighting, and reusable models.
Good animation is not defined by software alone. It depends on clear staging, controlled timing, consistent shapes, useful reference, and choices that support the story. The same principles can guide a pencil test, a puppet film, a 3D feature, or a short motion-graphics sequence.
Main Types of Animated Film Techniques
Most animated films use one technique or combine several. The following categories are broad, and studios may use different names for related workflows.
| Technique | How It Works | Best Fit | Main Tradeoff |
|---|---|---|---|
| Frame-by-frame 2D | You draw changing poses on separate frames. | Expressive acting, effects, and changing shapes | Requires many drawings and careful cleanup |
| Cutout or rigged 2D | You animate reusable character parts with pivots, deformers, or bones. | Series, explainers, and projects with repeated characters | Poor rigs can look stiff or mechanical |
| Rotoscoping | You trace or closely study live-action reference frame by frame. | Complex body motion and stylized realism | Literal tracing can feel flat without clear design choices |
| Stop motion | You move physical puppets, clay, paper, or objects a little between photographs. | Tactile texture and practical miniature worlds | Camera bumps, light flicker, and continuity errors are hard to repair |
| 3D CGI | You model, rig, animate, light, and render objects in a 3D scene. | Complex cameras, reusable assets, simulation, and depth | The setup, rendering, and technical pipeline can be demanding |
| Motion graphics | You animate text, icons, shapes, charts, and graphic layouts. | Titles, branding, data, interfaces, and explainers | Design hierarchy and easing must carry the message clearly |
Follow a Complete Animation Production Pipeline
A reliable pipeline reduces expensive changes late in production. Small teams may combine roles, but the main stages stay similar.
- Development: define the idea, audience, format, length, and delivery platform.
- Script and visual development: write the story, create character sheets, explore environments, and set a color direction.
- Storyboard and animatic: plan shots, camera angles, action, dialogue, and timing before final animation.
- Asset production: build clean character art, rigs, models, puppets, backgrounds, props, and textures.
- Animation: block key poses, add breakdowns and in-betweens, then refine acting and motion.
- Lighting and compositing: combine layers, effects, shadows, depth, and color into final shots.
- Sound and edit: align dialogue, Foley, music, and cuts with the finished picture.
- Quality control and delivery: check spelling, captions, audio peaks, missing frames, color, resolution, and playback on the target device.
Note: A short test shot can expose problems with the art style, rig, render time, or file format before those problems spread across the full film.
Learn Core Animation Principles First
The classic 12 principles give you a shared language for judging movement. Adobe’s certification guide lists them as squash and stretch, anticipation, staging, straight ahead action and pose to pose, follow-through and overlapping action, slow in and slow out, arcs, secondary action, timing, exaggeration, solid drawing, and appeal.
Timing controls how long an action takes. Spacing, which is closely related but is not a separate item in the classic list, controls how far the subject moves between frames. Together they create speed, weight, impact, and emotion.
Use squash and stretch to show force and flexibility while keeping the object’s overall volume believable. Use anticipation to prepare the audience for an action, such as a character leaning back before a jump. Use follow-through and overlapping action so hair, cloth, loose limbs, and props continue moving after the main body changes direction.
Strong animation does not make every part move at once. The main action leads, connected parts follow, and each movement settles at its own pace.
Straight ahead action means drawing or posing the movement in sequence, which can create energy and surprise. Pose to pose means planning the main poses first, which gives you stronger control over acting, timing, and structure. Many animators combine both methods.
The remaining principles support clarity and appeal. Staging directs attention, arcs keep movement natural, secondary action adds support without stealing focus, exaggeration strengthens the idea, solid drawing protects volume and balance, and appeal makes the design interesting to watch.
Plan Your Storyboard and Animatic
A storyboard is a sequence of panels that plans the shots. An animatic is a timed edit of those panels, often with temporary dialogue, sound effects, or music. Adobe’s official guides explain that storyboards help plan composition and transitions, while an animatic turns the storyboard into a timed preview.
Do not treat storyboard panels as animation keyframes. A storyboard plans the film’s shots and story flow. Animation keyframes define important poses or values inside a shot. The two can overlap visually, but they serve different production jobs.
Storyboard Panels and Shot Planning
Draw the important story beats first. Show where characters stand, what the audience should notice, and how one shot connects to the next. Add shot numbers, dialogue, action notes, camera moves, and rough duration.
Use clear silhouettes rather than polished drawings. The board should answer practical questions: Where is the camera? Who is speaking? What changes in the shot? Why does the cut happen here? Does the scene move the story forward?
Model sheets, prop sheets, scale charts, and color scripts can help the team keep characters and locations consistent across many shots.
Animatic Timing
Place the storyboard panels on a timeline and set rough durations. Add temporary dialogue and key sound cues, then watch the complete sequence without stopping.
- Check whether the story is understandable without an explanation.
- Shorten pauses that feel empty and lengthen moments that need time to register.
- Test camera moves, transitions, dialogue timing, and major actions.
- Revise the animatic until the team agrees on the shot order and approximate length.
The animatic becomes the timing reference for voice recording, layout, animation, editing, and sound. Changes are much cheaper here than after cleanup, rendering, or compositing.
Set Project Settings Before Animation
Choose the frame rate, resolution, aspect ratio, color settings, and delivery format before you animate. Adobe notes that a document uses one frame rate and recommends setting it before production begins. The total frame count and playback rate determine the film’s duration.
Warning: Changing the frame rate after animation has started can shift timing, lip sync, camera moves, effects, and sound cues. Confirm the delivery requirements first, then lock the project settings.
Create a folder structure for boards, audio, assets, scenes, renders, and exports. Use clear names such as scene-shot-version, and save numbered versions instead of overwriting the only working file.
Use an Exposure Sheet or Timeline
An exposure sheet, often called an Xsheet, records which drawing appears on each frame and can also organize layers, dialogue, timing notes, and camera information. Toon Boom’s current documentation describes planning a scene’s exposure in the Xsheet before creating all drawings.
For a small project, a software timeline may be enough. For dialogue-heavy or hand-drawn work, an Xsheet can make holds, substitutions, lip-sync drawings, and layer timing easier to track.
Choose the Right 2D Animation Method
Two common 2D approaches are frame-by-frame animation and keyframe-based animation. Frame-by-frame work changes the drawing across separate frames. Keyframe-based work changes selected properties, such as position, rotation, scale, or deformation, between set points on a timeline.
You can also use cutout rigs, motion tweens, shape interpolation, or a hybrid workflow. Choose based on the kind of movement you need rather than the tool that appears fastest.
Drawn Frame Workflow
Start with rough key poses that show the action clearly. Add breakdowns to define the path, balance, and change of shape between the keys. Then add in-betweens, cleanup, and color.
- Block the major poses: make each silhouette readable and connect it to a clear story beat.
- Add breakdowns: decide how the body turns, bends, follows an arc, and transfers weight.
- Fill the in-betweens: control speed and easing through spacing rather than adding frames at random.
- Clean and check volume: keep proportions, costume details, and line quality consistent.
- Test at normal speed: judge the movement in context instead of studying only single frames.
Onion skinning can display nearby frames as a drawing reference. It helps with spacing and continuity, but too many visible frames can make the screen difficult to read.
Software and Style Choices
Match the software to the animation method, output, and team. Clip Studio Paint supports drawing-focused features such as a light table, onion skinning, audio tracks, camera movement, and image-sequence export. Its official animation pages explain these frame-by-frame and timeline tools.
For cutout animation, check the quality of bones, deformers, reusable symbols, lip-sync tools, and scene management. For motion graphics, check text controls, easing graphs, masks, expressions, and compositing. For collaborative work, check file exchange, version compatibility, asset relinking, and render options.
Your visual style also changes the workload. Detailed line art, textured backgrounds, complex shadows, and frequent camera moves require more cleanup and compositing than a limited-palette design with simple shapes.
Master Timing, Spacing, and Motion
Timing tells the audience how long an action takes. Spacing tells them how speed changes within that action. Close spacing creates slower movement, while larger gaps create faster movement.
Plan the action with thumbnails or a rough exposure sheet. Mark the key poses, breakdowns, holds, contacts, and direction changes. Then test the shot at normal speed and adjust the spacing until the movement reads clearly.
- Find the story beat: decide what the audience must feel or understand.
- Place the key poses: define the start, main change, and result.
- Control acceleration: use gradual spacing for slow-in and slow-out, or sharper changes for impact.
- Add overlap: offset connected parts so the motion does not start and stop as one solid block.
- Review the arc: track hands, feet, heads, props, and camera paths for unwanted bumps.
Do not make every action smooth. A sudden stop, stepped movement, long hold, or uneven rhythm may be right for comedy, fear, power, or a graphic style. The motion should serve the scene rather than follow one preset.
Animate Characters With Clean Key Poses
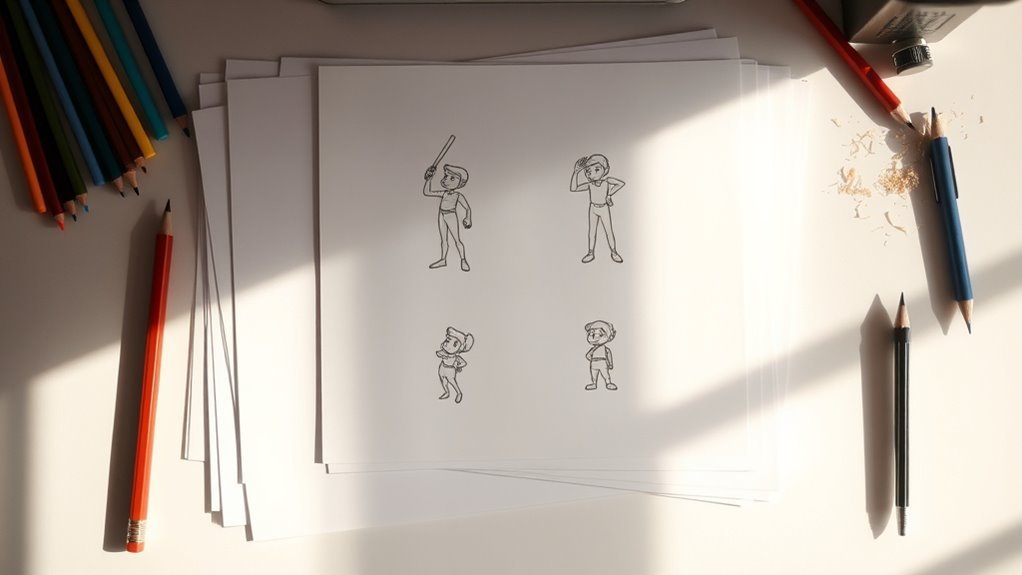
Key poses carry the action, attitude, and emotion of a character. A strong pose should read quickly, even as a small silhouette or without dialogue.
Before adding detail, check the line of action, balance, weight, eye direction, hand shape, and negative space between the limbs. Avoid tangents that merge body parts with each other or with the background.
Strong Key Poses
- Define the purpose: identify what the character wants and what changes in the moment.
- Push the silhouette: separate important shapes and make the direction of the pose clear.
- Show weight: place the center of gravity over the supporting foot or object unless the character is falling.
- Use contrast: vary straight and curved lines, open and closed shapes, and large and small actions.
- Refine only after it reads: details cannot rescue a weak pose.
Compare consecutive keys. If they have nearly the same silhouette, angle, and energy, the performance may feel flat even when the drawings are polished.
Clean Pose Timing
Place each pose on a meaningful beat. A reaction may need a brief hold before it lands. A fast action may need fewer drawings but stronger spacing. A heavy action often needs more anticipation, a slower change of direction, and a longer settle.
Use breakdown poses to explain how the character travels between keys. Track head direction, eye focus, hand paths, foot contacts, and the relationship between the hips and shoulders. These details prevent pops and make the performance feel intentional.
For dialogue, record or approve the voice track before final lip sync. Mark important sounds, mouth shapes, breaths, pauses, and emotional changes. Do not animate only the mouth. The eyes, brows, head, hands, and posture should support the line.
Pro Tip: Flip between the current key pose and the previous one. If the action is unclear in those two images, adding more in-betweens will usually make the problem harder to see rather than solve it.
Design Backgrounds for Each Scene
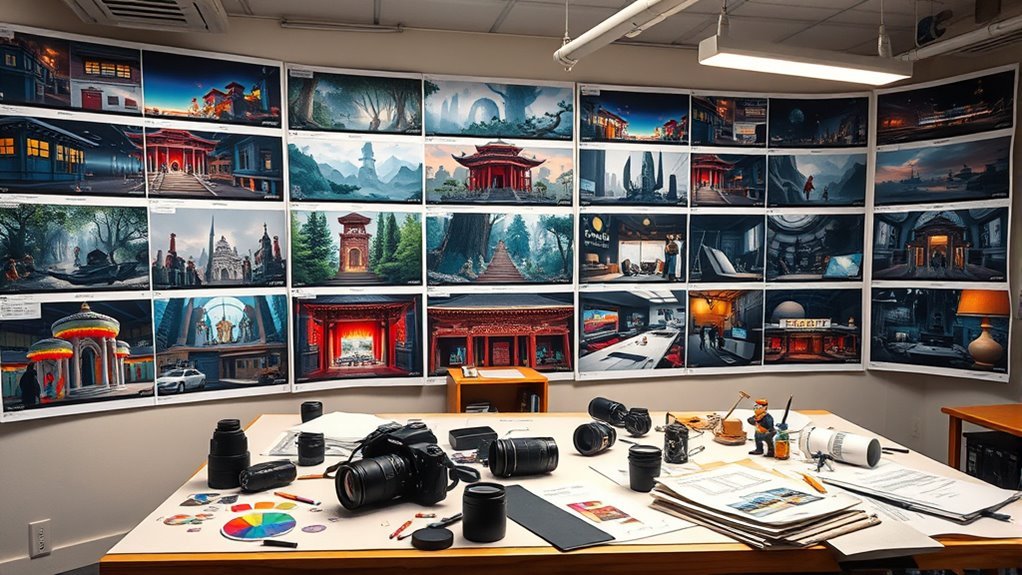
Backgrounds establish place, scale, depth, time, and mood. They should support the action without competing with the character.
- Keep a unified palette: use color scripts or approved swatches to maintain continuity between shots.
- Control detail: simplify busy areas behind faces, hands, text, or fast movement.
- Use clear perspective: keep horizon lines, scale, and camera height consistent with the layout.
- Plan depth: separate foreground, middle ground, and background when parallax or camera movement is needed.
- Design for compositing: provide clean layers for shadows, effects, atmosphere, and color adjustments.
Study real locations, architecture, lighting, and materials, then adapt them to the film’s visual language. Reference improves credibility, but the final design should still guide the audience’s eye toward the story.
Add Sound Effects and Music
Sound gives animation scale, texture, rhythm, and emotional direction. Build the soundtrack from dialogue, Foley, designed effects, ambience, and music.
Record important dialogue early enough to guide acting and lip sync. Temporary voice tracks can work during the animatic, but final performance changes may require animation revisions. Keep each speaker on a clean track when possible, reduce room noise, and record a few seconds of room tone.
Foley is performed sound that matches visible action, such as footsteps, cloth movement, or handling a prop. Designed effects can make actions feel larger, stranger, or more stylized than a literal recording.
A sound should not be added only because an object moves. Add it when it clarifies the action, strengthens the rhythm, builds the world, or directs attention.
Synchronize important contacts closely, but avoid filling every frame with noise. Silence can create contrast and focus. Mix dialogue so it remains clear over music and effects, then test the final audio on headphones, speakers, and a small mobile device.
Use music, recordings, fonts, reference footage, and sound effects only when you created them or have permission under a suitable license. Keep license records with the project files.
Work With Stop Motion and 3D Animation
Stop-Motion Production
Lock the camera, focus, exposure, white balance, and lights before shooting. Mark the puppet’s feet, camera position, and moving props when those marks will stay outside the frame. Use a remote trigger or capture software to reduce camera movement.
Plan replacement faces, hand shapes, mouth pieces, and fragile parts before the shot. Review a few captured frames often, because a bumped light, drifting puppet, or forgotten prop can ruin a long take. Remove support rigs in compositing only when you have clean background plates or enough image information to rebuild the area.
3D CGI Production
A typical 3D pipeline includes modeling, topology, texturing, rigging, layout, animation, simulation, lighting, rendering, and compositing. Animators often block the main poses with stepped keys, approve the timing, then refine curves and add overlap.
Rig controls should be tested before many shots depend on them. Check joint limits, deformation, facial shapes, scale, and export compatibility. Blender’s Grease Pencil also supports frame-by-frame 2D drawing inside a 3D environment, which can help with hybrid layouts and cameras.
Render short tests before final delivery. Confirm motion blur, transparency, color, shadows, noise, and render time. For long or complex shots, image sequences are safer than rendering directly to one video file because a failed frame can be replaced without restarting the whole sequence.
Troubleshoot Common Animation Problems
- The motion feels floaty: strengthen contact poses, shorten weak transitions, vary spacing, and show clearer weight transfer.
- The character changes size: use model sheets, construction guides, comparison overlays, and fixed landmarks.
- The action pops: check the arc, rotation, screen position, and drawing order between the two frames around the pop.
- The pose feels dead: improve the line of action, asymmetry, eye direction, hand shape, and contrast with the previous pose.
- The camera move feels rough: inspect the motion path and easing, then remove unintended direction changes.
- Lip sync feels late: check the audio offset and place readable mouth changes around the important sounds rather than changing the mouth on every letter.
- Stop motion flickers: lock exposure and white balance, block changing daylight, secure the set, and avoid touching lights between frames.
- The final export looks different: compare resolution, frame rate, color profile, alpha settings, codec, and player behavior with the approved master.
Finish Your Animation in Post-Production
Post-production combines the approved shots into a finished film. The main tasks include editing, compositing, visual effects, color correction, titles, captions, audio mixing, and export.
- Edit for rhythm: trim shots against the animatic and adjust only where the finished performance needs more or less time.
- Composite the image: combine characters, backgrounds, shadows, effects, depth, and camera treatments.
- Check continuity: compare character size, screen direction, lighting, props, color, and audio between cuts.
- Mix the sound: balance dialogue, Foley, effects, ambience, and music without clipping or masking important speech.
- Add delivery elements: include titles, credits, captions, legal notices, and required logos.
- Export and test: create the master, review the complete file, and test the platform copy after upload or conversion.
Keep a high-quality master and separate delivery files. When the software allows it, export a numbered image sequence for high-value renders and assemble it in the editing or compositing stage. Adobe Animate, for example, supports image-sequence and video export options.
Pick the Right Animation Software
The best animation software is the one that supports your method, hardware, team, and delivery needs. Try a short test scene before moving a full project into a new app.
| Software | Good For | Current Consideration |
|---|---|---|
| Pencil2D | Simple hand-drawn raster and vector animation | Free, open source, and available for Windows, macOS, Linux, and FreeBSD |
| Clip Studio Paint | Drawing-focused 2D animation, cleanup, and painting | Check the PRO and EX animation limits, license type, and supported device before purchase |
| Adobe Animate | Vector animation, symbols, tweens, and interactive or web-oriented assets | Adobe says Animate remains available but is in maintenance mode, with security and bug fixes but no planned new features |
| Blender Grease Pencil | 2D drawing in 3D space, hybrid cameras, and full 3D production | Free and open source, but the broad interface takes time to learn |
| Toon Boom Harmony | Hand-drawn, cutout, rigged, and studio pipeline work | Professional scene, Xsheet, rigging, and compositing tools with paid editions |
Pencil2D’s official site describes it as free, open-source, and cross-platform. Adobe’s current support notice says Adobe Animate is in maintenance mode but remains available to new and existing users.
Before you commit, test drawing response, playback, audio import, camera tools, rigging, file recovery, export formats, color management, and compatibility with the rest of your pipeline. Community tutorials are useful, but official documentation should be your first source for version-specific limits and features.
Frequently Asked Questions
What are the 12 principles of animation?
They are squash and stretch, anticipation, staging, straight ahead action and pose to pose, follow-through and overlapping action, slow in and slow out, arcs, secondary action, timing, exaggeration, solid drawing, and appeal. Spacing is also essential, but it is usually taught as part of timing rather than as a separate item in the classic list.
What are four basic animation techniques?
There is no single universal list of four. A useful beginner grouping is frame-by-frame 2D animation, cutout or rigged 2D animation, stop motion, and 3D CGI. Rotoscoping and motion graphics are also major techniques, and many films combine several methods.
What is the difference between a storyboard and an animatic?
A storyboard is a sequence of panels that plans shots and story beats. An animatic places those panels on a timeline with rough durations and often includes temporary dialogue, sound effects, or music. The animatic tests pacing before full animation begins.
What is the difference between keyframes and in-betweens?
Keyframes show the important poses or values that define an action. Breakdowns explain how the subject moves between those keys. In-betweens fill the remaining gaps and control the smoothness and spacing of the motion.
Should you animate on ones or twos?
Animating on ones uses a new drawing every frame, while animating on twos holds each drawing for two frames. Twos can reduce drawing work and suit many styles. Ones help with very fast action, camera movement, or motion that needs finer spacing. You can mix both within the same shot.
Which animation software is best for beginners?
Pencil2D is a simple free choice for hand-drawn practice. Clip Studio Paint suits artists who want strong drawing tools, while Blender offers free 2D and 3D options with a steeper learning curve. The best choice depends on whether you want frame-by-frame drawing, rigs, stop motion, motion graphics, or 3D CGI.
Conclusion
Animated film techniques work best when every choice supports the story. Plan the shots, test timing in an animatic, build readable key poses, and choose a method that fits the design and schedule. Then refine motion, backgrounds, sound, compositing, and delivery as one connected process.
You do not need the most expensive software to learn animation. A short, well-planned scene can teach timing, spacing, acting, sound, and editing more clearly than a long project that never reaches a final export. Start small, review the result at normal speed, and improve one production problem at a time.
Sources
- Adobe Certified Professional: Animate – lists the classic 12 principles of animation.
- Adobe: What Are Animatics? – supports the storyboard-to-animatic workflow.
- Toon Boom Harmony 25 Documentation – explains planning drawing exposure with an Xsheet.
- Clip Studio Paint Animation Tools – documents its drawing, timeline, audio, camera, and export features.
- Adobe Animate Maintenance Mode FAQ – confirms current support and feature-development status.
- Pencil2D Official Site – confirms its free, open-source, cross-platform availability.
