
Last Updated on July 27, 2026 by Daniel Globe
Choosing the right hiking backpack size is about two separate things: capacity and fit. Capacity tells you how much gear the pack can hold, while fit determines how comfortably that load sits on your torso and hips. A pack that is too large can encourage overpacking and feel unstable when partly empty. A pack that is too small can force you to leave behind clothing, food, water, or safety gear you may need.
The best hiking backpack is therefore not simply the biggest pack you can carry. It should have enough room for your actual trip while matching your torso length, hip size, expected load, weather, and gear bulk. A properly fitted pack also stays closer to your body, reduces unwanted movement, and lets the hipbelt support most of the load instead of leaving your shoulders to do all the work.
Quick Answer
For most hikers, start with about 20–35 liters for a typical day hike, 30–50 liters for a 1–3-night trip, 50–80 liters for 3–5 nights, and 70 liters or more for longer trips. Then choose the manufacturer size that matches your torso length and hip measurement.
Key Takeaways
- Choose backpack capacity by the gear you need to carry, not by trip length alone.
- Torso length—not your overall height—is the main measurement used to choose a backpack’s body size.
- A supportive hipbelt should sit over the top of your hip bones and carry most of the load on a backpacking pack.
- Test a pack with realistic weight before deciding that the fit is right.
- Pack dense, heavy items in the core close to your spine rather than automatically putting them at the bottom.
At a Glance
| Time Required | About 15–30 minutes to measure, load, adjust, and compare a pack |
| Difficulty | Easy |
| Tools Needed | Flexible measuring tape, a helper or mirror, and a realistic test load |
| Cost | $0 to measure and test the fit; backpack prices vary widely by capacity and features |
Disclosure: As an Amazon Associate I earn from qualifying purchases. Some links on this page are affiliate links, at no extra cost to you.
What Size Hiking Backpack Do You Need?
The first decision is capacity, normally measured in liters. Trip duration matters because longer trips usually require more food and equipment, but it is only a starting point. Your sleeping system, weather, water availability, bear-storage requirements, clothing, children’s gear, camera equipment, and preference for lightweight or traditional gear can all change the volume you need.
REI’s current daypack guidance identifies 21–35 liters as a common sweet spot for hiking daypacks, while smaller packs can work for short outings and larger daypacks can make sense when extra clothing or equipment is required. For backpacking, REI gives broader capacity ranges based on nights away.
| Pack Category | Typical Capacity | Typical Use | What to Know |
|---|---|---|---|
| Small daypack | About 10–20 L | Short, light day hikes | Best when your clothing, water and safety gear are compact. |
| Standard hiking daypack | About 20–35 L | Most full-day hikes | Allows more room for layers, food, water and emergency supplies. |
| Weekend backpack | About 30–50 L | 1–3 nights | Works best with reasonably compact sleeping and cooking gear. |
| Multiday backpack | About 50–80 L | 3–5 nights | Useful when carrying more food, clothing or shared equipment. |
| Extended-trip backpack | 70+ L | 5+ nights or bulky winter loads | Often needed when insulation, food or specialized equipment takes up significant space. |
These ranges are guidelines rather than rules. A lightweight backpacker with compact gear may use less volume, while a winter hiker or parent carrying equipment for children may need considerably more. The best method is to lay out the actual gear you plan to carry before choosing a capacity.
Warning: Do not choose a smaller pack by leaving essential safety gear behind. The National Park Service Ten Essentials include navigation, sun protection, insulation, illumination, first aid, fire, repair supplies, food, hydration and emergency shelter. Conditions and your specific trip may require additional equipment.
Capacity and Backpack Fit Size Are Not the Same Thing
A common source of confusion is the word “size.” A 50-liter pack describes storage capacity. A label such as Small, Medium or Large may describe the torso range that the suspension is designed to fit. Two people can therefore use the same 50-liter backpack but need different torso-size versions of that model.
Manufacturers do not use one universal Small/Medium/Large measurement system. Always compare your torso length and hip measurement with the size chart for the exact backpack model you are considering.
Finding the Right Fit for Your Body Type
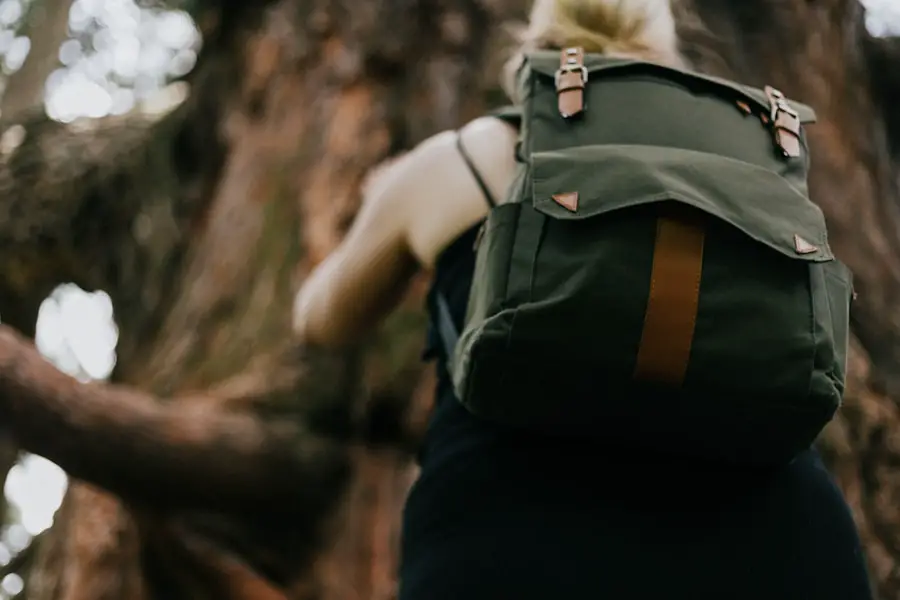
Finding the right fit starts with your torso length rather than your overall height. According to REI’s backpack fitting guide, torso length is measured from the C7 vertebra at the base of the neck to the level of the iliac crest at the top of your hip bones.
1. Find Your C7 Vertebra
Tilt your head forward. Feel for the prominent bony bump where your neck meets the slope of your shoulders. That is the C7 vertebra and the top point of the torso measurement.
2. Find the Top of Your Hip Bones
Place your hands on the upper edges of your hip bones, also called the iliac crest. Point your thumbs toward your spine. Imagine a horizontal line connecting your thumbs across your lower back.
3. Measure Your Torso Length
Stand naturally and have another person measure from the C7 vertebra straight down along your back to the imaginary line between your thumbs. Compare that number with the torso range published for the exact pack and size you are considering.
4. Measure Your Hips
Wrap a flexible tape around the top of your hips at the iliac crest. This is normally a little higher than the waistband of your pants, so your backpack hip measurement may not match your pants size.
Pro Tip: If your torso measurement falls between two sizes, try both with weight inside. Manufacturer size charts are the starting point; the shape of your shoulders, hips and back also affects how a pack feels.
How to Check Backpack Fit Before Buying
A backpack can match your measurements on paper and still feel wrong once loaded. Whenever possible, test it with realistic weight instead of trying on an empty pack. Osprey’s current fitting instructions recommend loading a pack with roughly 10–20 pounds before adjusting it.
- Loosen the straps first. Loosen the hipbelt, shoulder harness, sternum strap and load lifters before putting on the pack.
- Position the hipbelt. Center the padded hipbelt over the top of your hip bones and tighten it until snug without painful pinching.
- Tighten the shoulder straps. Pull them down and back until they follow the shape of your shoulders without digging in.
- Set the load lifters. On packs that have them, tighten them enough to bring the upper pack closer to your body without pulling the shoulder straps away from your shoulders.
- Adjust the sternum strap. Fasten it across your chest to stabilize the shoulder straps. It should not restrict breathing.
- Move around. Walk, bend, climb stairs if available, and check for slipping, pinching, pressure points or excessive pack movement.
The number printed on the pack tells you its capacity. Your torso and hip measurements tell you whether that pack can fit your body.
Signs the Backpack May Be Too Long
- The shoulder straps leave a noticeable gap above your shoulders.
- The hipbelt wants to sit below the top of your hip bones.
- You cannot achieve a secure fit even after adjusting an adjustable torso system.
Signs the Backpack May Be Too Short
- The shoulder straps wrap unusually far down your back before attaching to the pack.
- The hipbelt rides too high when the shoulder harness sits correctly.
- The pack feels as though it is hanging mainly from your shoulders instead of transferring most of the load through the hipbelt.
How to Pack Efficiently with the Perfect Size Backpack
Packing efficiently complements good backpack sizing. Once you have a pack that fits your torso and has enough capacity, organize the load so the pack stays balanced and the items you need during the day remain easy to reach.
Bottom Zone: Bulky, Lightweight Gear
Put bulky items that you normally will not need until camp near the bottom. Depending on your setup, this may include a sleeping bag, sleep clothing or other soft, compressible equipment.
Core Zone: Dense and Heavy Gear
Place heavier, denser items in the middle or core of the pack, close to your spine. Examples can include food, a cook kit, a stove or a bear canister. This positioning creates a more stable center of gravity than putting the heaviest equipment at the very bottom.
If you use a hydration reservoir, fill it and put it into its sleeve while the pack is still mostly empty. Sliding a full reservoir into a tightly packed backpack later can be difficult.
Top and Exterior Pockets: Items You Need Quickly
Keep frequently used items where you can reach them without unpacking everything. A rain jacket, insulating layer, first-aid kit or water filter may belong near the top, while snacks, sunscreen, navigation tools and water bottles can go in suitable exterior pockets.
REI’s backpack loading guidance follows the same basic bottom, core and top-zone approach.
Note: Packing cubes and compression sacks can help organize clothing and soft gear, but compression does not make heavy equipment lighter. Keep the final load centered and avoid hard or sharp objects pressing directly against your back.
Features to Consider in Addition to Backpack Size
Capacity and torso fit should come first, but features affect how useful the backpack will be on the trail. Consider:
- Frame and suspension: A supportive frame can improve load transfer when you carry heavier equipment.
- Hipbelt: Look for padding and enough adjustment range to wrap securely around your hips.
- Ventilation: Suspended mesh or ventilated back panels can improve airflow in warm weather.
- Hydration compatibility: A reservoir sleeve and hose routing may be useful if you prefer a hydration bladder.
- Pockets: Hipbelt, side and front pockets make frequently used items easier to reach.
- Compression straps: These can help stabilize a partly filled pack and keep the load closer to your body.
- Attachment points: Trekking pole loops, ice-axe attachments or external straps may matter for specialized trips.
- Weather protection: Check the fabric, zipper construction and whether the pack includes or accepts a rain cover. Water-resistant materials are not necessarily waterproof.
Benefits of a Properly Sized Hiking Backpack
A properly sized backpack is easier to stabilize because the suspension can sit where it was designed to sit. On a supportive hiking or backpacking pack, the hipbelt can transfer much of the load to the pelvis while the shoulder straps keep the pack close to your body.
That does not guarantee perfect posture or eliminate fatigue, but it can reduce pressure points and unnecessary pack movement. A secure load is especially useful on uneven trails, where a backpack that swings away from your body can make movement feel less controlled.
Choosing enough capacity also makes it easier to carry clothing, food, water and emergency equipment without hanging excessive loose gear from the outside of the pack.
Common Mistakes to Avoid When Selecting a Hiking Backpack Size
Choosing Capacity Before Checking Fit
A large backpack may offer plenty of storage, but that does not help if its torso length or hipbelt does not fit. Prioritize a compatible suspension size first, then select the capacity needed for your trips.
Buying a Bigger Pack “Just in Case”
Extra space can encourage you to carry equipment you do not need. A lightly filled oversized pack can also feel floppy unless its compression system controls the load well.
Choosing a Pack That Is Too Small
The opposite mistake is squeezing essential equipment into a pack simply because you want a lower capacity. Take an inventory that includes food, water, clothing layers, navigation, first aid and emergency equipment before deciding how many liters you need.
Using Height Instead of Torso Length
Two people of the same height can have different torso lengths. Use the pack manufacturer’s torso chart rather than assuming a Medium or Large based on your shirt size or height.
Trying On an Empty Backpack
An empty pack can hide fit problems. Add a realistic load and move around before you commit to the fit.
Tips for Adjusting and Customizing the Fit of Your Backpack
Most modern hiking and backpacking packs provide several adjustment points. Start with the torso adjustment if the pack has an adjustable suspension. Strap adjustments cannot fully compensate for a torso setting that is fundamentally too long or too short.
Next, position and tighten the hipbelt so its padding wraps securely over the top of your hip bones. The hipbelt should be snug but should not pinch painfully. Tighten the shoulder straps until they follow your shoulders naturally without carrying the entire load.
Finally, use the load-lifter straps, if fitted, to bring the upper pack closer to your body, and adjust the sternum strap so the shoulder straps remain stable without restricting your chest.
Small adjustments during the hike are normal. Loosening or tightening different straps can shift pressure as terrain and comfort change.
Do Men’s and Women’s Hiking Backpacks Fit Differently?
Many brands sell women’s-specific, men’s-specific, unisex and extended-fit backpacks. Women’s-specific models often use shorter torso ranges, narrower or differently shaped shoulder harnesses, and hipbelts shaped for different body proportions. Osprey and Deuter both describe these kinds of design differences in their current fit guidance.
However, the label is less important than the fit. A person should choose whichever torso length, harness shape and hipbelt feel best on their body. Some manufacturers also offer interchangeable hipbelts, adjustable torso systems or extended-fit versions for a wider range of body shapes.
For manufacturer-specific details, see the Osprey pack fitting guide.
Where to Find the Best Selection of Hiking Backpacks
Outdoor specialty retailers can be useful because you can compare several torso sizes and load the packs before buying. REI and Bass Pro Shops are examples of stores where backpack selections and fitting help may be available, depending on the location.
Online retailers such as Amazon and Backcountry provide a much larger range of models, but online shopping makes careful measurement more important. Check the manufacturer’s torso and hipbelt chart for the exact model instead of assuming that a Medium in one brand will fit like a Medium in another. Also review the seller’s return policy before buying a pack you have not tried on.
Whenever practical, test the pack with the weight and gear you expect to carry. A backpack that feels comfortable for two minutes while empty may feel very different after it is loaded.
If you’re preparing other gear for an outdoor trip, you may also be interested in this guide to the best travel fishing pole. A compact setup can be easier to carry when you are already managing hiking equipment.
Love travel? Join Our Facebook Community For More Tips.
Frequently Asked Questions
What is the ideal size for a hiking backpack?
For a typical day hike, about 20–35 liters works well for many hikers. A 1–3-night trip often calls for roughly 30–50 liters, while 3–5 nights commonly requires 50–80 liters. Trips of five nights or more may require 70 liters or more. Your gear bulk, season, food, water and safety requirements can change these ranges.
How do I determine the right size for a hiking backpack?
Choose capacity based on what you need to carry, then measure your torso from the C7 vertebra at the base of your neck to the level of the iliac crest at the top of your hips. Measure your hip circumference at the iliac crest as well, and compare both measurements with the manufacturer’s size chart.
What features should I look for in a hiking backpack?
Useful features can include an adjustable suspension, supportive hipbelt, comfortable shoulder harness, compression straps, accessible pockets, hydration-reservoir compatibility, ventilation and suitable attachment points. The best feature set depends on the load and activity rather than on having the greatest number of pockets.
Can I use a regular backpack for hiking?
A regular backpack can work for a short, light hike when it comfortably holds the equipment you need. For heavier loads or longer trips, a hiking or backpacking pack with a supportive hipbelt, suitable suspension and trail-oriented storage usually provides better load control.
Are there different sizes of hiking backpacks for men and women?
Yes. Some manufacturers offer women’s-specific, men’s-specific, unisex and extended-fit versions. Women’s-specific models may use shorter torso ranges, narrower shoulder harnesses or differently shaped hipbelts. Your actual torso length, hip measurement and comfort should determine the best choice rather than the label alone.
Is a 40-liter backpack too big for a day hike?
Not necessarily. A 40-liter pack is larger than most hikers need for an ordinary warm-weather day hike, but the extra space can be useful for winter layers, climbing gear, camera equipment or supplies for children. Compression straps help stabilize a larger pack when it is not completely full.
What should I do if I am between two backpack torso sizes?
Check whether the backpack has an adjustable torso system, then try both sizes with a realistic load when possible. Look for a hipbelt that stays centered over your hip bones and shoulder straps that follow your shoulders without large gaps or excessive wrap down your back.
Sources
- REI — How to Choose Daypacks — current daypack capacity ranges, activity considerations and fit guidance.
- REI — How to Choose a Backpack — weekend, multiday and extended-trip backpack capacity guidance.
- REI — How to Size and Fit a Backpack — torso measurement, hip measurement and pack adjustment.
- REI — How to Pack and Hoist a Backpack — bottom, core and top packing zones and load placement.
- Osprey — Backpack Size and Fit Guide — loaded fitting procedure, hipbelt placement and harness adjustment.
- U.S. National Park Service — Ten Essentials — essential hiking safety and emergency equipment.

