
Last Updated on September 10, 2026 by Daniel Globe
Choosing hiking poles is less about finding the lightest or most expensive pair and more about matching the poles to your height, terrain, hiking style, and priorities. The right trekking poles can add stability on rough ground, give you extra support on climbs and descents, and make it easier to manage a loaded backpack. The wrong size or design, however, can feel awkward and may cause unnecessary hand, wrist, or shoulder fatigue.
Quick Answer
To choose hiking poles, start with a pair that lets your elbows sit near a 90-degree angle on level ground. Then compare telescoping, folding, and fixed designs; aluminum versus carbon shafts; grip comfort; locking mechanisms; weight; collapsed length; baskets; and tips. Adjustable aluminum poles are a practical all-around choice for many hikers.
Key Takeaways
- A pair of trekking poles usually provides more balanced support than a single hiking staff, especially on uneven terrain or when carrying a backpack.
- For level ground, a pole length that leaves your elbow near 90 degrees is a reliable starting point; always check the manufacturer’s sizing chart.
- Aluminum is generally less expensive and more tolerant of hard impacts, while carbon fiber saves weight and reduces vibration but can cost more and may be less forgiving of severe side impacts.
- Grip shape, wrist straps, locking mechanisms, collapsed length, baskets, and tips can matter just as much as shaft material.
- Check the locks, shafts, tips, straps, and baskets before every hike, and dry wet pole sections thoroughly before storage.
Disclosure: As an Amazon Associate I earn from qualifying purchases. Some links on this page are affiliate links, at no extra cost to you.
Why Use Hiking Poles?
Hiking poles, also called trekking poles, add extra points of contact with the ground. That can improve stability when you are moving across loose rock, roots, mud, snow, steep grades, or other uneven surfaces. They can also help you control your pace and distribute some of the work to your arms and upper body.
Research supports a more specific benefit on descents. In a small laboratory study of eight men walking downhill, researchers measured reductions of roughly 12% to 25% in several ground-reaction and knee-loading variables when hiking poles were used. A later study involving downhill walking with backpack loads also found reductions in lower-extremity joint loading with pole use. These findings support using poles to redistribute load, but they do not mean poles will prevent every injury or eliminate knee pain.
Laboratory research has found lower knee-loading measures during downhill walking with trekking poles, but the benefit depends on proper technique and should not be treated as a guarantee against pain, injury, or falls.
Trekking poles also engage the upper body. That does not necessarily mean they reduce total energy use. Research has found that oxygen consumption and heart rate can rise when hikers use poles even when perceived effort does not increase much. It is more accurate to say that poles can redistribute work and change how a hike feels rather than automatically making walking more energy-efficient.
Note: Trekking poles are recreational outdoor equipment, not a substitute for a medically prescribed cane, crutch, or other mobility aid. Anyone using poles because of an injury, balance disorder, or significant joint problem should follow advice from an appropriate health professional.
Should You Use One Hiking Pole or Two?
Most trekking poles are designed to be used as a pair. Two poles provide support on both sides of the body and work well for backpacking, long descents, uneven trails, and situations where you want a steady alternating rhythm.
A single hiking staff may make more sense when you want one hand free, travel mainly on moderate terrain, or simply want occasional support. A staff is also easier to manage when you frequently stop to use a camera, map, or other gear.
- Choose two trekking poles for backpacking, rough terrain, long climbs and descents, or maximum all-around stability.
- Choose one hiking staff when you want occasional support while keeping one hand free.
Considering the Different Types of Hiking Poles
The three main designs are telescoping poles, folding poles, and fixed-length poles. None is automatically best; the right choice depends on how much you value adjustment, compact storage, weight, and simplicity.
Telescoping Poles
Telescoping poles use two or three shaft sections that slide inside one another. They offer the widest adjustment range and are an excellent general-purpose option. You can shorten them slightly for steep climbs, lengthen them for descents, and change their size when different people use the same pair.
The trade-off is that telescoping models contain additional shaft material and locking hardware, so they are often heavier and longer when packed than minimalist folding poles.
Folding or Z-Style Poles
Folding poles separate into connected sections in a manner similar to tent poles. Their biggest advantage is a short collapsed length, making them easy to attach to or place inside a backpack. That makes them popular with trail runners, fast hikers, travelers, and people who frequently stow their poles.
Some folding poles have a fixed usable length, while others combine the folding system with a short adjustable section. Check both the usable-length range and the collapsed length before buying.
Fixed-Length Poles
Fixed-length models remove most length-adjustment hardware. They can be simple and light, but the fit must be correct from the start. They also provide less flexibility when you want a different length for steep terrain.
Fixed poles make the most sense when low weight and simplicity are high priorities and you already know the length that fits you.
Pro Tip: Check the collapsed length, not just the trail weight. A very light pole is less convenient if it is too long to fit where you intend to carry it on your backpack or inside your luggage.
Evaluating the Material and Weight of Hiking Poles
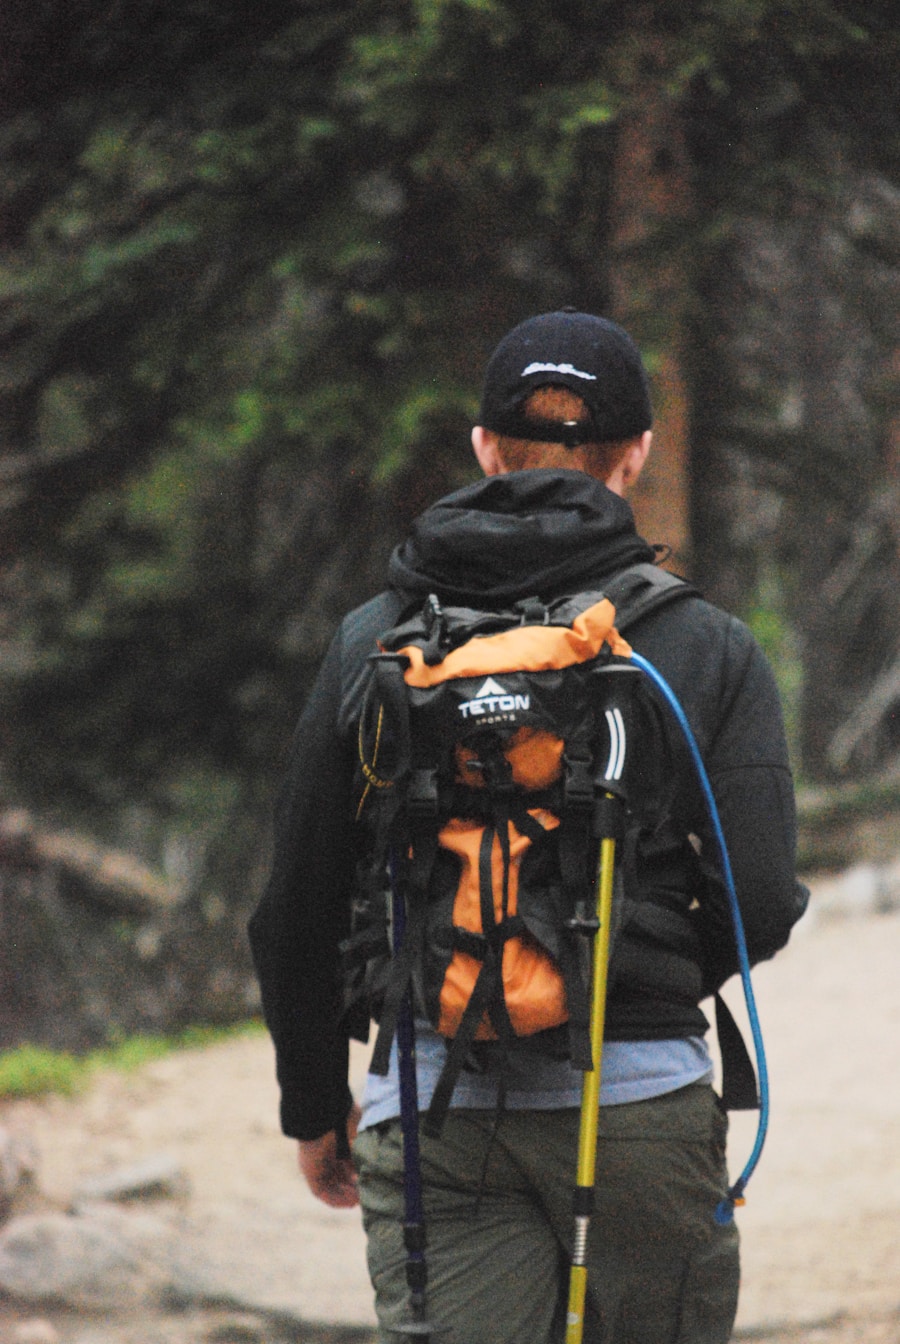
Most modern trekking-pole shafts are made from aluminum, carbon fiber, or a combination of the two.
| Feature | Aluminum | Carbon Fiber |
| Weight | Usually heavier | Usually lighter |
| Impact behavior | May bend under severe loading rather than snapping immediately | Strong and stiff but can crack or splinter after severe impact |
| Vibration | More trail vibration may reach the hands | Often damps vibration better |
| Price | Generally more economical | Generally more expensive |
| Good fit for | General hiking, beginners, rugged use and value-focused buyers | Fast hiking, trail running and hikers prioritizing low swing weight |
Do not focus on weight alone. Saving several ounces can feel good during thousands of pole swings, but comfort, lock reliability, fit, and durability matter more than winning a specification comparison.
Choosing the Right Length for Your Hiking Poles
Proper length is one of the most important parts of choosing trekking poles. On level ground, stand upright with the pole tip beside your foot and your hand on the grip. Your elbow should form roughly a 90-degree angle. Treat this as a starting point rather than an absolute rule.
For fixed-length poles, the following common sizing ranges are useful estimates. Check the manufacturer’s chart before purchasing because grip design and intended use can affect the recommended size.
| Hiker Height | Approximate Fixed Pole Length |
| Under 5 ft 1 in | 100 cm / 39 in |
| 5 ft 1 in–5 ft 7 in | 110 cm / 43 in |
| 5 ft 8 in–5 ft 11 in | 120 cm / 47 in |
| 6 ft and taller | 130 cm / 51 in as a common starting size; check the manufacturer’s range |
Adjustable poles make terrain changes easier. Many hikers shorten them modestly for steep climbs and lengthen them on descents so they can reach the ground without leaning excessively. Avoid dramatic changes that leave your shoulders raised or force you to reach far ahead.
Warning: Do not confuse centimeters and inches when reading pole specifications. A trekking pole marked “120” almost always means 120 centimeters, which is about 47 inches—not 120 inches.
Understanding Trekking Pole Locking Mechanisms
An adjustable pole is only useful if its sections stay securely locked. Check how the mechanism works before buying, especially if you expect to adjust the poles while wearing gloves.
External Lever Locks
Lever or clamp locks close around the pole shaft. They are easy to see, quick to operate, and often simple to adjust in the field. The clamp tension may need occasional adjustment as components wear.
Twist Locks
Twist locks use an internal expander. They create a clean exterior and can work well when correctly adjusted, but dirt or incorrect tension can make operation less intuitive for some users.
Push-Button and Combination Systems
Many folding poles use a push button to secure the sections after deployment. Some designs combine that system with a lever lock so the pole can fold compactly while still offering a limited adjustment range.
Whichever style you choose, extend the pole fully according to its instructions and press downward on the grip before your hike to confirm that the sections remain secure.
Understanding the Importance of Grip and Straps
The grip is the part of a trekking pole you will notice for hours at a time, so comfort deserves more attention than many buyers give it. Common materials include cork, foam, and rubber.
- Cork: comfortable in warm conditions, manages sweaty hands well, and can gradually conform to the shape of your hand.
- Foam: soft, lightweight, and comfortable, although it may absorb moisture and can wear faster than harder materials.
- Rubber: durable and useful in cold conditions because it insulates the hand from the shaft, though some hikers find it less comfortable when their hands become sweaty.
Grip diameter and shape also matter. A grip that is too large can force you to squeeze harder, while a comfortable grip lets you keep your hands relatively relaxed.
How to Use Wrist Straps Correctly
With a conventional trekking-pole strap, place your hand upward through the bottom of the loop and then bring your hand down onto the grip. Adjust the loop so the strap supports the heel of your hand without cutting into your wrist.
This lets you transfer some pressure through the strap instead of squeezing the handle continuously. Some poles use left- and right-specific straps, so check their markings.
Pro Tip: When testing poles in a store, adjust the straps before judging the grip. A pole that feels tiring with a death grip can feel very different once the strap is supporting part of your hand.
Considering Additional Features and Accessories
Shock Absorption
Some trekking poles include a spring or other damping system that compresses under load. This can soften the feel of repeated pole plants on descents. Standard rigid poles are generally simpler, lighter, and less expensive, and they still provide stability when used correctly.
Do not confuse a carbon shaft’s natural vibration-damping feel with a dedicated mechanical shock-absorption system; they are different features.
Baskets
Baskets sit above the tip and help stop the pole from plunging too deeply into soft ground. Small trekking baskets work well for ordinary trails, while larger snow baskets spread the load over a wider area in soft snow.
Before buying replacement baskets, check that the mounting system is compatible with your pole model.
Pole Tips
Carbide or steel tips provide grip on natural trail surfaces and rough rock. Rubber walking tips are useful on pavement and other hard surfaces and can also protect sharp tips during transport. Replace tips when they are badly worn rather than continuing to hike on damaged components.
Packability and Shelter Compatibility
Backpackers should measure where the poles will be carried when collapsed. Trail runners and frequent travelers may value a very short folding design, while hikers who leave their poles extended for most of the day may care more about adjustment range and durability.
If your backpacking shelter uses trekking poles instead of dedicated tent poles, confirm that the trekking poles provide the minimum and maximum length required by the shelter. That can make adjustment range more important than saving a few ounces.
Trying Out and Testing Hiking Poles Before Purchase
Trying poles in person is one of the best ways to find a comfortable pair. Adjust them to the length you expect to use, secure every lock, and walk naturally rather than simply holding them while standing still.
During the test, check the following:
- Can you keep your elbows near a comfortable angle without raising your shoulders?
- Does the grip fit your hand without forcing you to squeeze hard?
- Can the wrist strap be adjusted to support your hand comfortably?
- Can you operate the locking mechanism easily?
- Do the shaft sections remain secure when you put moderate downward pressure on the grips?
- Is the collapsed size practical for your backpack or luggage?
- Does the pair feel light enough to swing repeatedly without sacrificing the durability you need?
If possible, walk up and down an incline. A pole may feel fine on level flooring but reveal an uncomfortable grip angle or awkward adjustment range on a slope.
How to Use Hiking Poles on the Trail
Once the poles fit correctly, let your arms swing naturally. A common pattern is to move the left pole with the right foot and the right pole with the left foot. This creates an alternating rhythm and avoids planting both poles unnecessarily with every step.
Going Uphill
Plant the poles close enough to your body that you can push down and slightly backward rather than reaching far ahead. On steep climbs, adjustable poles can be shortened slightly to help keep your shoulders relaxed.
Going Downhill
Lengthening adjustable poles slightly can help you reach lower ground without bending excessively at the waist. Plant the pole securely before loading it, especially on loose rock or wet surfaces.
Traversing Uneven Ground
On a sustained side slope, some hikers shorten the uphill pole or lengthen the downhill pole. Make small adjustments and return both poles to normal length once the terrain changes.
Streams and Uncertain Ground
A trekking pole can help you feel for submerged rocks, mud, holes, or changing depth. However, probing with a pole does not prove that a stream crossing is safe. Current, water depth, footing, weather, and downstream hazards still need to be assessed before entering the water.
Common Mistakes When Choosing Hiking Poles
- Buying by body height alone: Use height charts as a starting point and confirm the actual grip position and adjustment range.
- Ignoring collapsed length: A pole can fit perfectly on the trail but be frustrating to transport.
- Choosing only by lowest weight: Ultralight construction is less useful if the grip, lock, or durability does not suit your hiking.
- Overlooking lock operation: Make sure you can tighten, release, and inspect the mechanism before relying on it outdoors.
- Using the wrong basket: Small trail baskets may sink deeply into soft snow.
- Gripping too tightly: Proper strap adjustment can reduce how hard you need to squeeze the handle.
- Assuming poles prevent every fall: They improve support but can slip, break, become trapped between rocks, or be planted poorly.
Maintaining and Caring for Your Hiking Poles
Inspect trekking poles regularly rather than waiting for a problem on the trail. Check the shafts for bends, cracks, deep gouges, or splintering. Make sure locks hold firmly, straps are not badly frayed, baskets remain secure, and tips are not excessively worn.
After a dry hike, remove loose dust and dirt according to the manufacturer’s instructions. After wet or muddy trips, pay particular attention to moisture trapped between telescoping or folding sections.
Some manufacturers specifically recommend separating wet telescoping sections and allowing them to dry completely before reassembly. Folding poles should likewise be extended and dried before they are packed away. Do not apply grease, oil, or other lubricant to locking surfaces unless the manufacturer specifically instructs you to do so.
Store dry poles in a protected location where shafts and locking mechanisms will not be crushed or bent. Replace worn parts with compatible components rather than improvising a repair that could fail under load.
Warning: Do not continue using a pole with a cracked shaft, unreliable locking mechanism, badly damaged connector, or other structural defect. A sudden collapse under body weight can cause a fall.
If you’re looking to enhance your hiking experience, a well-fitted pair of trekking poles can be a useful piece of gear. Compare fit, adjustment range, shaft construction, locking system, grip comfort, collapsed length, baskets, and tips rather than choosing on appearance or weight alone. Testing those factors before purchase will give you a much better idea of whether a particular pair suits your next outdoor adventure.
Love travel? Join Our Facebook Community
Frequently Asked Questions
What are hiking poles?
Hiking poles, commonly called trekking poles, are lightweight poles used to provide extra contact with the ground while hiking. Trekking poles are normally used as a pair, while a single pole is often called a hiking staff.
What are the benefits of using hiking poles?
Trekking poles can improve stability on uneven ground, provide support during climbs and descents, and redistribute some loading to the upper body. Research has also measured lower knee-loading variables during downhill walking with poles. They do not, however, guarantee protection from falls, joint pain, or injury.
How do I choose the right hiking poles?
Start with correct length, then compare telescoping, folding, and fixed designs. Consider aluminum versus carbon construction, grip comfort, strap fit, locking mechanism, weight, collapsed size, baskets, tips, and the terrain where you normally hike. Adjustable aluminum poles are a versatile starting point for many hikers.
What are the different types of hiking poles?
The main designs are telescoping poles, folding or Z-style poles, and fixed-length poles. Telescoping poles offer the broadest adjustment range, folding poles pack especially small, and fixed-length poles emphasize simplicity and low weight.
What features should I look for in hiking poles?
Look for a secure locking mechanism, comfortable grips and straps, an appropriate adjustment range, acceptable weight, a useful collapsed length, replaceable tips, and basket compatibility. Shock absorption can be useful for some hikers but is not essential for everyone.
How long should my trekking poles be?
On level ground, a good starting point is a length that leaves your elbow at roughly 90 degrees while the tip is beside your foot. Common fixed lengths are about 100, 110, 120, and 130 centimeters, but the manufacturer’s size chart should take priority.
Are aluminum or carbon trekking poles better?
Neither material is best for everyone. Aluminum is generally less expensive and can tolerate rough treatment well, while carbon fiber is usually lighter and reduces vibration. Carbon can be more vulnerable to cracking or splintering after severe impacts, so durability needs and hiking style should guide the choice.
How should I maintain my hiking poles?
Inspect the shafts, locks, straps, baskets, and tips regularly. Remove dirt after use and allow wet internal sections to dry completely before storage. Follow the pole manufacturer’s instructions for disassembly and cleaning, and avoid adding oil or grease unless the manufacturer specifically recommends it.
Sources
- REI Co-op — How to Choose Trekking Poles and Hiking Staffs — sizing, shaft materials, grips, locking mechanisms, baskets, tips, and shock absorption.
- REI Co-op — How to Use Trekking Poles and Hiking Staffs — strap technique, baskets, tips, and trail use.
- PubMed — Knee Joint Forces During Downhill Walking With Hiking Poles — research on knee-loading changes during downhill pole use.
- PubMed — Trekking Poles Increase Physiological Responses to Hiking Without Increased Perceived Exertion — evidence on oxygen use, heart rate, and perceived effort.
- LEKI — Care and Maintenance of Poles — drying, cleaning, inspection, and storage guidance.

