
Last Updated on July 24, 2026 by Daniel Globe
To find out how far you traveled, first decide whether you need a planned route distance, a straight-line measurement, or the distance recorded during an actual trip. A mapping tool can calculate a walking, running, hiking, cycling, or driving route, while a phone, watch, or GPS device can record where you really went. For a useful result, also check elevation, surface type, access rules, closures, and expected travel time.
Quick Answer
To find how far you traveled, use a route planner for a planned path or a GPS app or watch for a completed trip. Select the correct travel mode, check the total distance and elevation, and verify trail access and closures before leaving because map data can be incomplete or outdated.
Key Takeaways
- Use routed directions when you need a distance that follows mapped roads or trails.
- Use point-to-point measurement when you need a direct line or want to trace a path manually.
- Use a GPS recording when you need the distance you actually covered.
- Include elevation, terrain, breaks, and the return trip when estimating travel time.
- Confirm closures, permits, weather, and public access through the official land manager.
At a Glance
| Time Required | About 5 to 15 minutes for a basic route |
| Difficulty | Easy for basic routes; moderate for off-road planning |
| Tools Needed | Phone or computer, mapping service, and optional GPS watch or handheld device |
| Cost | Basic tools are usually free; offline or advanced maps may require a subscription |
Disclosure: As an Amazon Associate I earn from qualifying purchases. Some links on this page are affiliate links, at no extra cost to you.
Understanding Straight-Line, Routed, and Recorded Distance
Before measuring anything, choose the type of distance that answers your question. The three common measurements are not interchangeable.
- Straight-line distance: The direct distance between selected points. It may cut across buildings, rivers, private property, or steep terrain.
- Routed distance: The distance along mapped roads, sidewalks, bike routes, or trails. This is usually the best choice when planning how far you will walk, run, cycle, or drive.
- GPS-recorded distance: The path recorded by your phone, watch, or handheld GPS while you move. It can include detours, wandering, rest-area movement, and GPS errors.
Note: Google Maps’ Measure Distance feature traces a direct line through the points you add. For a distance that follows mapped roads or paths, use Google Maps Directions and select the correct travel mode.
Getting Started With Route Planning for Outdoor Activities
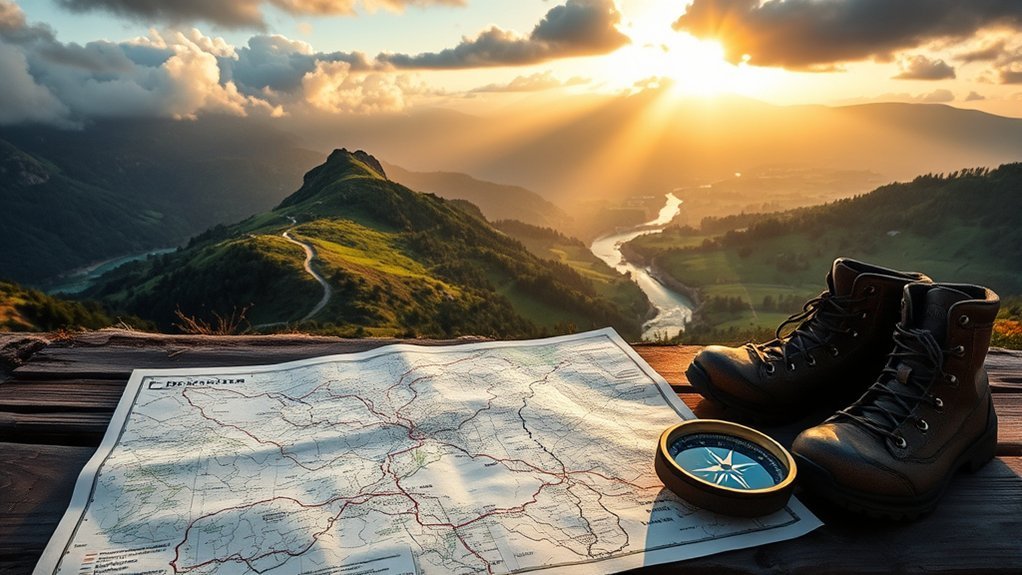
Start by choosing a clear starting point, destination, and activity. A road-running route, mountain-bike route, and hiking route may use different surfaces and access rules even when they connect the same places.
- Choose your activity. Select walking, running, cycling, driving, or manual drawing based on how you will travel.
- Place the starting point. Use a trailhead, address, parking area, transit stop, or known landmark.
- Add the destination and stops. Include viewpoints, water stops, rest areas, road crossings, or turnaround points.
- Check the full distance. Make sure the total includes the return journey if you are not finishing at the starting point.
- Review elevation and terrain. A short route with steep climbs can take longer than a flat route of the same distance.
- Verify access. Check whether the route crosses private property, seasonal gates, permit areas, or closed trails.
- Save a copy. Keep the route in your account, download an offline map, or export a compatible file.
- Share a trip plan. Tell a trusted person where you are going and when you expect to return.
Waypoints make a route easier to understand and adjust. Place them at important turns instead of adding dozens of unnecessary points. Too many points can make editing harder, while too few may cause the tool to choose a different road or trail.
Pro Tip: Add a turnaround time as well as an estimated finish time. If the route takes longer than expected, turn back at the planned time instead of pushing on until dark.
How to Create and Customize Your Running Map
A useful running map should match your target distance, preferred surface, traffic tolerance, fitness level, and available time. It should also make the start and finish easy to reach.
Choose the Right Mapping Tool
Use a directions service for road and sidewalk routes, or choose a dedicated outdoor planner when you need trail layers, contour lines, detailed elevation profiles, or offline maps. Interactive tools normally let you add points, drag route sections, compare alternatives, and save a map. The exact controls and available features vary by platform.
For a completed run, use a GPS-enabled watch, fitness app, or phone recording. That gives you the path you actually followed rather than the route you intended to follow.
Designing Custom Routes
Place your start point and then add the next location. Continue adding points until the displayed distance reaches your goal. Drag the route or insert a waypoint when you want to use a quieter street, park path, bridge, or specific trail.
For a loop route, finish at the original starting point. For an out-and-back route, confirm that the displayed distance includes both directions. If the planner shows only the outward leg, double that distance before estimating your time.
- Choose well-lit or low-traffic streets when running before sunrise or after dark.
- Avoid adding crossings where sidewalks or safe shoulders are missing.
- Check whether park gates or paths close at certain hours.
- Look for water, toilets, shelter, and safe exit points on longer routes.
- Use manual drawing only when automatic routing does not recognize a real path.
Warning: A manually drawn line does not prove that a trail is open, legal, passable, or safe. Confirm land ownership, permits, closures, water crossings, and current conditions with the official park or land-management agency.
Analyzing Elevation Changes
An elevation profile shows where the route climbs and descends. Pay attention to total elevation gain, not only the difference between the starting and highest points. A route can climb and descend several times, producing much more total gain than its net change suggests.
Use the profile to identify steep sections and decide where you may need to slow down or take a break. For routes in the United States, the USGS National Map provides topographic and elevation information that can help you review terrain.
Elevation totals may differ between apps because they can use different elevation datasets, point spacing, smoothing rules, or barometric readings. Treat the number as a planning estimate rather than a perfect measurement.
Choosing the Right Routing Mode for Your Activity
The correct routing mode helps the planner follow suitable roads and paths. Available modes depend on the service and location.
- Walking or foot mode: Uses mapped pedestrian routes where available. Check sidewalks, crossings, trail restrictions, and local conditions.
- Running mode: Some dedicated fitness tools offer this separately. When they do not, walking mode is often the closest option for road running.
- Bike mode: May favor mapped bicycle roads, lanes, and paths. Confirm the surface and whether the route suits your bicycle.
- Driving mode: Follows roads that allow motor vehicles. It should not be used to estimate a walking or cycling route.
- Manual or straight-line mode: Lets you trace an unmapped trail or off-road section. It does not check access, safety, or route legality.
Some planners let you apply a different mode to one part of a route. For example, you might use normal walking directions through town and manual drawing for a confirmed trail segment. Look for an edit, route-type, or segment menu because the control differs by service.
How to Easily Measure Distance and Elevation
The right method depends on whether you want a direct measurement, a route that follows mapped paths, or a record of a completed trip.
Measure a Direct Distance on Google Maps Using a Computer
- Open Google Maps on your computer.
- Right-click the starting point.
- Select Measure distance.
- Click along the path you want to measure.
- Drag a point to adjust it or click a point to remove it.
- Read the total distance shown at the bottom of the map.
This method follows the points you place. It does not automatically stay on a road or trail. Google provides the current desktop instructions in its Measure Distance help guide.
Measure a Direct Distance on a Phone or Tablet
- Open the Google Maps app.
- Touch and hold an unlabeled point to drop a pin.
- Select Measure distance.
- Move the map until the target point is under the marker.
- Tap Add point.
- Repeat for each turn or waypoint.
- Read the total in miles or kilometers.
Measure a Walking, Running, or Cycling Route
- Open a directions or route-planning tool.
- Enter the start and destination.
- Select walking, cycling, driving, or another suitable mode.
- Add stops or drag the route to match your intended path.
- Review the distance, estimated time, and available alternatives.
- Confirm that every section uses a path you can legally and safely enter.
Estimate Travel Time From Distance
For a basic estimate, divide distance by average speed:
Travel time = distance ÷ speed
For example, a 3-mile route would take about:
- 1 hour 12 minutes at 2.5 mph
- 1 hour at 3 mph
- 45 minutes at 4 mph
Add time for hills, rough surfaces, road crossings, photographs, meals, navigation checks, and rest stops. On an outdoor route, your moving pace and total elapsed pace will rarely be the same.
Why Map and GPS Distances Can Be Different
A planned route and a GPS recording may show different totals even when both are working normally.
- GPS drift: Recorded points can move slightly while you stand still.
- Signal blockage: Trees, cliffs, bridges, and tall buildings can reduce accuracy.
- Corner cutting: A recording interval may connect widely spaced points and shorten curves or switchbacks.
- Map matching: An app may move recorded points onto a known road or trail.
- Auto-pause: The recording may stop during slow movement or at rest areas.
- Different start and stop times: One device may include movement before or after the main activity.
- Route changes: Detours and missed turns increase the actual distance.
GPS.gov reports that smartphones are typically accurate within about 4.9 meters under open sky, but accuracy can become worse near trees, buildings, and bridges.
For more detail, review the official GPS.gov accuracy guidance. Small differences are normal. A major difference may mean the wrong routing mode was selected, the GPS signal was weak, or part of the recording was paused.
How to Save and Share Your Routes
Saving a route makes it easier to use again, compare with your completed activity, or send to another person. Before sharing, review the route name, privacy setting, home location, and edit permissions.
Saving Routes Privately
After plotting the route, use the service’s save, bookmark, or add-to-library control. Privacy defaults vary, so do not assume a new route is private.
- Give the route a clear name that includes the place and activity.
- Check whether it is private, link-only, shared with selected people, or public.
- Remove your exact home address if the route will be public.
- Save an offline copy when mobile coverage may be poor.
- Update or delete outdated versions to avoid opening the wrong route later.
Sharing by Link, Email, or Social Media
Many mapping services can generate a link that opens a route in a browser or app. Some shared links display the current version of the map, while others create a fixed copy. Check what the recipient can see and whether the link permits editing.
When sharing a public route, avoid exposing a regular home address, school location, or other private starting point. Move the public start to a nearby landmark or public parking area when appropriate.
Exporting to GPX Format
A GPX file can store tracks, routes, and waypoints for use in compatible apps and GPS devices. Export options vary, and not every tool preserves every detail.
- Track: A series of recorded or drawn location points.
- Route: A planned sequence of points that another device may recalculate.
- Waypoint: A saved location such as a trailhead, campsite, or viewpoint.
After exporting, import the file into the device or app you plan to use and inspect the route before leaving. Google confirms that Google My Maps can import GPX files, along with KML, KMZ, spreadsheets, and several other file types.
A GPX file does not create collaboration permissions by itself. A recipient must import it into a compatible service before making changes.
GPX Versus KML
- GPX: Commonly used for routes, tracks, and waypoints on fitness and outdoor-navigation devices.
- KML or KMZ: Commonly used for map layers, place information, styling, and Google Earth or My Maps content.
Choose the format supported by the device or app you will use. When possible, test the imported route before your trip rather than assuming every waypoint and segment transferred correctly.
Tips for Finding Local Trails and Paths
Begin with the official website for the park, forest, wildlife area, municipality, or other land manager. Official pages are the best place to confirm closures, permits, seasonal restrictions, trail rules, parking, and current hazards.
You can also use:
- Local parks and recreation websites
- National, state, provincial, or regional park maps
- Visitor centers and ranger stations
- Outdoor clubs and running groups
- Established mapping apps with recent user reports
- Outdoor gear shops with local trail knowledge
- Conservation-area and nature-reserve websites
User-created routes can help you discover options, but they may cross private land, closed areas, unofficial shortcuts, or damaged trails. Compare them with an official map and recent land-manager alerts.
Outdoor Route Safety Checklist
Distance is only one part of route planning. Before leaving, review the following:
- Current trail, road, bridge, and gate closures
- Weather forecast and severe-weather risks
- Sunset time and a planned turnaround time
- Permits, fees, reservations, and access hours
- Water availability and safe treatment options
- Terrain, elevation, river crossings, snow, and heat
- Mobile coverage and offline-map availability
- Phone or GPS battery level and a backup power source
- A paper map, compass, or other backup navigation method
- A trip plan left with a trusted person
The National Park Service Hike Smart guide recommends choosing a route that matches your group’s abilities, checking alerts and weather, leaving a trip plan, and not relying only on a phone.
Warning: Digital maps may contain missing roads, incorrect trail lines, old closures, or inaccurate access information. Follow posted signs and official instructions when they conflict with an app.
Troubleshooting Route-Planning Problems
The Route Keeps Snapping to the Wrong Road
Add a waypoint before and after the section you want to use. Check the travel mode, since driving mode may reject a footpath and walking mode may avoid a vehicle-only road. Use manual drawing only after confirming that the intended path exists and is open.
The Trail Does Not Appear on the Map
Compare another map layer or the official land-manager map. A missing trail may be new, unofficial, closed, or absent from that provider’s data. Do not assume that a user-drawn line is an approved route.
The Elevation Gain Looks Too High or Too Low
Compare the elevation profile with a topographic map. Short GPS jumps and frequent elevation sampling can inflate the total, while heavy smoothing can reduce it. Different apps may provide different but reasonable estimates.
The GPS Recording Shows Extra Distance
Look for zigzags while you were stopped or while passing through heavy tree cover or tall buildings. Trim obvious points only when the app provides a safe editing feature and you can identify the incorrect section.
The Shared Route Will Not Open
Check the route’s privacy setting, whether the recipient needs an account, and whether the link has expired. For a device that cannot open the link, export a supported GPX or KML file instead.
Frequently Asked Questions
How do I check the distance of a route?
Enter your starting point and destination in a directions or route-planning tool, select the correct travel mode, and review the displayed distance. Add waypoints or drag the route when you need it to follow a specific road or trail.
How far did I walk in 20 minutes?
Multiply your speed by one-third of an hour. At 2.5 mph, you would walk about 0.83 mile. At 3 mph, you would cover about 1 mile. At a fast 4 mph pace, you would cover about 1.33 miles. Hills, stops, and uneven ground can reduce the total.
How do I check the distance between two places?
Use Directions when you need a route along roads or paths. Use Measure Distance when you need a direct point-to-point measurement. The two totals may differ because a routed trip must follow available roads, sidewalks, or trails.
How do I see route distance on Google Maps?
Open Google Maps, select Directions, enter the start and destination, and choose your travel mode. Google Maps will display the estimated time and distance for the available route options.
Does Google Maps Measure Distance follow roads?
No. Measure Distance connects the points you place and can cross areas that are not travel routes. Use Directions with walking, cycling, or driving mode when you need a distance that follows mapped roads or paths.
Why is my watch distance different from the mapped route?
Your watch records the path you actually took and may include detours or GPS drift. Trees, buildings, recording intervals, auto-pause, and map matching can also change the result. Small differences are normal.
How do I calculate an out-and-back route?
Measure the outward route and multiply it by two when you will return along the same path. If you plan to use a different return route, plot both sections instead of doubling the first distance.
Conclusion
To measure how far you traveled, match the tool to the question. Use routed directions for a planned road or trail journey, direct measurement for a custom line, and a GPS recording for the path you actually completed. Review elevation and terrain, include the return trip, allow extra time for stops, and verify official access and safety information before you leave. A well-checked route is more useful than a precise-looking number from an unverified map.
Sources
- Google Maps Help: Measure Distance Between Points — direct point-to-point distance measurement on desktop and mobile devices
- Google Maps Help: Get Directions and Show Routes — routed distance, travel modes, stops, and route alternatives
- Google My Maps Help: Import Map Features From a File — supported GPX, KML, KMZ, spreadsheet, and map-import formats
- U.S. Geological Survey: The National Map — topographic, trail, and elevation information for the United States
- GPS.gov: GPS Accuracy — smartphone GPS accuracy and factors that weaken positioning
- National Park Service: Hike Smart — route selection, trip plans, weather, closures, equipment, and navigation safety
