
Last Updated on September 10, 2026 by Daniel Globe
Hiking shoes should feel secure without squeezing your feet. Your heel and midfoot should stay firmly in place, the widest part of your foot should sit comfortably in the widest part of the shoe, and your toes should have enough room to spread and move. Getting that fit right helps reduce rubbing, toe impact, pressure points, and distractions once you are on the trail.
Quick Answer
Hiking shoes should fit snugly around the heel and midfoot but never feel tight or painful. Leave roughly a thumb’s width of space in front of your longest toe, make sure your toes can wiggle, and check that your heel does not slide excessively. Test the shoes with your normal hiking socks and on an incline before deciding.
Key Takeaways
- Fit hiking shoes to your larger foot and judge the fit while standing, not just while sitting.
- Aim for roughly a thumb’s width of space between your longest toe and the front of the shoe.
- Your heel and midfoot should feel secure, while the toe box should let your toes move naturally.
- Try shoes later in the day and wear the same socks and orthotics you expect to use while hiking.
- Walk uphill and downhill before buying. Your toes should not hit the front on descents, and your heel should not slide excessively on climbs.
- Do not buy painfully tight shoes expecting them to stretch into the correct size.
At a Glance
| Time Required | About 15–30 minutes to measure, lace, walk, and incline-test several pairs |
| Difficulty | Easy |
| Tools Needed | Paper, pencil, ruler or measuring tape, normal hiking socks, and any orthotics or replacement insoles you use |
| Cost | Free for self-measuring; professional fitting is often available when shopping for footwear |
Disclosure: As an Amazon Associate I earn from qualifying purchases. Some links on this page are affiliate links, at no extra cost to you.
How Should Hiking Shoes Fit?
A properly fitted hiking shoe is snug where you need control and roomy where your foot needs space. According to REI’s hiking footwear fitting guidance, hiking shoes should feel snug throughout without feeling tight, and your toes should still be able to wiggle.
- Heel: Your heel should sit securely in the heel cup with minimal slipping as you walk.
- Midfoot: The shoe should hold your foot without squeezing it or creating numbness or pressure.
- Forefoot: The ball of your foot should sit comfortably at the shoe’s widest point.
- Toe box: Your toes should be able to spread and wiggle without rubbing the top or sides.
- Toe clearance: Leave roughly a thumb’s width between your longest toe and the end of the shoe.
- Volume: The upper should not press painfully on the top of your foot, and you should not need to overtighten the laces just to keep the foot stable.
The American Orthopaedic Foot & Ankle Society’s FootCareMD guidance similarly recommends checking that the ball of the foot sits comfortably in the widest part of the shoe and that there is about 3/8 to 1/2 inch of room in front of the longest toe.
Warning: Do not buy hiking shoes that already pinch your toes, create numbness, or cause a painful pressure point because you expect them to stretch. Materials can soften with use, but an incorrect size or shoe shape is unlikely to become a truly good fit.
How to Measure Your Feet for Hiking Shoe Sizing
Measuring your feet gives you a useful starting point, especially when ordering online or comparing several brands. Shoe sizes can vary between brands and even between models, so do not treat the number on the box as the final answer.
- Place a sheet of paper on a hard, level floor with one edge against a wall.
- Put on the hiking socks you expect to use most often.
- Stand with your heel against the wall and your full weight on the foot.
- Trace the outline of the foot or mark the end of the longest toe.
- Measure from the back of the heel to the longest toe.
- Measure the widest part of the forefoot.
- Repeat the process with the other foot.
- Use the larger foot as the starting point when comparing the measurements with the manufacturer’s size chart.
The American Academy of Orthopaedic Surgeons recommends measuring both feet while standing and notes that one foot may be slightly larger than the other. It also cautions that labeled sizes vary between brands and styles.
Pro Tip: Remove the shoe’s insole and stand on it while wearing your hiking socks. REI recommends checking for about a thumb’s width of space between your longest toe and the end of the insole. This is a quick way to screen for obviously short footwear.
Tips for Finding the Right Hiking Shoe Width
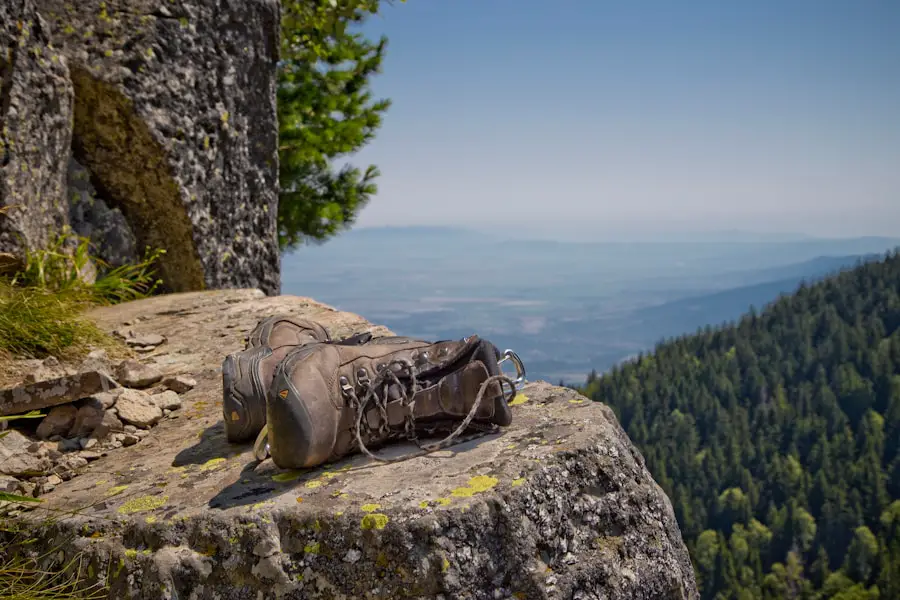
Length is only one part of hiking shoe fit. A shoe can be long enough and still be uncomfortable because its width, shape, or internal volume does not match your foot.
Check the widest part of your forefoot first. The ball of your foot should line up naturally with the widest part of the shoe. Your toes should not be squeezed together, and the side of your forefoot should not bulge painfully against the upper.
At the same time, going excessively wide is not the solution. If your foot slides from side to side or you have to pull the laces extremely tight to gain control, the shoe may have too much width or volume.
People with wide forefeet, narrow heels, high-volume feet, bunions, or other foot-shape differences may get a better result by changing to another width or another shoe model instead of simply adding length. Footwear is built around different lasts, so two shoes marked with the same numerical size may fit very differently.
Note: A bigger numerical size adds length as well as some volume. If the shoe is long enough but squeezes the forefoot, try a wide version or a differently shaped model before automatically sizing up.
The Importance of Trying on Hiking Shoes in the Afternoon
| Time of Day | What It Means for Fitting |
| Morning | Your feet may be less swollen, so a shoe that feels fine now can feel tighter after hours of walking. |
| Afternoon | Often a better time to judge hiking-shoe fit because normal daily activity has allowed the feet to expand somewhat. |
| Evening | Also useful if you have been active during the day, especially when trying footwear intended for long days on your feet. |
Your feet naturally change in volume over the course of a day. Hiking also combines hours of standing, walking, heat, and repeated impact, so footwear that feels roomy first thing in the morning can feel much tighter later.
REI recommends trying hiking footwear toward the end of the day, while Cleveland Clinic also recommends late-day fitting because feet are usually somewhat more swollen by then.
The American Academy of Orthopaedic Surgeons notes that feet may swell during the day—sometimes by as much as about 8%—which is one reason end-of-day shoe fitting can provide a more realistic comfort check.
After lacing the shoes, spend several minutes walking rather than judging them while standing still. Pay attention to toe pressure, rubbing, heel movement, and pressure across the top of the foot.
How to Account for Sock Thickness in Hiking Shoe Sizing
Always try hiking shoes with the socks you expect to wear on the trail. Sock cushioning changes the amount of room inside the shoe, so fitting a shoe with thin everyday socks can give you a misleading result if you later hike in thick cushioned socks.
Do not automatically increase your shoe size just because you use thicker wool socks. Instead, put those socks on and reassess the whole fit. Your toes still need clearance, your forefoot should not feel squeezed, and your heel should remain secure.
REI recommends hiking socks made with materials such as wool or synthetics rather than slow-drying cotton. Properly fitted socks also reduce folds and wrinkles that can create friction inside the shoe.
If you alternate between thin summer socks and heavily cushioned cold-weather socks, make sure the footwear works with the combination you will actually use on a given trip. In some cases, two different footwear setups make more sense than forcing one tight-fitting pair to handle every season.
The Role of Toe Room in Hiking Shoe Sizing
Preventing Discomfort and Toe Impact
When standing in your hiking shoes, aim for roughly a thumb’s width of clearance between your longest toe and the front of the shoe. Both REI and orthopedic fitting guidance use approximately this amount as a practical check for adequate room.
The space becomes especially important on descents. Your foot naturally shifts forward somewhat, and shoes that are too short can allow your toes or toenails to repeatedly strike the front.
Check Toe Movement and Forefoot Space
You should be able to wiggle your toes without feeling them pressed together or pushed against the roof of the toe box. Your foot should also remain stable rather than sliding freely inside the shoe.
If your toes are cramped but your heel and overall length seem correct, a wider or differently shaped toe box may work better than simply going up another full size.
Balance Toe Room With Control
More space is not always better. Excessive length or internal volume can allow the foot to slide, increasing friction and making technical footing feel less precise. The goal is a secure heel and midfoot with enough room in front for natural toe movement and downhill clearance.
Check Heel Hold and Shoe Volume
Your heel should feel comfortably seated in the back of the shoe. A small amount of natural movement may occur, especially in stiff new boots, but obvious lifting or repeated rubbing is a warning sign.
Next, check the volume over the midfoot. Lace the shoe normally. You should be able to make the foot secure without crushing the top of your foot or pulling the two sides of the upper together as tightly as possible.
If the shoe is otherwise the correct size but your heel moves, a different lacing pattern may help. REI’s hiking-boot lacing guide describes heel-locking techniques such as a surgeon’s knot that can reduce heel movement.
Lacing cannot rescue a fundamentally wrong fit. If your heel continues to lift significantly, the forefoot is pinched, or your toes hit the end, try another size, width, or shoe shape.
Test Hiking Shoes Uphill and Downhill
A flat store floor does not reveal everything. Whenever possible, use an incline ramp, test rock, stairs, or another safe sloped surface.
Downhill Test
Lace the shoes as you would for hiking and walk down an incline. Your foot should stay controlled and your longest toe should not repeatedly hit the front of the shoe.
Uphill Test
Walk uphill and pay attention to your heel. Excessive lifting can create rubbing and hot spots. If the heel moves, first check your lacing. If the movement remains significant, the shoe’s heel shape or overall volume may not suit your foot.
REI specifically recommends moving around in new hiking footwear and checking for heel position, cramped areas, friction, and toes striking the front when the shoe is on an incline.
Pro Tip: Do not ignore a hot spot during a fitting because it feels minor. Friction and pressure can become much more noticeable after thousands of trail steps. Try another lacing method or compare another shoe before buying.
Signs Your Hiking Shoes Are Too Small or Too Large
Signs They May Be Too Small
- Your longest toe touches the front while standing or descending.
- Your toes feel pinched together.
- You feel numbness, tingling, or strong pressure after lacing.
- The sides of your forefoot feel compressed.
- The top of the shoe presses painfully against your toes or instep.
Signs They May Be Too Large
- Your heel repeatedly lifts or rubs even after reasonable lacing adjustments.
- Your foot slides forward on descents.
- Your foot moves noticeably from side to side.
- You must overtighten the laces to keep the shoe stable.
- The bend point of the shoe does not line up well with the natural bend at your forefoot.
Blisters are often linked to friction, pressure, and moisture. REI’s blister-prevention guidance identifies good-fitting footwear and properly fitted socks as important ways to reduce those problems.
Considering Terrain and Conditions When Choosing Hiking Shoe Size
Terrain should influence the type and construction of hiking footwear you choose, but it should not change the basic rules of fit. A technical mountain trail may call for a stiffer shoe, stronger traction, more protection, or a higher-cut boot. A smooth day-hiking trail may allow a lighter and more flexible shoe.
In either case, your toes still need adequate space and your heel and midfoot still need secure control. Do not deliberately squeeze into a smaller shoe for rocky terrain or choose a loose shoe simply because the route is easy.
Weather can affect the overall setup. In cold conditions, fit the footwear while wearing the thicker socks you actually expect to use. In warm conditions, breathable socks and adequate toe-box space can improve comfort, but the shoe should still hold your foot securely.
For wet trails, prioritize appropriate outsole traction, upper materials, and moisture management rather than choosing an intentionally loose fit.
Do Hiking Shoes Need to Be Broken In?
Some hiking footwear benefits from gradual break-in, but break-in and sizing are not the same thing.
Flexible hiking shoes and trail-running-style footwear may feel comfortable almost immediately. Stiffer hiking or backpacking boots can soften and flex more naturally after shorter walks. REI recommends breaking in substantial hiking boots before taking them on a major trip.
However, the American Academy of Orthopaedic Surgeons advises against buying shoes that do not fit correctly in the expectation that they will eventually stretch to fit.
Warning: Break-in can make a correctly fitted stiff boot feel more natural. It cannot reliably create missing toe length, fix a painfully narrow toe box, or change a heel shape that does not match your foot.
Using Insoles and Orthotics With Hiking Shoes
If you hike with custom orthotics or replacement insoles, bring them when trying on footwear. An insert changes the space available inside the shoe and can alter heel position, arch feel, and overall volume.
REI recommends fitting footwear with your orthotics in place when you normally use them. A removable factory insole can also make a shoe easier to adapt to a replacement footbed.
Do not assume that a more supportive insole will correct a shoe that is too short, too narrow, or badly matched to the shape of your heel.
The Benefits of Professional Fitting for Hiking Shoes
You can successfully fit many hiking shoes yourself, but a knowledgeable footwear specialist can help when your feet are difficult to fit or several models seem almost—but not quite—right.
A fitter can compare foot length and width, evaluate shoe volume, check heel hold, and suggest models built on shapes that better match your feet. Cleveland Clinic also recommends proper fitting when possible so width, arch height, toe-box shape, and the intended activity can be considered together.
Professional fitting is particularly useful if you use custom orthotics, have a large size difference between your feet, regularly develop the same blister or pressure point, or cannot find a shoe that feels secure without squeezing.
Return rules differ between retailers, especially once footwear has been worn outdoors. Before trail-testing a new pair, check the seller’s current return requirements. When outdoor testing is not allowed, spend enough time walking indoors to identify rubbing, toe impact, heel lift, or pressure before removing tags or wearing the shoes on a trail.
Note: Persistent foot pain, numbness, unusual swelling, or recurrent problems despite properly fitted footwear deserve evaluation by a podiatrist or another qualified healthcare professional.
Proper hiking shoe sizing comes down to more than choosing your usual street-shoe number. Measure both feet, fit the larger one, wear your real hiking socks, protect your toe clearance, secure the heel, and test the shoes on an incline. A good pair should feel comfortable and controlled from the start rather than forcing your foot to adapt to the shoe.
Footwear is only one part of preparing for outdoor activities. Other gear should also match how and where you plan to use it. For anglers who combine hiking and fishing trips, this guide to the best travel fishing pole covers compact fishing equipment designed for travel. Choosing equipment that matches the activity can make an outdoor trip easier and more enjoyable.
Love travel? Join Our Facebook Community
Frequently Asked Questions
What are the key factors to consider when fitting hiking shoes?
Check length, width, toe-box shape, heel hold, midfoot security, and overall shoe volume. Your heel should feel secure, the ball of your foot should sit comfortably in the widest part of the shoe, and your toes should have room to move without the foot sliding around.
How should the length of a hiking shoe fit?
While standing, aim for roughly a thumb’s width—about 3/8 to 1/2 inch as a practical guideline—between your longest toe and the front of the shoe. Your toes should not hit the front when you walk downhill.
What about the width of a hiking shoe?
The forefoot should feel secure but not squeezed. The ball of your foot should sit naturally in the widest part of the shoe, and your toes should not be pinched together. If the length is correct but the sides feel tight, try another width or a different shoe shape.
How should the volume of a hiking shoe fit?
The upper should hold the midfoot comfortably without pressing painfully on the top or sides of your foot. Your heel should stay secure without requiring extreme lace tension. Persistent empty space or movement can mean the shoe has too much internal volume for your foot.
What should I look for in overall comfort and support?
A good hiking shoe should feel comfortable when you first try it, with no sharp pressure points, pinching, numbness, or obvious rubbing. It should also provide the level of cushioning, protection, traction, and stiffness appropriate for your hiking terrain and pack weight.
Should hiking shoes be a half size bigger?
Not automatically. Some hikers end up wearing hiking footwear a half size larger than certain street shoes, but size labels vary between brands and models. Judge the actual fit: adequate toe clearance, secure heel and midfoot, correct width, and comfort with your hiking socks matter more than the number on the box.
How much heel slip is acceptable in hiking shoes?
Your heel should feel securely held with minimal movement. A stiff new boot may have a small amount of movement at first, but repeated lifting, rubbing, or obvious sliding is a sign to adjust the lacing or try another shoe shape or volume.
Sources
- REI Co-op — How to Choose Hiking Boots and Hiking Shoes — hiking-specific fit, toe room, socks, late-day fitting, orthotics, incline testing, and break-in guidance.
- American Academy of Orthopaedic Surgeons — Shoes: Finding the Right Fit — foot measurement, daily swelling, brand-size variation, forefoot position, and general shoe-fitting guidance.
- FootCareMD — 10 Points of Proper Shoe Fit — toe clearance, shoe width, depth, foot shape, and fit principles.
- Cleveland Clinic — Foot Support: What to Look For When Buying Shoes — late-day fitting, measuring feet, toe-box space, arch considerations, and activity-specific fitting.
- REI Co-op — How to Lace Hiking Boots — heel-locking and pressure-relief lacing techniques.
- REI Co-op — Blister Prevention and Care — friction, pressure, moisture, footwear fit, and sock considerations.

